
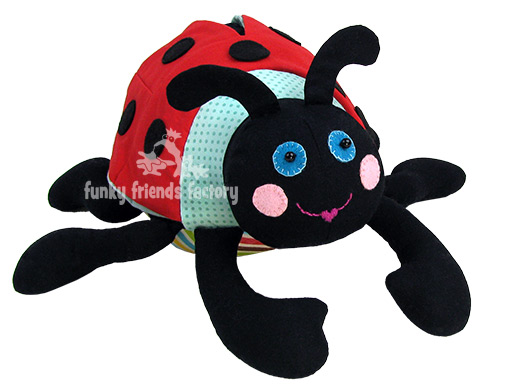
See me sewing Lily the Ladybug!
This photo tutorial shows you how to sew my Lily Ladybug sewing pattern. Once you have made your first ladybug stuffed toy you'll find it's such fun to sew, you'll want to make a whole flower garden full of spotty bugs!!!
*** PLEASE NOTE - this in ONLY a PHOTO TUTORIAL ***
I have made this photo tutorial so people who have purchased the Softie Sewing Pattern can SEE how to sew my Lily Ladybug! (I wanted to explain this so you are not disappointed if you have found this page via a search engine and not from the link in my ladybug pattern!)
The FULL PATTERN IS NOT included here. It is also NOT A FREE PATTERN.
Right, let's sew a Ladybug!
* The Ladybug Stuffed Toy Sewing Pattern is available to buy, from the Funky Friends Factory website as an Instant Download e-Pattern.
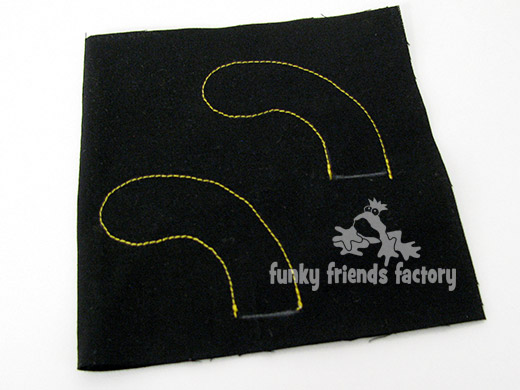
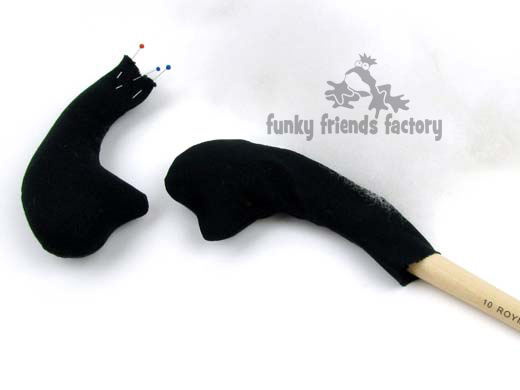
We start with the Ladybug's Feeler's
STEP 1
Trace the FEELER PIECE onto a double layer of fabric (with right sides together!). Sew the FEELER PIECES together on the sewing line.
***I sewed in yellow thread for this photo so you can see that I sewed on the traced/ sewing line - you should sew the feelers with black thread!
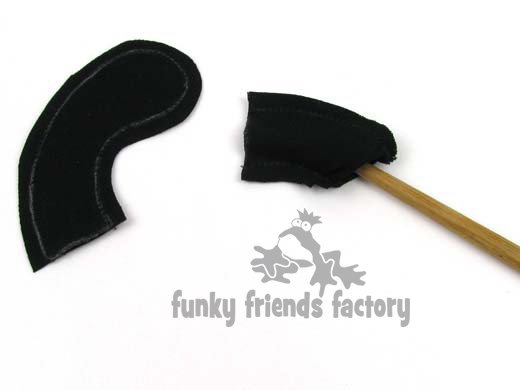
Cut around the sewing line with a 5mm/¼ inch seam allowance. Clip the seam allowance, especially where it is very curved then turn the FEELER PIECES right sides out.
TIP: I use a wooden chopstick to help me turn the feelers nicely!
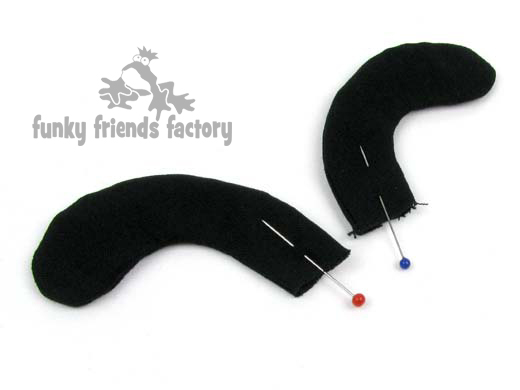
Finger press the FEELERS flat, pin the open edge closed and put them aside.
Arms:
STEP 2
Sew the ARM PIECES together in pairs. Clip the seams and turn them right sides out.
Use the chopstick again to turn the seams nicely. Stuff the ARMS with toy stuffing, leaving the top 12mm (½inch) unstuffed and pin the open edges closed.
TIP: Use an old child’s paintbrush to help with stuffing. Use very small bits of stuffing for the ARMS so you can push them into the hand area more easily and make sure the hands are very firmly stuffed.

Legs:
STEP 3
Sew and stuff the the LEG PIECES in the same way. You should have 2 completed ARMS and 4 completed LEGS.

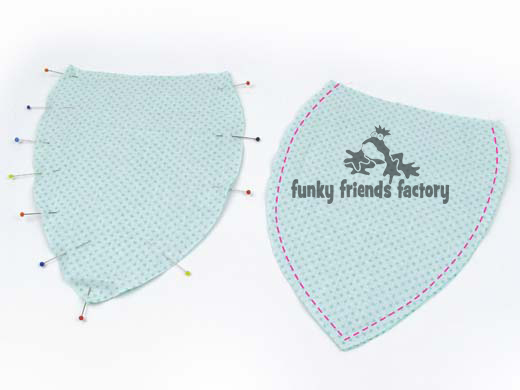
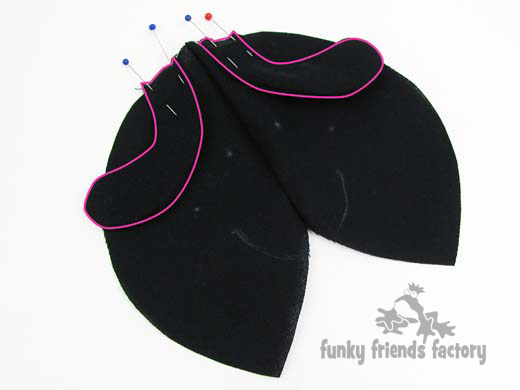
Wings:
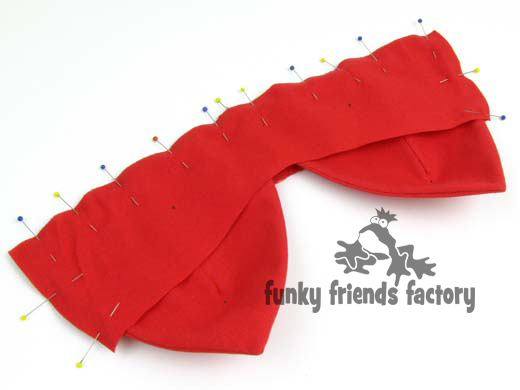
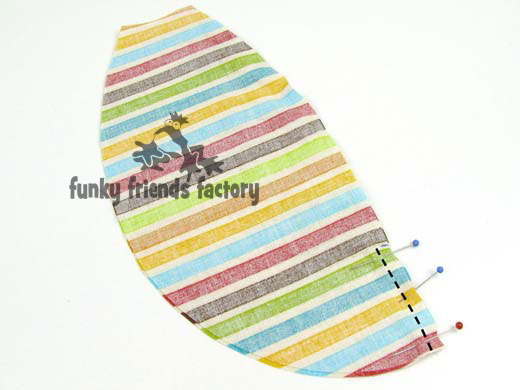
STEP 4
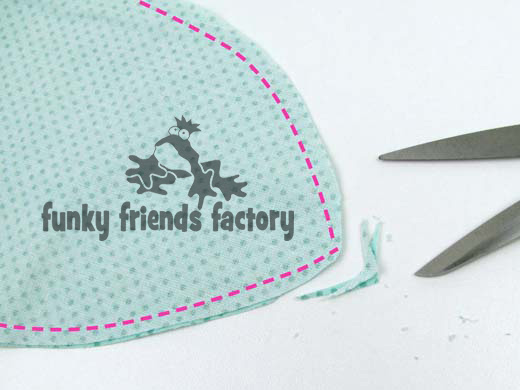
Sew the WING PIECES together in pairs from A – B – C (shown by the dashed pink line in the photo below), leaving the front edge open for turning.
Trim the seams at the tip of each WING then turn the WINGS right sides out. Use a cool iron to press the WINGS nice a flat.
Hold the WINGS together at the front, at C...
... so you can sew them together with a zig-zag stitch, as shown in the pattern markings.
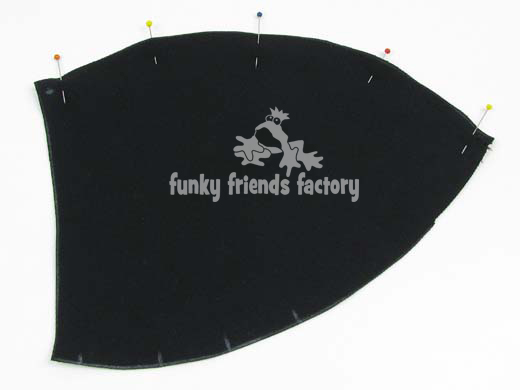
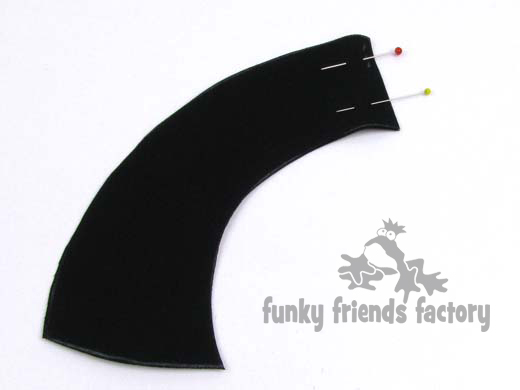
Body:
STEP 5
Pin and sew the BODY PIECES together from C – D.
TIP: Make sure you sew the correct edge of the BODY PIECES. The centre and the side look almost the same but they are different. This is a very EASY mistake to make - I know, I did it myself!
STEP 6
Pin the WINGS to the BODY PIECES matching A and C.
*** The WING PIECES will not reach to the edge of the BODY PIECES at the sides.***
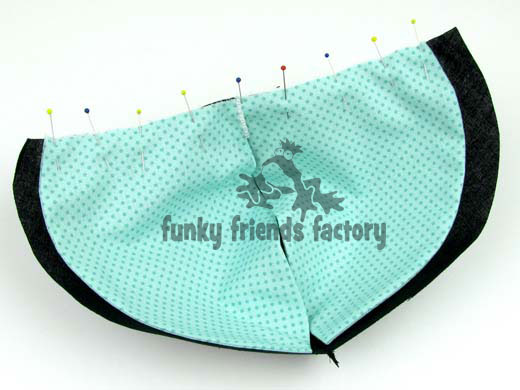
Shell:
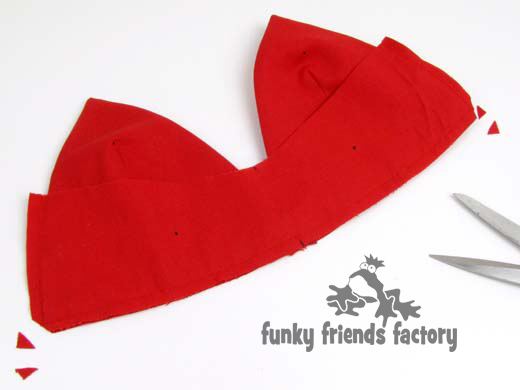
STEP 7
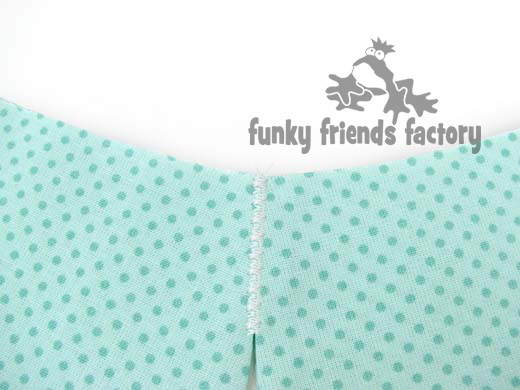
Sew the SHELL BACK PIECES together in pairs.
Fold the fabric with right sides together, pin and sew the darts in the SHELL BACK PIECES.
Trim the seams at the tips of the SHELL BACK PIECES.


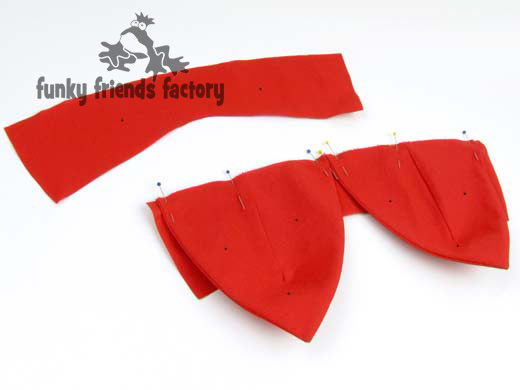
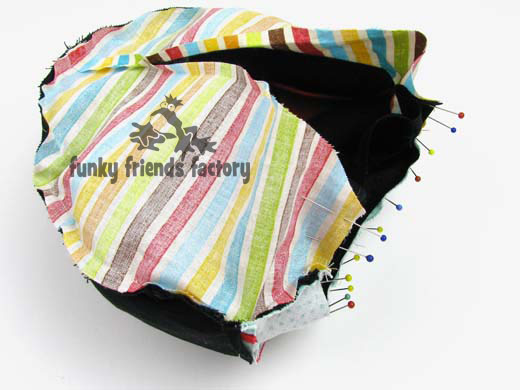
STEP 8
Turn the SHELL BACK PIECES right sides out. (I like to finger press the seam allowance at the darts to opposite sides so they lie nice and flat.) Pin the SHELL BACK PIECES to one SHELL FRONT PIECE.
TIP: Use the dots of the pattern markings to guide you so that the pieces are positioned correctly. This is very important to make the SHELL and WING PIECES lie properly once your ladybug is all sewn up!
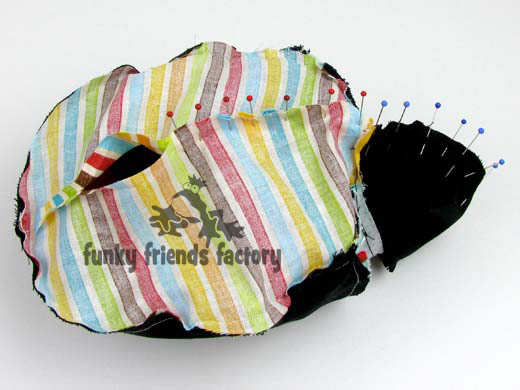
Pin the SHELL FRONT PIECES together with the SHELL BACK PIECES sandwiched in between.
Trim the seams of the SHELL FRONT PIECES (at F).
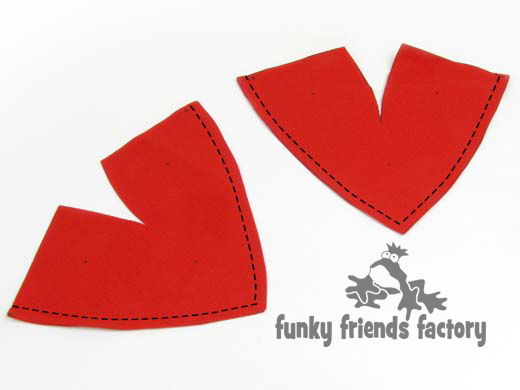
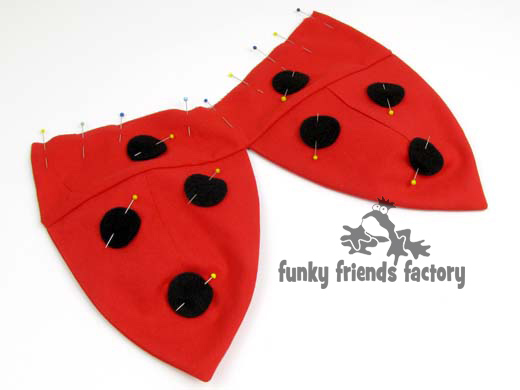
STEP 9
Turn the SHELL FRONT PIECES right sides out and pin them closed along the front edge.
Cut, pin and sew the felt spots on the SHELL. (I added a few more spots after I took this photo - so please use the pattern markings as your guide!)
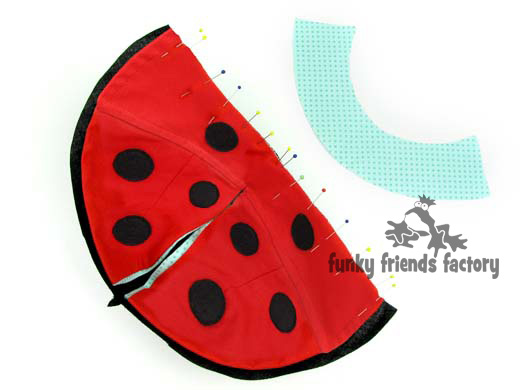
STEP 10
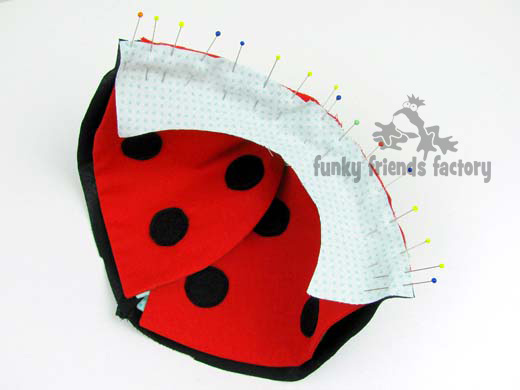
Pin the SHELL to the WINGS PIECES and BODY PIECES.
*** The SHELL PIECES also do not reach to the edge of the BODY PIECES at the sides (like the WING PIECES).***
TIP: Check that the WINGS are sandwiched in between the SHELL and BODY PIECES and that you can see the spots.
Thorax:
STEP 11
Pin and sew the THORAX PIECE to the SHELL, WING and BODY PIECES.
STEP 12
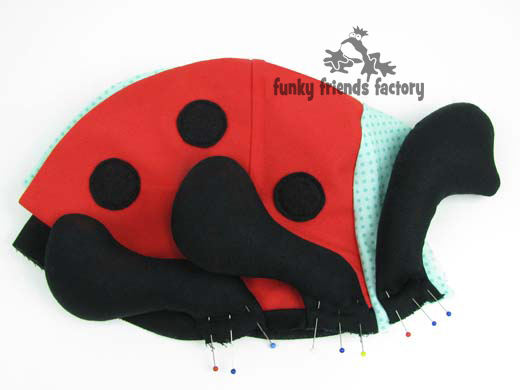
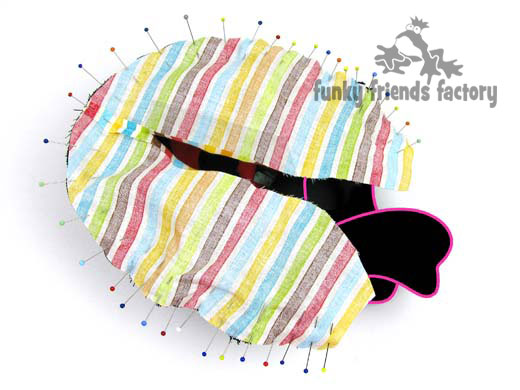
Pin the ARMS to the THORAX PIECE. Pin the the LEGS to the BODY PIECES, using the pattern markings to guide you with the positioning.
Check that the LEGS go back and the ARMS go to the front.
Fold all of the ARMS and LEGS on top of the SHELL PIECES and set aside.
TIP: I like to use a LOT of pins so the ARMS and LEGS won't slip when you sew the ladybug together. It is a very good idea to tack/baste the ARMS and LEGS in place too, especially if you are a beginner sewer/toy-maker! :)
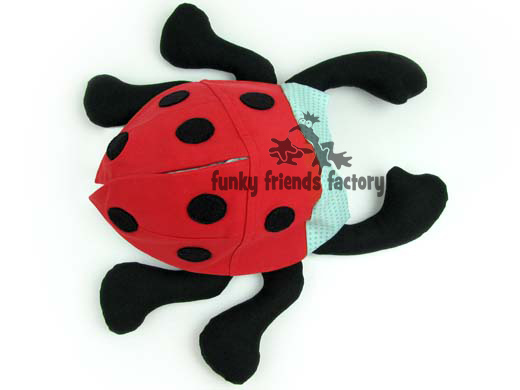
STEP 13
Sew the TUMMY PIECES together from K – L.
STEP 14
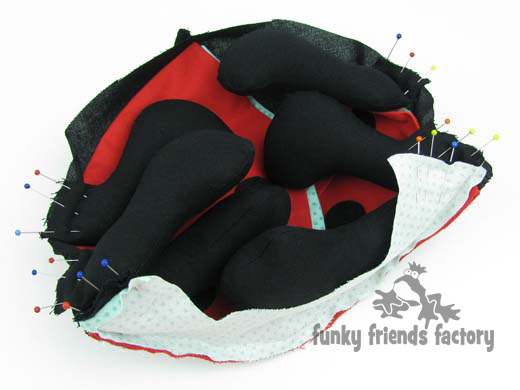
Pin the TUMMY PIECES to the BODY PIECES with the ARMS and LEGS sandwiched in between.
TIP: Sew the TUMMY PIECES to the BODY PIECES with the TUMMY PIECE facing down. This makes it easier to fit the ladybug under the sewing machine for sewing!
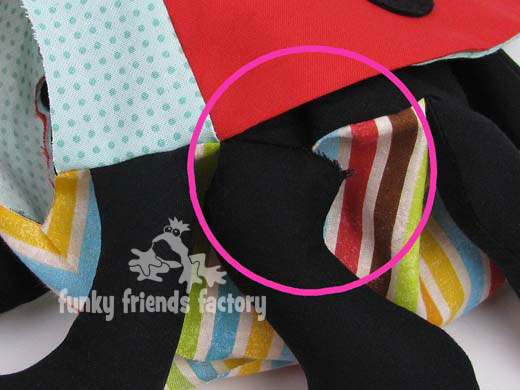
Turn the BODY right side out and check that ALL of the ARMS and LEGS are caught in the seam.
TIP: Unpick, push them back in and sew that bit of the seam again, if they have. It is easier to fix this NOW than once your ladybug body is all sewn up.

Head:
STEP 15
Sew the FACE PIECES from M – N.
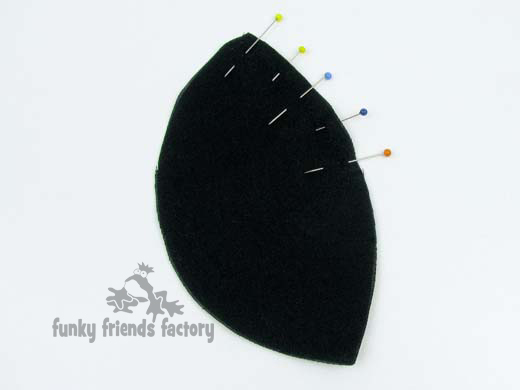
STEP 16
Pin the FEELERS to the FACE PIECES, using the pattern markings to guide you. (I have outlined the FEELERS in pink as it is hard to see them against the black FACE PIECES.)
STEP 17
Pin and sew the NECK PIECES together from M – P.
STEP 18
Sew the NECK PIECES to the FACE PIECES, with the FEELERS sandwiched in between.
Turn the FACE and NECK PIECES right sides out. If you are using safety eyes insert them now.
TIP: I have a photo tutorial for inserting craft eyes on my blog ~> /blog/safety-eyes-picture-tutorial-for-great-looking-peepers/
STEP 19
Pin the NECK PIECES to the THORAX and TUMMY PIECES.
TIP: I find the easiest way to do this is to push the FACE and NECK PIECES inside the ladybug's body.
Sew the NECK PIECES to the THORAX and TUMMY PIECES, then pull the FACE and NECK PIECES back out of the ladybug's body (so they are inside out again).
STEP 20
Pin and sew the ladybug closed from N on the FACE PIECE, along the NECK PIECES from Q – R, to S on the TUMMY PIECE. (Remember to leave a gap open on the TUMMY PIECE between S and K for turning!
STEP 21
Turn the ladybug right sides out through the gap left on the TUMMY PIECES, and stuff the ladybug’s HEAD very firmly.
STEP 22
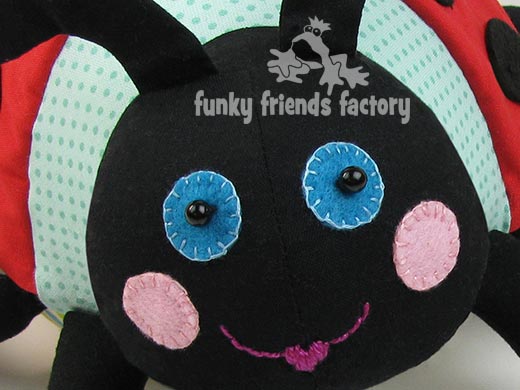
Pin felt circles on the FACE PIECES for eyes and cheeks. Sew these on with a blanket stitch. Embroider a mouthwith back stitch ~ I added a little heart to the mouth!
STEP 23
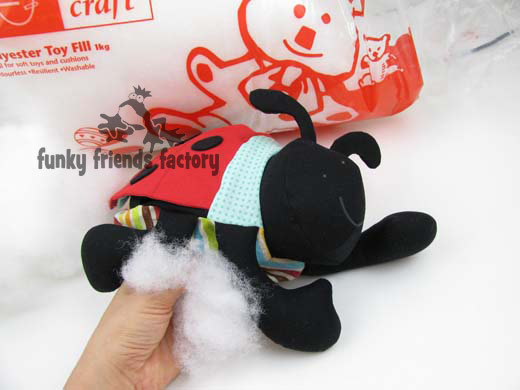
Stuff the ladybug’s body nice and firmly.
TIP: Stuff until there are no more wrinkles in her BODY – you will be amazed how much stuffing you can fit inside her body! I have a link to show you how to get rid of wrinkles on my blog - www.funkyfriendsfactory.com/blog/baby-doll-sewing-pattern-stuff-to-note/
STEP 24
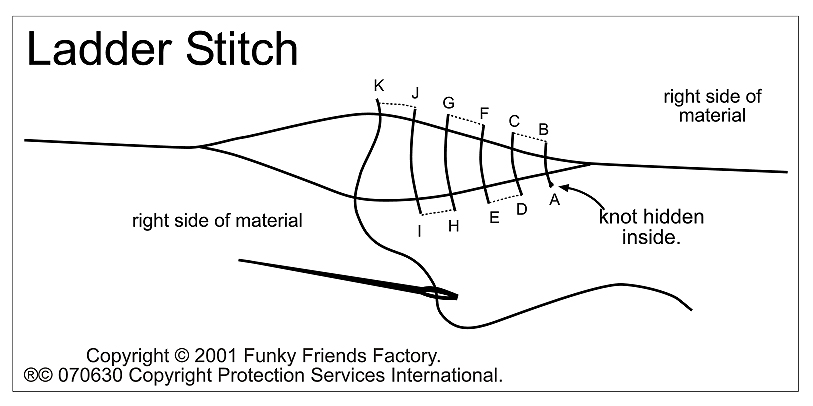
Sew the stuffing gap closed using a ladder stitch.
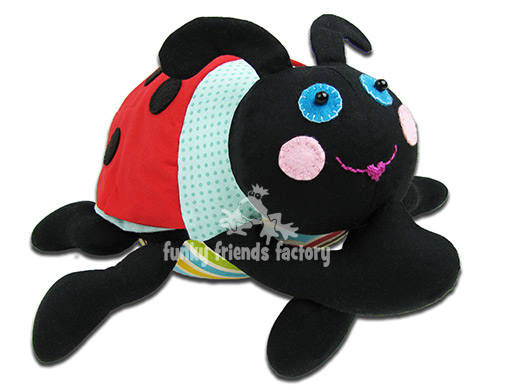
Your Ladybug softie is ready to LOVE!
I can't wait to see
YOUR ladybugs...
![]()
I LOVE to see how your Funky Friends Factory toys turn out!
When you've made your own Sock Monkeys - please come and paste a photo of your NEW Funky Friends on my Funky Friends Factory Facebook page for me to see!
You could win a FREE PATTERN
in the MAKE MY MONDAY Pattern Giveaway!

Till next time,
Happy Sewing,
Pauline
xxx