
Funky Friends Factory Take&Make Toy Kit
I am super excited to be colaborating with the awesome team from takeandmake.co with the production of my Takeandmake Kawaii Cat Softie Kit. Take and make is 'the home of the DIY kit' which means that they help indie designers like me to package together a fabulous branded kit ready for crafters around the world to see, buy and make!!!
How cool is that?
![]()
The softie kit is to make my Kawaii Kuties CAT.
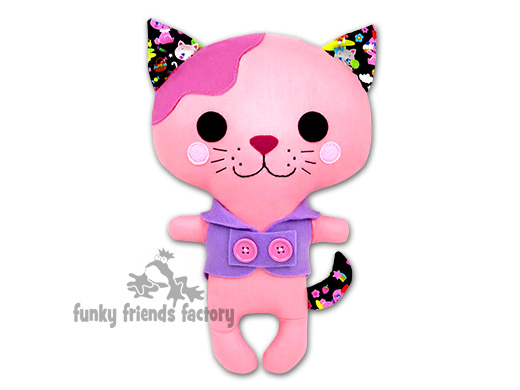
This cute little Kawaii animal doll is one of the Kawaii soft toy designs that was inspired by my trip to Japan. Kawaii means CUTE in Japanese and what could be cuter than a kitty doll with a typical over-sized head and huge eyes dressed in it's own little pet jacket?
This toy kit will make a perfect first sewing project for a beginner because it is QUICK and FUN to make. This kit includes everything you need to make one CAT doll - the materials, pattern and full step-by-step photo instructions so beginners can SEE how to make the animal doll and the super cute kitty jacket .
How can you get a KIT?
* The Kawaii Cat Softie KIT is available to buy from takeandmake.co. FOR a LIMITED TIME ONLY!!!!
Get a KIT!!!
* The Kawaii Cat Softie Kit is available to buy from the takeandmake.co.
This photo tutorial shows you how to sew the Kawaii CAT!
Step 1: Open your KIT!
Your KIT will contain:
□ Homespun /cotton fabric - 35cm x 55cm wide / 14x12inches wide.
□ Fabric scraps for ears.
□ Felt scraps for face pieces.
□ Black embroidery thread for face.
□ General sewing supplies (thread, pins, needles,scissors, etc).
□ Craft glue & firm card for templates.
□ Fine tipped permanent marker pen.
□ Toy stuffing.
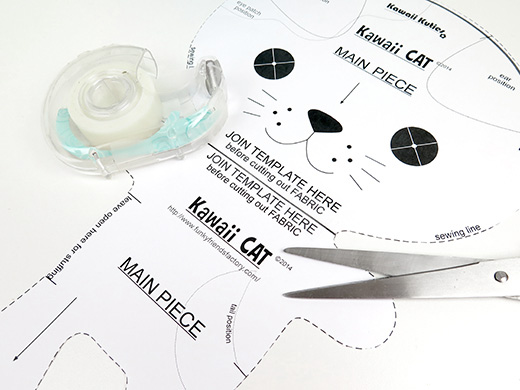
Step 2:
Glue the pattern pages onto card or thick paper. (Recycled cereal boxes are great for this too.) Cut out the pattern pieces to make your templates. Use glue or sticky tape to join the 2 parts of the MAIN PIECE.
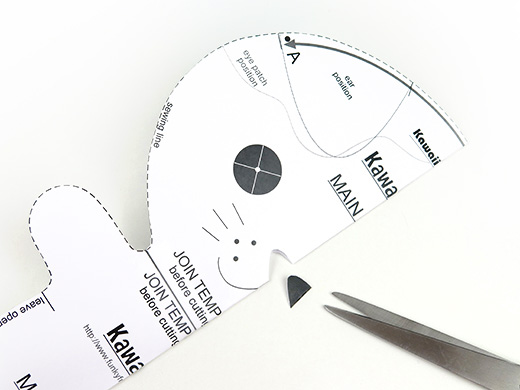
Step 3:
Fold the MAIN PIECE along the middle and cut out the NOSE shape. This is so you can trace the NOSE onto the fabric.
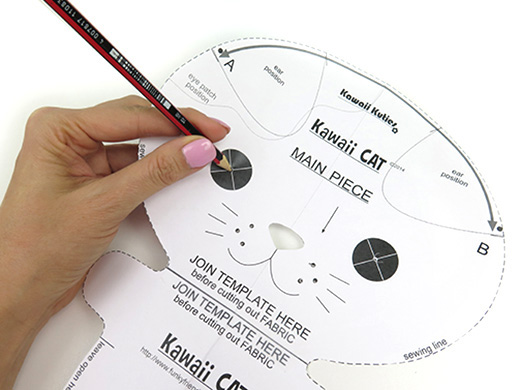
Step 4:
Use a pencil to make holes at the centre of each eye, and at each whisker dot, so you can transfer these marks to the fabric.
 TIP: If you are using a light coloured fabric you might be able to see the pattern markings through the fabric so you can trace the face through the fabric!
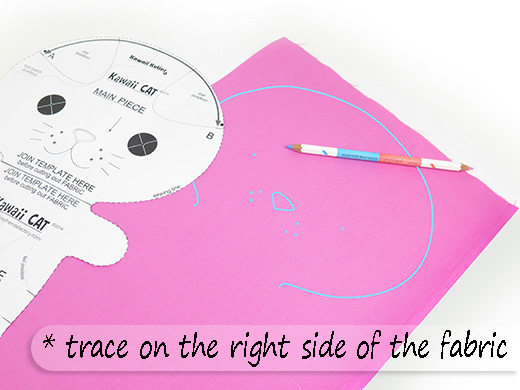
Step 5:
Lay the fabric on the table RIGHT SIDE UP. Place the MAIN PIECE template onto the right side of the fabric and trace the head and nose and whisker dots, with a fabric marker or pencil.
* It is very important to trace on the RIGHT side
Step 6:
Cut out a NOSE, an EYE PATCH and 2 EYE PIECES from felt and pin these over the face markings.
I like to trace felt pieces with a fabric marker, if you don’t have one ~
visit my blog to see other methods of cutting out felt -CLICK on this PICTURE or the LINK below it!
5 easy techniques for neat accurate pieces>>
 TIP: Make sure that you place the felt of the EYE PATCH so that it overlaps the sewing line by 6mm/ ¼inch. This is so that the felt will be caught in the seam when you sew the Kutie’s body together.

Step 7:
Sew the felt pieces in place. I like to do this by machine as it is much quicker, but you can sew them on with embroidery thread if you like.
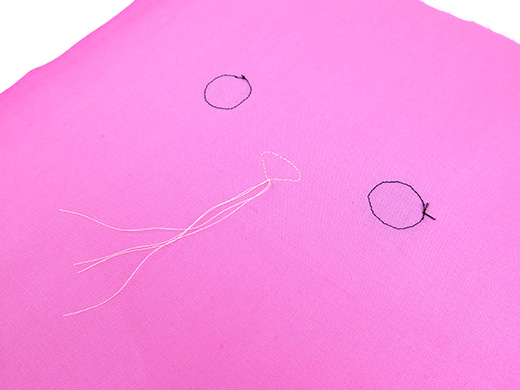 TIP: If you sew with a machine, pull your threads to the back of the fabric and tie these together before you snip them off. It looks neat and the stitching won’t come undone with lots of toy-squeezing!!!
Step 8:
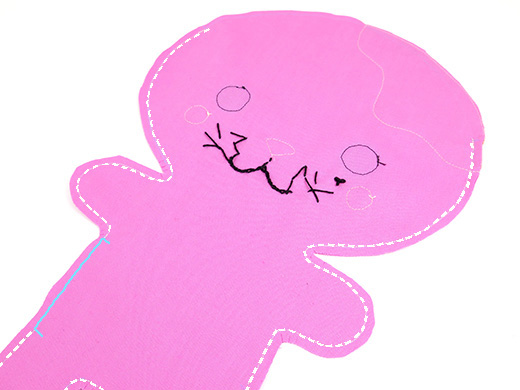
Use the pencil to make 3 holes on the MAIN PIECE for the mouth. Transfer these marks to the fabric and join the dots to draw the mouth.

Step 9:
Embroider the mouth and spots with black embroidery thread (I used perle embroidery thread). Transfer and sew the whisker lines in the same way.
 TIP: I used a back stitch for the mouth and French knots for the spots.
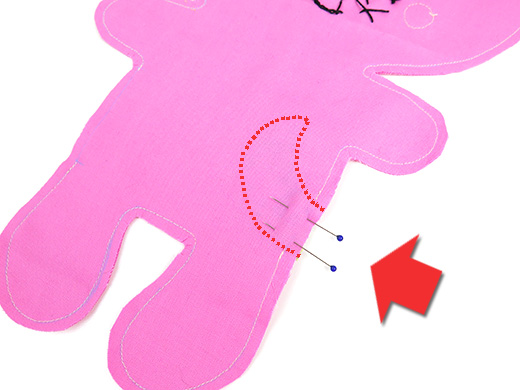
Step 10:
Turn the fabric over so that it is now WRONG SIDE UP. Place the MAIN PIECE template onto the wrong side of the fabric. Line up the gap you cut for the SNOUT PIECE with the stitching holding the felt SNOUT PIECE in place!
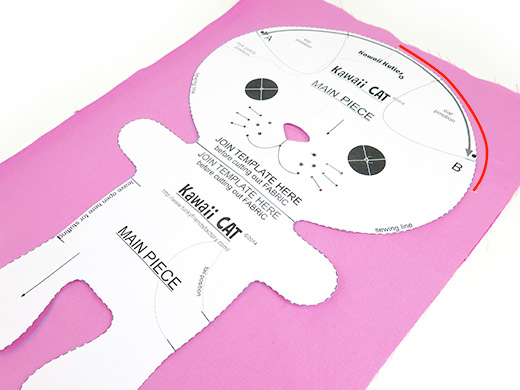 TIP: If your face is a bit crooked - line up the nose as accurately as you can! (We are all slightly crooked!)
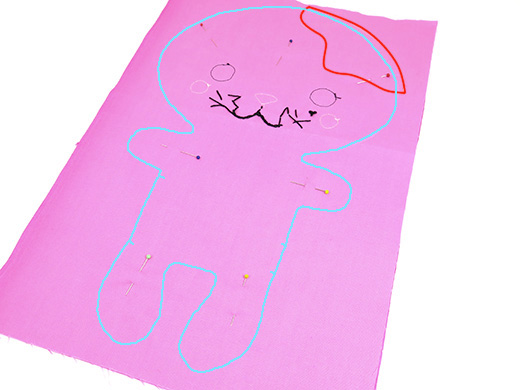
Step 11:
Trace right around the outside of the MAIN PIECE and transfer the pattern markings for the TAIL and EAR positions and stuffing gap. Place the piece of fabric with your face sewn on it, on top of another piece the same size with RIGHT SIDES TOGETHER.
Step 12:
Sew around the MAIN PIECE but leave the stuffing gap, the tail gap and the top of the head open, between A and B, then cut out your Kutie (all the way around) with a 5mm/ 1⁄4 inch seam-allowance.
 TIP: Seam allowance is a sewing term - it simply means you cut out your Kutie, along an imaginary line 5mm (1⁄4 inch) outside the sewing line! (I find a smaller seam allowance will fray easily and the toy can split open. A bigger seam allowance makes the toy hard to turn right sides out.)
Step 13:
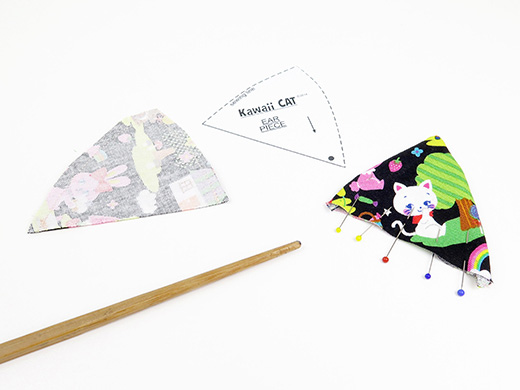
Trace and sew the EARS in pairs, sewing on the traced line. Cut the EARS out with a 5mm /¼iinch seam-allowance. Turn them (press if you like) and pin them closed. Do the TAIL in the same way!
Step 14:
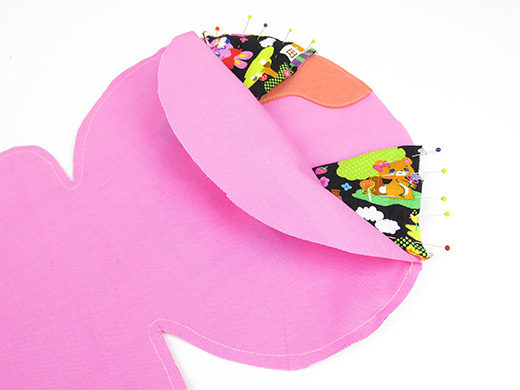
Pin the EARS in place, as shown in the photo, in between the MAIN PIECES. (The tips of the EARS point down, into the head.)
Step 15:
Pin the head closed at the top. Sew the head closed from A - B, with the EARS in between the 2 MAIN PIECES. Clip the fabric around the curves. Be very careful NOT to cut through the stitches.
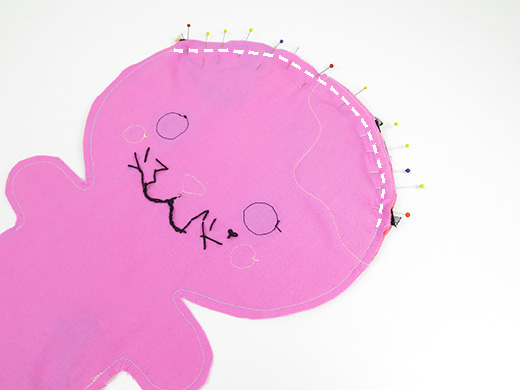 TIP: This is very important so the seams will turn out easily!
Step 16:
Push the TAIL into the tail gap and pin the TAIL in between the MAIN PIECES. Sew the TAIL in place.
Step 17:
Turn your Kutie right side out. I use a wooden chop stick to turn my toys but you can also use the end of a child’s paint brush!
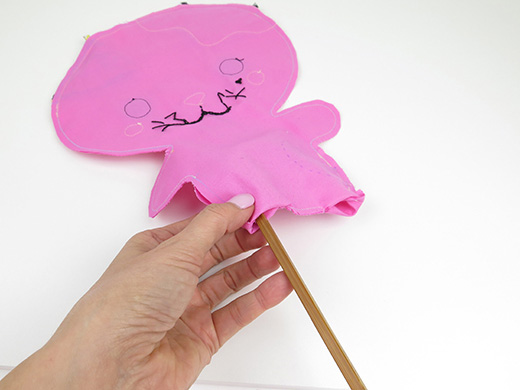 TIP: Always turn the smallest bits first! Push the legs and arms into the body, then push the top of the head out through the turning gap.
Step 18:
Use a wooden chopstick to make sure the seams are turned nicely.
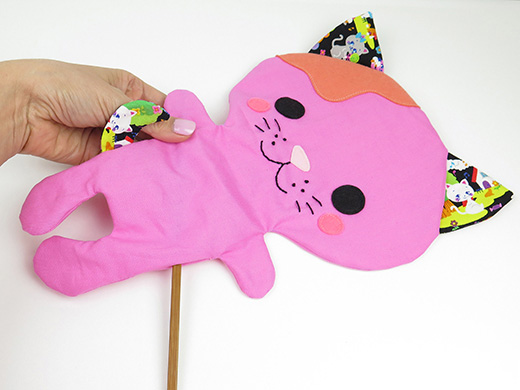 TIP: Run the chopstick back and forth along along the stitch line, right around the body, until all the seams are smooth.
Step 19:
Stuff the head starting at the top. When the head is firm, stuff the legs and arms. Go back and stuff the neck firmly then finish by filling the body.
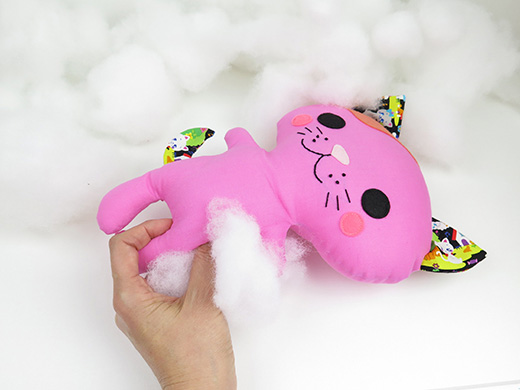 TIP: Kuties take a lot more stuffing than you’d think! You may have a crease at the arms and neck but keep stuffing firmly to remove the wrinkles, especially at the front.
Step 20:
Sew the stuffing gap closed using a ladder stitch.
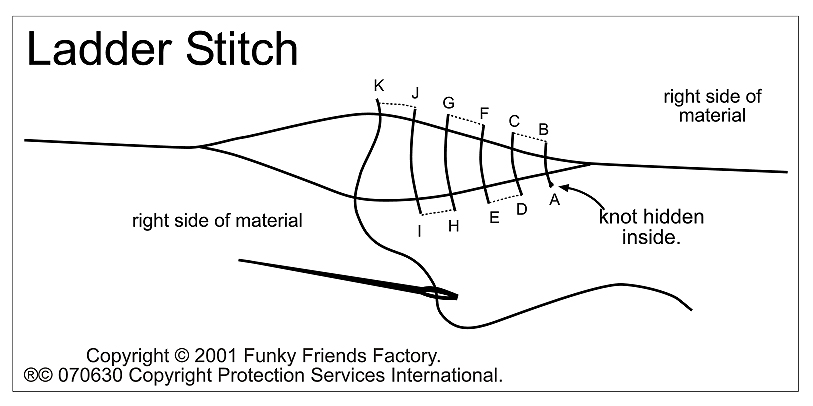 TIP: Use a double strand of sewing machine thread and make your stitches as small and neat as you can!
Next you can
make your CAT
a pet jacket...
Jacket step 1:
Trace the JACKET PIECE and BAND PIECE onto the felt.
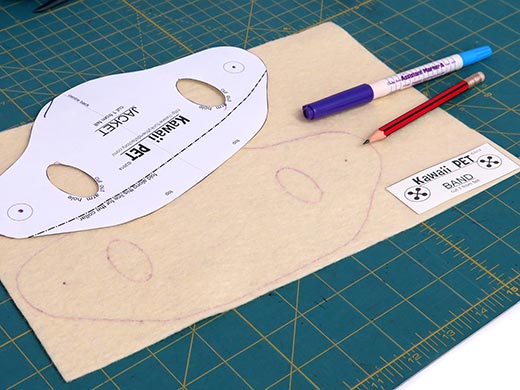 TIP: I used an air-erasable fabric marker for this so it wouldn’t leave marks on the pale yellow felt
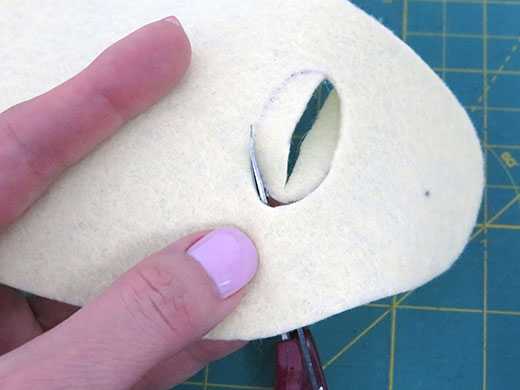
Jacket step 2:
Cut a slit in the felt and cut out the felt ovals for the arm holes.
Jacket step 3:
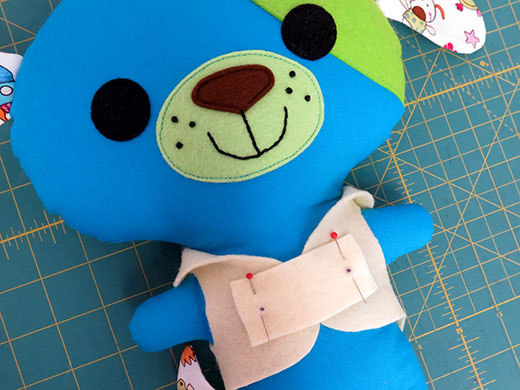
Put the JACKET PIECE onto your Kutie and fold the collar down and pin it in place.

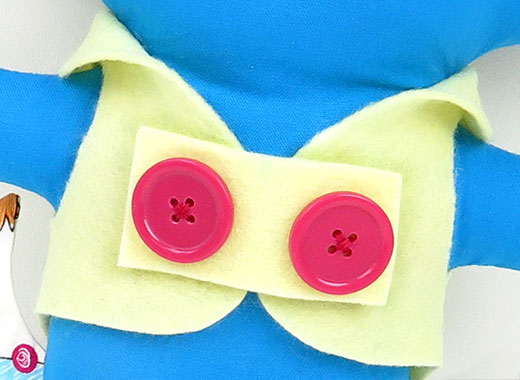
Jacket step 4:
Pin the BAND PIECE in place. Check that the BAND is straight and the JACKET is fitting nicely, then mark the positions for the buttons.
* In this photo tutorial I am making a jacket for my Kawaii DOG
~> it's exactly the same methodfor the Kawaii CAT jacket!
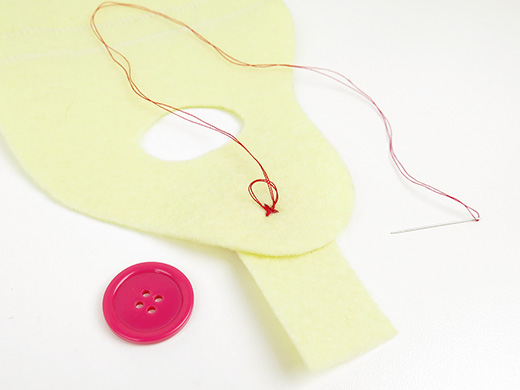
Jacket step 5:
Unpin the pieces on one side and take the JACKET off. Sew one of the buttons in place, sewing through both layers (the BAND and the JACKET PIECES).
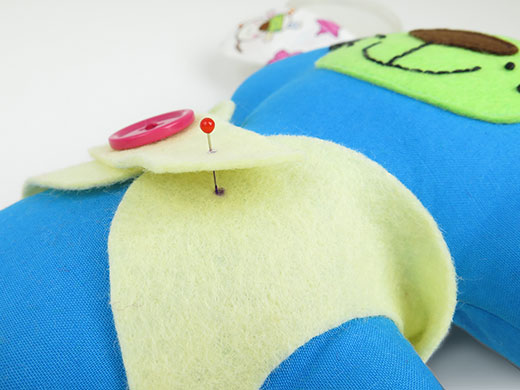
Jacket step 6:
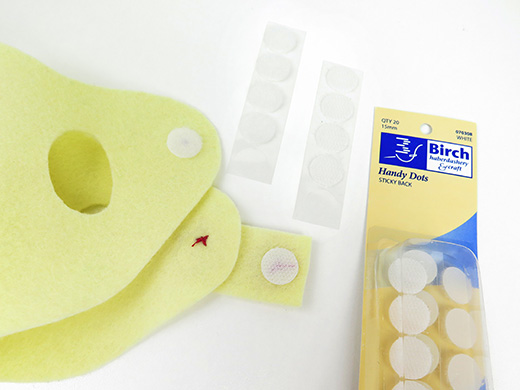
Put the JACKET back on to check the fitting and mark the position for the velcro.
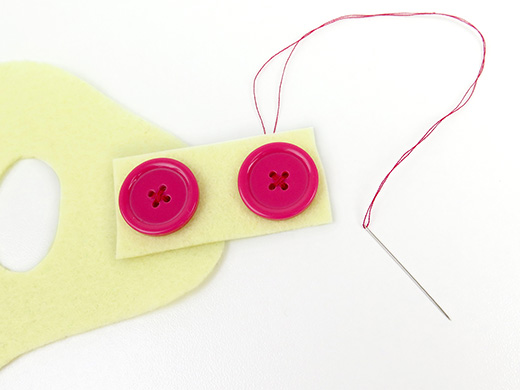
Jacket step 7:
Sew the second button onto the BAND.
Jacket step 8:
Use velcro or snap fasteners on the BAND PIECE just behind the second button and on the JACKET PIECE for fastening the JACKET closed. Put your cute pet jacket on your DOG!
Your Kawaii CAT is ready to LOVE!
Go and show it off to your friends...
I LOVE to see how your Funky Friends Factory toys turn out!
When you've made your own dolly - please come and paste a photo of your NEW Funky Friend on my Funky Friends Factory Facebook page for me to see!You could win a FREE PATTERN in the MAKER of the MONTH Pattern Giveaway!
Till next time,
Happy Sewing,
Pauline
xxx