
If there’s one thing I’d rather NOT focus on, it’s my feet!
Being so tall I guess I can just ignore them (all the way down there!) BUT as a teenager, I remember ‘dying a thousand deaths’ every time some insensitive classmate would say at the top of their voice,
“Oooooh look how BIG your feet are
– they’re HUUUUUUGE!”
Isn’t it funny how these things stick with us as adults?

Right, moving swiftly along…
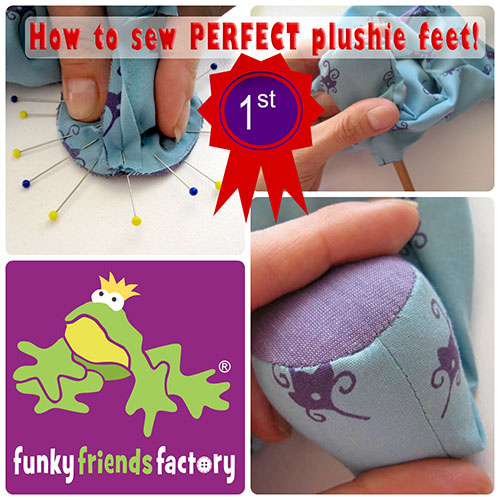
I got a lovely email from Jen recently, whose nieces and nephews are all huge fans of Ellie the Elephant. Jen asked if I could help her with some tips for sewing her softies’ feet as her foot pads always end up with pinching or puckering on the seams, no matter what she does. So let me get straight to it ~> and show you how to make PERFECT FEET for your next softie creation – nice and neat, without any pesky puckers or pleats, and of course, dainty and pretty to look at!
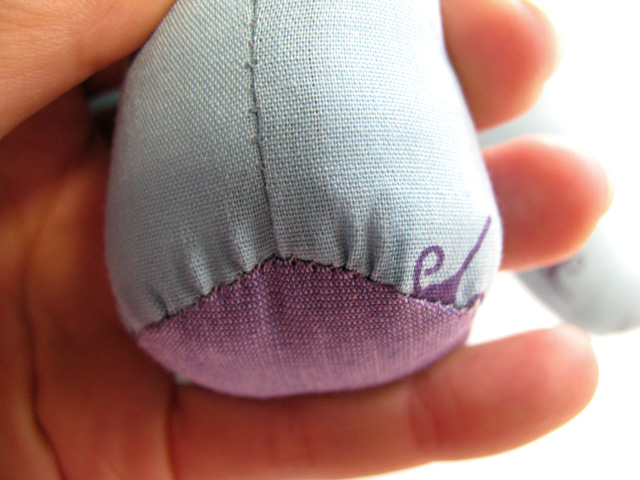
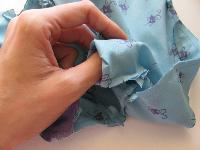
First, l’ll show you a ‘not-so-nice-looking foot’:
For those of you who may be wondering what on earth I am talking about. OK, here is a wrinkly, pinching, puckered, foot…
I almost don’t want to show you!
It’s not bad, BUT certainly not BEAUTIFUL!
Second, I’ll share some TIPS for beginners:
Here are my BEST 4 TIPS for FOOTPADS:
1. PINS! 📍
You’re going to need lots of PINS, at least 12 per foot (one for each hour position on a clock face).
2. Go SLOW!✋
Turn down your machine speed. (You may even want to hand crank your sewing machine, if you find it difficult to sew slowly!)
3. USE FLEECE FABRIC!🧣
It’s the easiest fabric for foot pads for beginners. WHY? Because it stretches instead of forming puckers.
4. BASTE/TACK.🪡
This is a “last resort step” that I don’t use myself BUT you may want to give it a try. If your fabric is still slipping, even after careful pinning, you may want to consider hand tacking/basting the pieces to keep them from shifting and slipping as you sew. (Don’t forget to remove the baste stitches after machine sewing the feet!)
Third, let’s banish those pesky puckers, once and for all!😄
STEP 1
Pin the foot pads in place, starting with 4 pins, front back and on each side.
(I like to think of these as North, East, South, and West!)
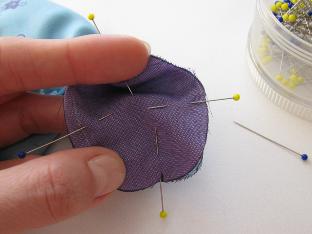
STEP 2
Place another pin between the first 4 pins, so you should have 8 pins so far.
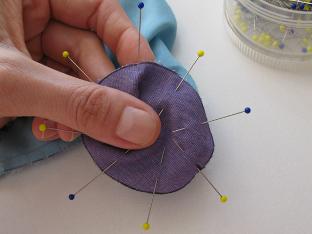
STEP 3
Turn the foot over and pin from the other side. Place a pin in between the pins on the first side. You should end up with a ‘pinwheel’ which looks a LOT like the new pins which you buy at the haberdashery store!
(This is also the position in which you will SEW the feet)
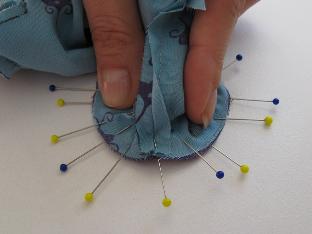
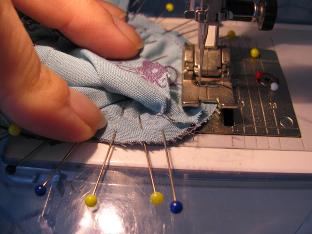
STEP 4
Sew with the foot pad flat, facing down, and all the pins sticking outwards. (Makes me think of an octopus!) I move my sewing machine needle to the very LEFT position and sew with the edge of the fabric running along the inside of the right-hand prong of the machine foot so that I get a ¼inch/5mm seam. (‘scuze all the technical terms!)
* Pull the pins out just before you are about to go over them. Pins can do a lot of damage to your machine or your eyes if they snap!!!
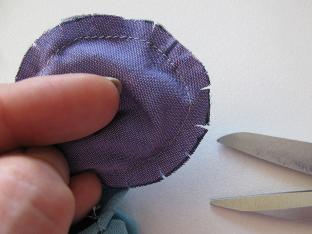
STEP 5
Clip or snip your seam, be extra careful NOT to snip your sewing line! (This allows the seam to flex a bit which helps smooth out the puckering.)
STEP 6
I always use my thumb to turn the feet ‘into the body’ BEFORE I turn my softies inside out. (I do this with all smaller parts as it makes turning the toy much easier.)
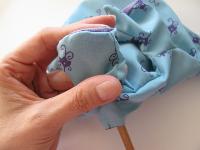
STEP 7
Then I use a wooden chopstick as a turning tool to help me turn the seems properly. I smooth them out by running the end of the chopstick back and forth so the stitches can be seen, right around the edge of the footpad.
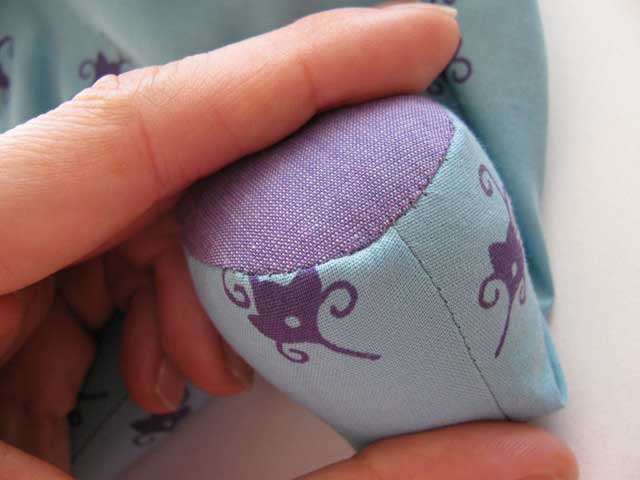
STEP 8
ALL that’s left to do is to stuff your feet FIRMLY so the toy stuffing ‘puffs out’ the foot.
AND all the
pesky puckers
are GONE!
Well, it was fun making these pics, and I hope that it helps you to make the MOST GORGEOUS softies’ feet ever!
.

Till next time… happy sewing!
xxx
Pauline
![]()

My pleasure guys! I find it’s easier to show you what I mean with photos than with words – so glad that helped!!! : )
Oh, wow, I thought it was normal and accepted to have little puckers in things like this. Now I know that there is a better way.
Thanks so much for your advice. You are a very good teacher.
I am just making my very first soft toy and will be putting the feet together this evening! Thanks for the tips, they arrived just in time!
Thanks for giving us the tip. It’s a great help to me and will have to try your way next time I sew the feet. I never liked doing the feet because of two problems. One of them was the pesky puckers. That wasn’t my main problem. Half of the time, when I do the animals, it seems like the pads fit perfectly for the two feet but it’s too small for the other two feet which is frustrating because I copied pattern pieces exactly like the ones you gave me and didn’t understand why it won’t fit together. Half of the time, I wanted to make a bigger pads but then it will make 2 & 2 pair of feet unevenly so I tried my best to stretch the two pads to reach the edges of the animals’ legs so all 4 feet will be the same size. Maybe I did something wrong and somehow stretch the fabric but I didn’t think so. Anyways, just wanted to say thank you again for your tip and hopefully it will make my life easier and that I will enjoy sewing the feet in the future.
My pleasure Leah,I’m glad my tips are helping you. I find the pins work a treat! Now you should have perfect matching feet EVERY TIME!
🙂