
Have you ever wanted to add a REAL shirt collar to a memory or keepsake bear? Well, you’re not alone!
This is one of the top questions
in our Pattern Fan Club!
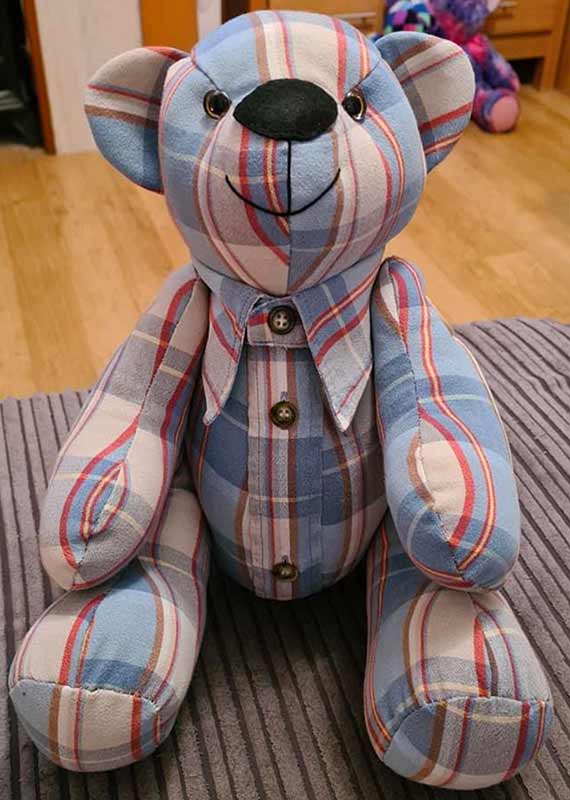
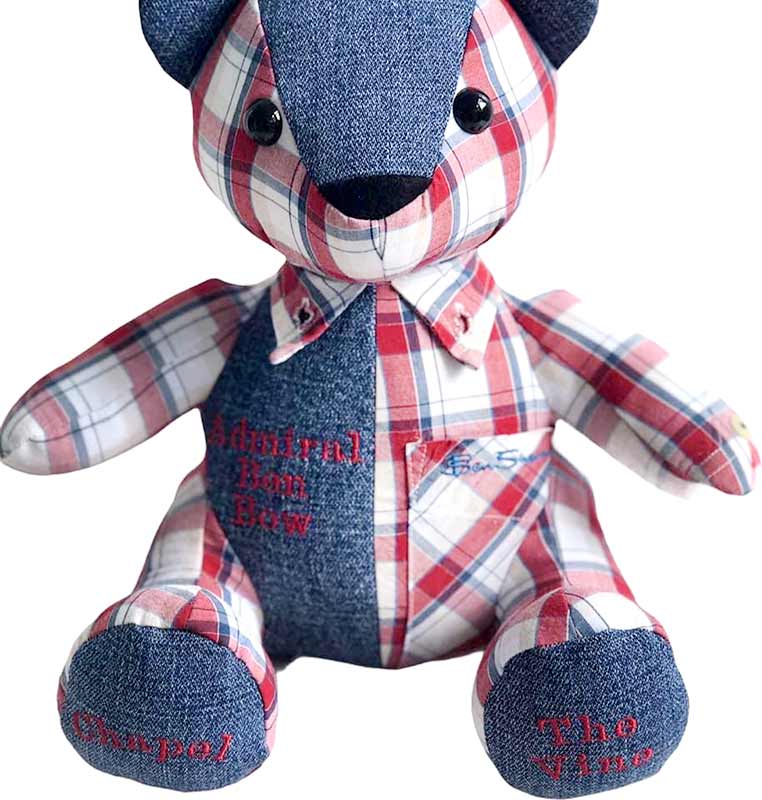
This is a pic of a collar added to Melody Memory Bear by Gail McKnight Anderson of Gail’s Little Sewing Room. This is one of the many collar bears posted in our Pattern Fan Club Group.
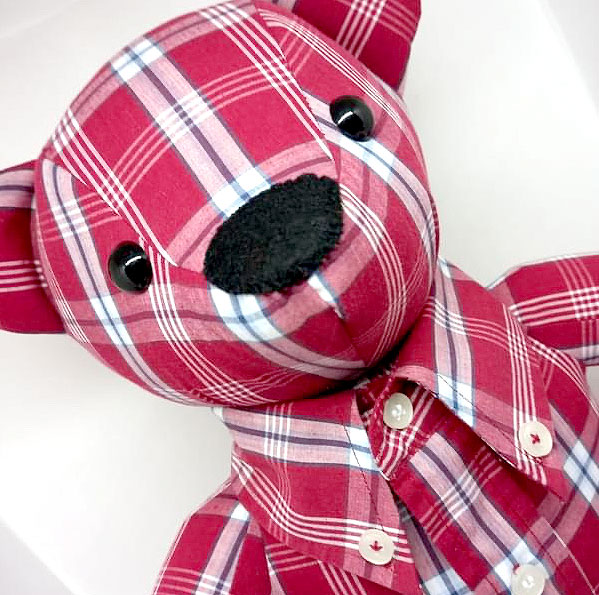
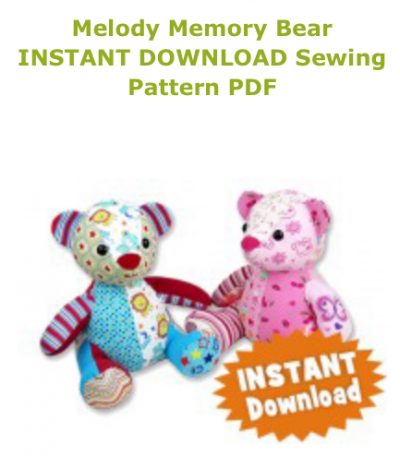
Click HERE to purchase the Melody Memory Bear Pattern.
And our lovely members have been so patient in explaining their tips and techniques. I’ve never actually added a shirt collar to a toy, so I’m going to let the “experts” on this topic (our group members) explain their techniques below….
BUT first ~> some
common questions about collars:
1. What is this style called?
We call this the “collar bear” style in our Facebook group, so if you’d like to add your technique, pics, or tips, please tag your post #collarbear so we can all find it in the group search engine. If you’d like to FIND more pics, search our group for #collarbear or “collar.”
2. Is it difficult to make a collar bear?
Usually, it’s easy! As with any sewing project, that will depend on your experience level and your spirit of adventure. The first two techniques below are in the “easy” category. The third technique is “advanced.”
3. Should the bear be stuffed first?
For the first two techniques below, YES you should finish and stuff the toy first. For the third technique, which is more advanced, the collar is sewn on as you sew the bear (before you turn and stuff the bear).
4. Can this ONLY be done on BEARS?
It’s not just for bears! I’ve seen a collar done on Patch Pussycat, Lucky Labrador, Fifi Fox, Raff Giraffe, Mikey Moose, and more. Feel free to experiment by adding a collar to any of the Funky Friends Factory toys – maybe you’ll start a new trend. I’d love to see your pics – and I’m sure LOTS of our Fan Club Members would too!!! Soon your pics can have people exclaiming, “That’s so cute! How did you do it?”
Fifi Fox sewn at 80%
by Nat Egan of Rothmore bears
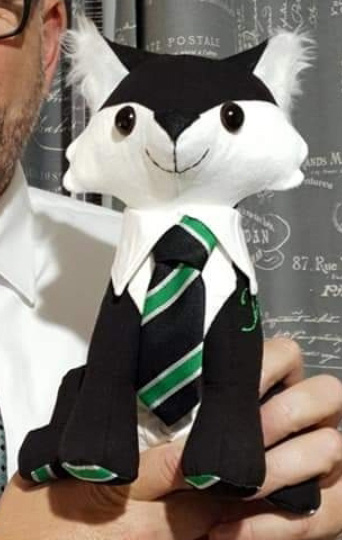
Click HERE to purchase the Fox pattern.

Right, let’s get on with it!
HOW do you add a collar?
This post covers the 3 most popular techniques submitted by our group members.
Before you start – here are 2 TERRIFIC TIPS!
As I said earlier, there are MANY ways to add a shirt collar to a toy, but no matter HOW you add a collar, please remember these tips…
* Terrific Tip 1 *
Practice FIRST!
Whenever you’re dealing with precious materials: PRACTICE FIRST on a similar piece of clothing from your closet or a charity shop.
And
* Terrific Tip 2 *
Leave extra fabric when removing the collar.
For any collar bear technique, you first have to remove the collar from the shirt. Make sure to LEAVE EXTRA FABRIC for yourself to work with later when attaching the collar to the bear. You can Google the basic parts of a dress shirt collar for more info, but the stiffer part of a collar that stands up and goes around the neck is generally called the “band.” Don’t cut right at the band seam. Leave yourself some fabric to work with! Depending on the technique you select from those below, you will need at least a finger’s width of fabric below the band.
AND here are the three techniques!
No.1. The EASIEST TECHNIQUE:
Removable collar – just button it on!
THIS IS A GREAT OPTION IF:
you’re unsure of whether you will like the collar look, the recipient wants a removable collar, you’re short on time, or you don’t want to hand-sewn the collar onto the bear.
HOW to do it:
If the shirt has a button at the neck, you can do this easy “no-sew” option in minutes. Just cut the collar off the shirt, turn under the edges so they don’t fray (hem by hand or machine for a neater look), and then button the collar onto the STUFFED toy.
HOW to resize a collar if it doesn’t fit:
After removing the collar from the shirt, button it on the toy and check the size. Most likely it will be a bit too big and you will need to make the collar smaller. In other words, you will “take in” the collar size, to fit the toy’s neck.
Don’t worry, this is easy!
- Pinch the collar in the back and pin it so it’s fitting the neck, then mark both sides where they meet at the back of the neck.
- Remove the collar from the toy, fold the extra bit of collar to the INSIDE of the collar and machine or hand sew the sides together where you marked them.
- Neaten up! If there is only a little bit of extra collar – flap it to one side and hand sew it to the inside of the collar. BUT if there is a LOT of extra collar – cut off the excess. Just be sure to leave yourself a seam allowance or it will be too tight. Tuck the raw edges under and hand-sew them down neatly.
That’s it! Button your collar on your bear!
Some cool examples…
Here’s a LOVELY example of a “removable” collar sewn by Megan Koshurba with Technique 1:
~> added to Melody Memory Bear
Click HERE to purchase the Melody Memory Bear Pattern.
Here is an explanation from Hayley Sayers of Soft Federation of how she makes a “removable” collar with Technique 1:
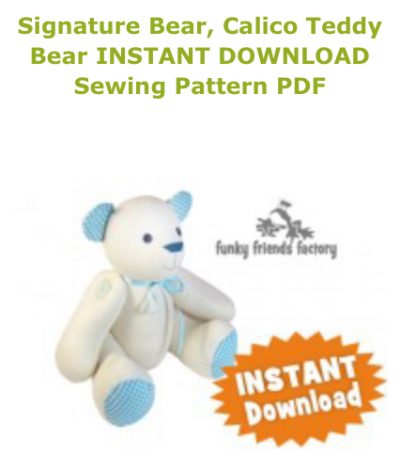
~> added to Calico Bear
Click HERE to purchase the Calico Bear pattern.
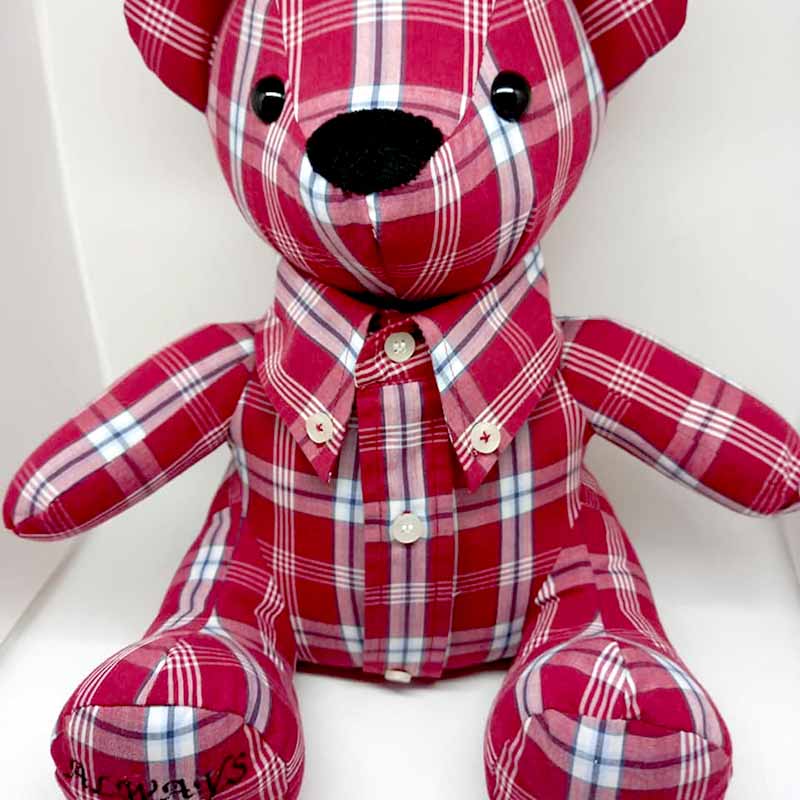
AND here’s a LOVELY example of a “removable” collar sewn by Emma Boulton using Technique 1:
*** You can see in the photo from behind,
that the collar is NOT attached on her Keep Me Keepsake Bear .
Click HERE to purchase the Keepsake Bear pattern.
No.2. The MOST POPULAR TECHNIQUE:
Hand Sew the collar onto the bear.
THIS IS A GREAT OPTION IF:
you don’t mind a bit of hand sewing, the collar you’re using doesn’t have buttons, and/or you want a “permanent” (non-removable) collar.
This is by far the most popular technique! You can use it on any type of collar (including those without buttons), it’s permanent, and gives a neat and tidy look.
HOW to do it:
You’re basically just adding one additional step to the “removable” collar technique above: secure the collar in place by hand-stitching it onto the toy. Follow the steps for Technique 1 (Removable collar) above, including the TIPS for REMOVING the collar from the shirt and adjusting the SIZE of the collar. Once you’ve got a good fit, use the extra bit of fabric you left yourself under the band as your seam allowance and stitch the collar in place by hand.
Some cool examples…
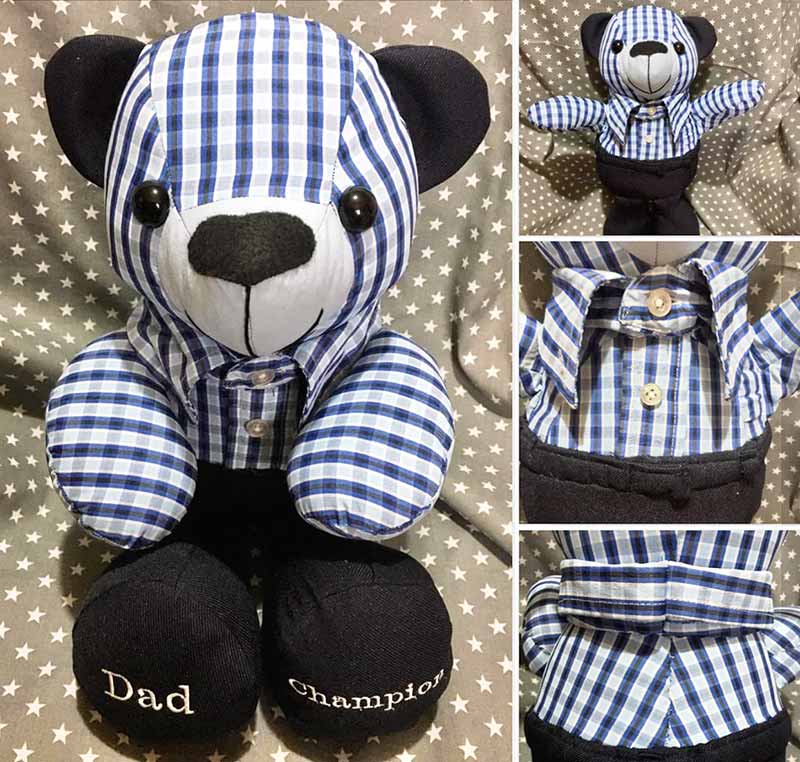
Here is Jayne Cash’s explanation of how she makes a hand sewn collar with Technique 2:
~> Look how she’s sewn the buttons
on her Melody Memory Bear!
Click HERE to purchase the Melody Memory Bear Pattern.


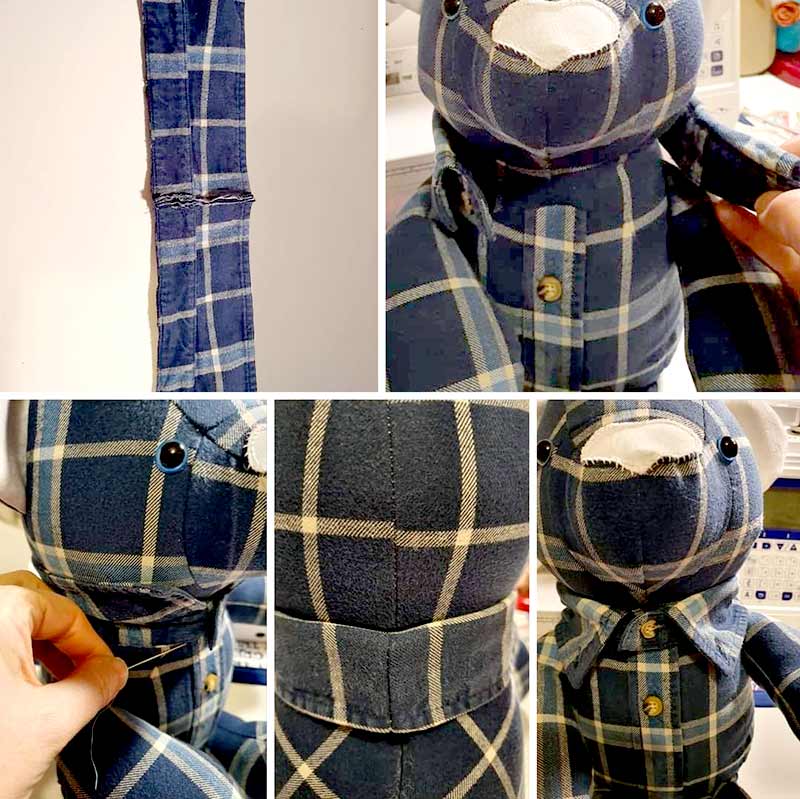
Here’s another example of a hand sewn collar by Jane Tate using with Technique 2:
The photos show the steps she uses in adjusting the collar size and hand sewing it onto a finished (stuffed) Keep Me Keepsake Bear.
*** Look closely at the pic in the bottom left ~>
you can see she lifts the collar UP to sew it to the bear’s body!
Click HERE to purchase the Keepsake Bear pattern.
Here is Gail McKnight Anderson‘s explanation of how she makes a hand sewn collar with Technique 2:
~> added to Melody Memory Bear
Click HERE to purchase the Melody Memory Bear Pattern.
;

No.3. The MOST CHALLENGING TECHNIQUE:
Machine sew – “Sandwich” the layers.
THIS IS A GREAT OPTION IF:
you’re already comfortable with the toy pattern itself, you don’t mind experimenting to fine-tune the process for yourself, you’re an expert with pins, you want a super-strong machine attachment, and/or you absolutely do NOT want to sew by hand (of course, you don’t have to sew this by machine, but with the extra layer it might be easier on your fingers).
This third technique produces a wonderful result, as you can see in the example pics below, but it’s MUCH more difficult than the Techniques above.
WHY is this MORE DIFFICULT?
The fabric can easily shift during sewing, creating an uneven collar (and lots of time unpicking). You will be attaching the collar as part of the head installation process. This requires careful layering and pinning of the collar in between the head and body pieces, and more layers generally creates more difficulty in toy sewing. But if you’re OK to practice a bit, and come up with your own method, this technique can give you a really professional result.
HOW to do it:
The collar is pinned between the HEAD and BODY before you sew them together at the neck seam. It is a good idea to tack (baste) all the layers together so they don’t slip as you sew. To be honest – I’ve noticed that very FEW people actually use this method – I think it’s because it’s WAY MORE DIFFICULT than the other 2 methods, which give you almost the same look!
Some cool examples…
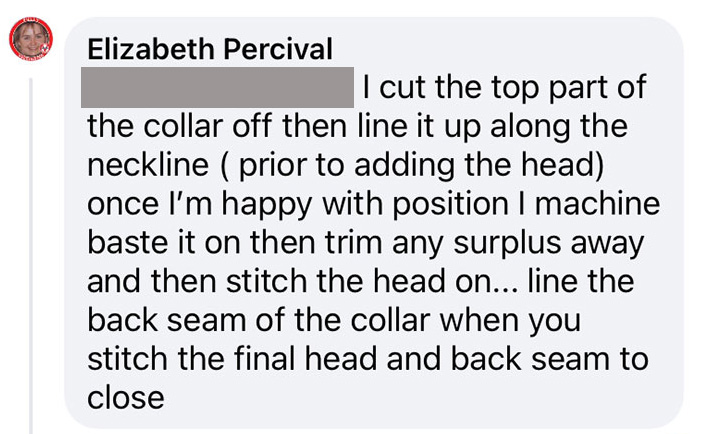
Here is an explanation from Elizabeth Percival of Dolli-Mixtures Keepsakes of how she machine sews the collar with Technique 3:
~> added to Melody Memory Bear
Click HERE to purchase the Melody Memory Bear Pattern.
Here’s another example of a machine sewn collar by Emma Boulton using Technique 3:
~> added to Melody Memory Bear
Click HERE to purchase the Melody Memory Bear Pattern.
There you have it – ALL the basics! 😀
Now you’ve seen HOW to add a collar to your bears – it’s time for you give it a go and re-cycle a shirt collar for your next memory bear or keepsake project. Please don’t forget to come post your pics in the Funky Friends Factory Patterns Fan Club on our Main Facebook page or email me your photos and you could be our next MAKER OF THE MONTH winner (Find out more below!)
Want to win a
FREE toy pattern?
It’s so EASY to enter the Pattern GIVEAWAY!
![]()
ALL you need to do is post a photo of a FUNKY FRIENDS FACTORY toy that you have made on the Funky Friends Factory Facebook Page .
At the end of each month I draw a winner and post the winner’s name on the Blog the following MONTH. I have an Album on Facebook for all the MAKEROFTHEMONTH winners. You can check it out HERE!
NOT on Facebook? ENTER by email! 😀
*** You can send me your photos by email too!
So come on! Share your photos ~> The next winner could be YOU!!!
 .
.
Till next time,
Happy Sewing,
Pauline
xxx
![]()

Oh wow 2 mentions in this blog thankyou Pauline you’ve made my day .
Hey Emma, credit where credit’s due!!!! Your collar bears are gorgeous!!!! I couldn’t find a link for your business? Please let me now where I can link to if you want me to refer people to you for keepsakes!!!! xxx
I cut 3 pieces, one long narrow strip and 2 triangles. It’s easy to sew together and then I attach it to the bear by sewing two small tabs of Velcro on the back of the collar making it removable. This way I can make the collar more proportionate to the size of the bear.
That sounds like a great idea when you don’t have a collared shirt! 🤩
Love seeing all the different bears. I’m making the Melody Memory Bear for my nephew’s daughter made from one of his flannel shirts. He was a Navy pilot killed in a training accident before she was born. What size eyes did you use for the Melody Memory Bear? Thank you
Hi Pamela, That’s so sad. Sounds like a very precious bear. I can’t remember, I think 18mm but please check in the Specific Requirements in the pattern to be sure! xxx
Love the collars ! Thank you for sharing !
Thank you so much Pauline for the info on Collars it’s very helpful and so very kind of you
Aw, no worries, good to know you like reading my toy-making tips!!!!
I love all your patterns
Thank you Zoe! 🥰