
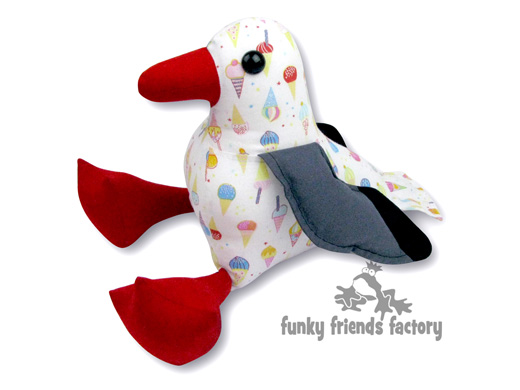
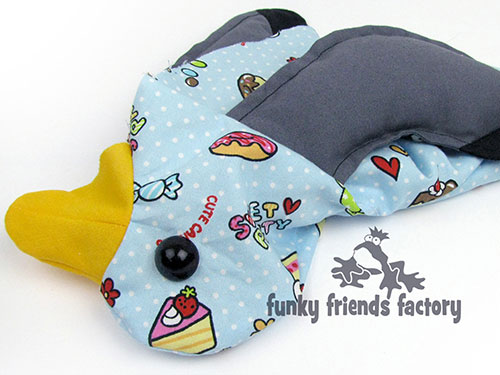
Sew a fabric bird - seagull
I have made a photo tutorial so you can see how to sew my Seagull Sewing Pattern. Once you have made your first one you'll find it's such fun you'll want to make a whole flock of seagull softies!
*** PLEASE NOTE - this in ONLY a PHOTO TUTORIAL ***
I have made this photo tutorial so people who have purchased the pattern can SEE how to sew a toy seagull! (I wanted to explain this so you are not disappointed if you have found this page via a search engine and not from the link in my seagull sewing pattern!)
The FULL PATTERN IS NOT included here. It is also NOT A FREE PATTERN.
Right, let's sew a fabric Seagull!
We start with the WINGS:
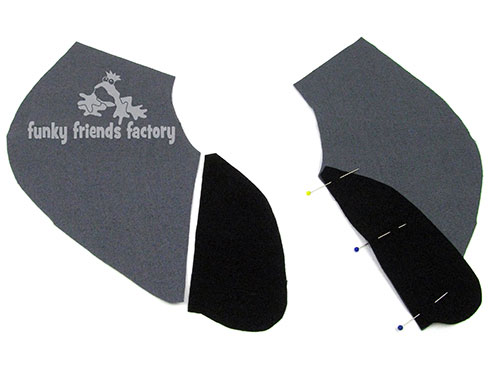
STEP 1
Pin and sew the WING TIP PIECES to the WING PIECES, matching the crosses of the pattern markings. I like to finger-press these seams open with a fingernail so they lie nice and flat for the next step.
STEP 2
Sew the WING TIP & WING PIECES together in pairs to make the wings. Remember to leave the straight edge open for turning .
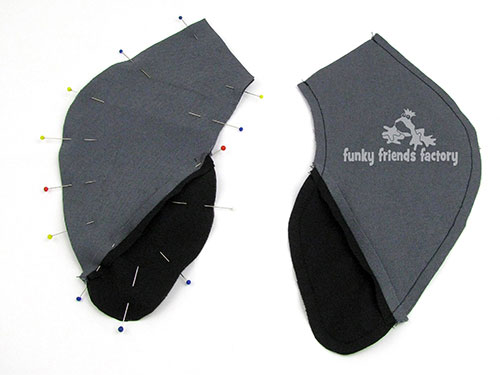
STEP3
Clip the seams especially at the tip of each wing, then turn the WING PIECES right sides out. Pin the WING PIECES so that the edges are flat. Sew around the edge of each wing using a 5mm/¼inch seam allowance to create a ‘rim’ around the outsides.

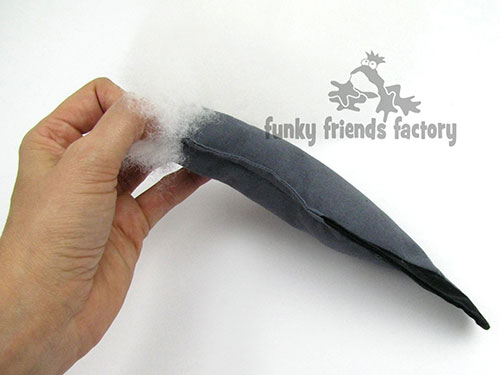
STEP 4
Stitch across the wings at the seam between the WING TIP PIECES and WING PIECES. This is important because it makes the wings flatter so it is easier to sew the seagull closed with the wings inside!
TIP:I stitch in black thread just on the black fabric of the WING TIP PIECES. so that you don’t see the stiching!
STEP 5
Stuff the wings using just a little bit of toy stuffing so they are quite flat (thin).
STEP 6
Pin the wings in position on the BODY PIECES using the pattern markings to guide you.
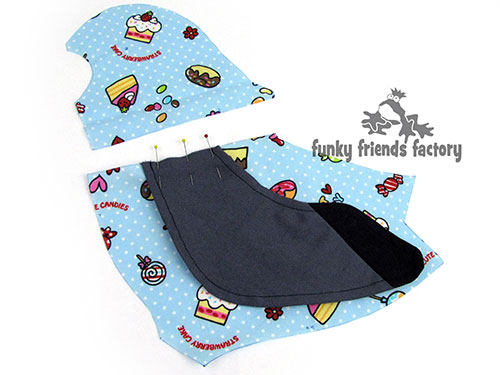
HEAD and BODY
STEP 7
Pin the HEAD PIECES on top of the BODY AND WING PIECES. Sew the HEAD AND BODY PIECES together with the WINGS sandwiched in between them.

STEP 8
Pin the seam you have just sewn so that it lies downwards and sew a line of stitching over the seam so the wings are sewn in nice and strong.
TIP:Make sure you stitches go through all the layers at the back! This is important as the WINGS will definitely get tugged on!!!!
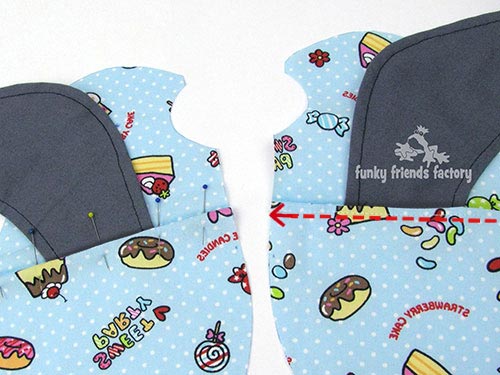
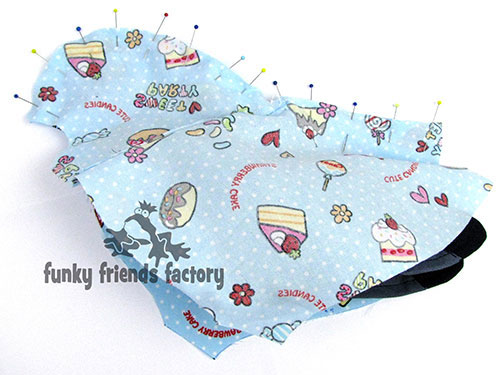
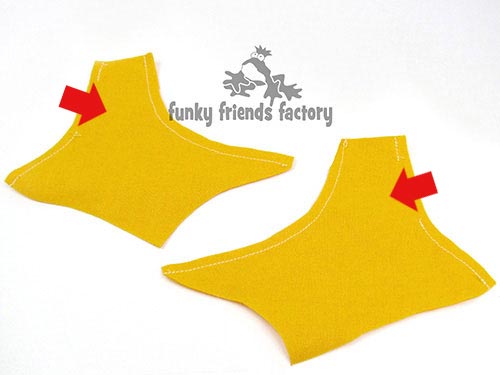
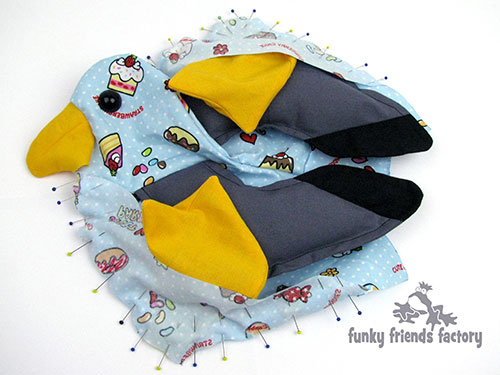
STEP 9a
Pin and sew the Seagull’s body together down the back, from C – E. Clip the seams especially the very curved part around the top of the seagull’s head.
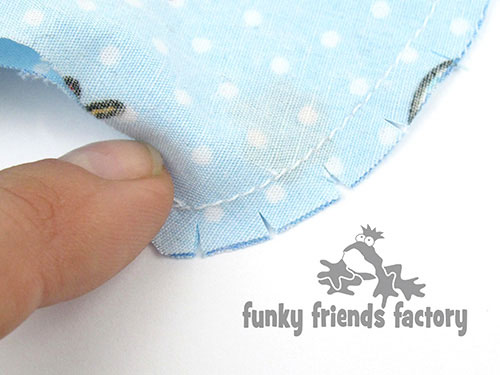
STEP 9b
Clip the seams especially the very curved part around the top of the seagull’s head.
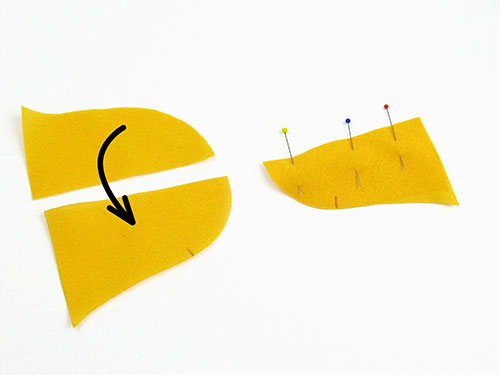
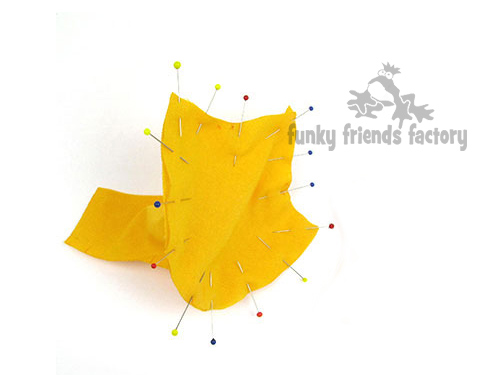
BEAK
STEP 10a
Sew the BEAK TOP PIECES to the BEAK BASE PIECES in pairs. Sew from A – B, matching the 3 crosses (xxx) of the pattern markings.
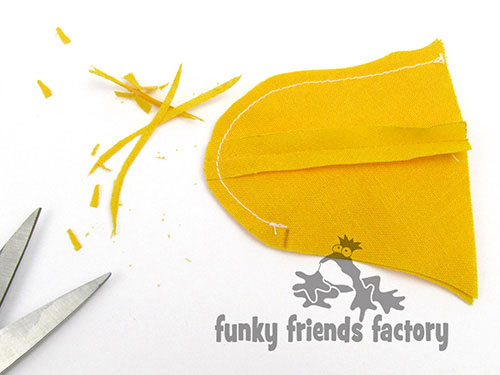
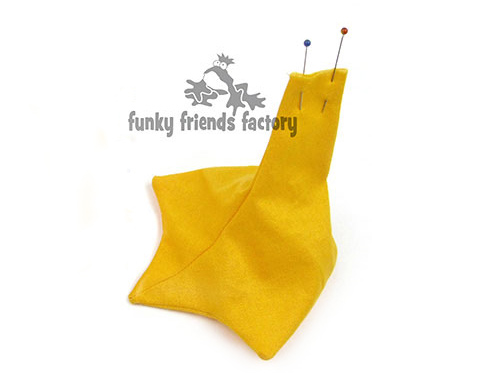
STEP 10b
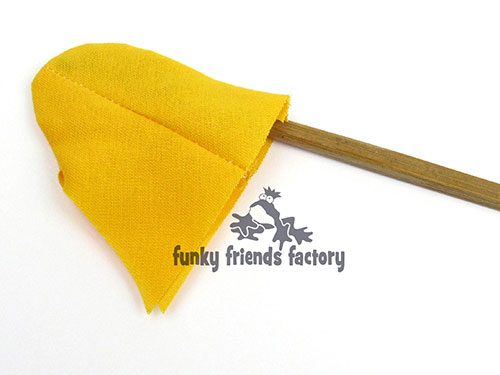
Pin the pairs of BEAK PIECES together. Sew them together from C – D and make sure you leave the seam open from D – F. This is important so that it will be easier to sew the beak to the HEAD PIECES! Trim the seam, especially at the tip, so it will turn nicely and turn the beak right sides out.
TIP:Use a wooden chopstick to turn the seams nicely. Run it, back and forth, along the stitch line inside the beak to make the seams smooth. If you don’t have a chopstick, the end of a children’s paintbrush works really great for this too!
STEP 11
Pin the BEAK PIECES to the BODY PIECES matching point C and F. Sew from F – C – F on the other side.
EYES
STEP 12
If you are using craft eyes fit them now. If you want to embroider eyes, I recommend doing them after the toy is stuffed.
TAIL
STEP 13
Sew the TAIL PIECES together with fabric right sides facing, leave the straight edge open for turning. Snip the corners of the seams and turn the TAIL PIECES right sides out and use a chopstick to turn the seams nicely especially at the corners.
***Do not stuff the tail.***
STEP 14a
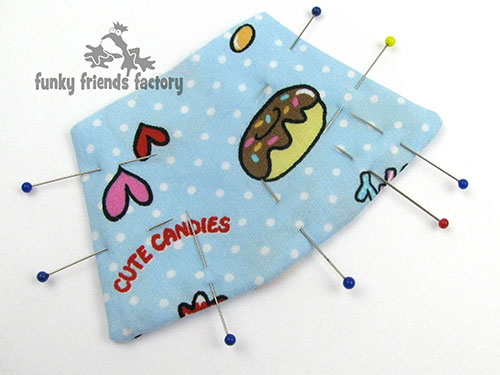
Pin the TAIL so that the edges are flat (like you did with the wings).
STEP 14b
Sew around the edge of the TAIL using a 5mm/¼inch seam allowance.

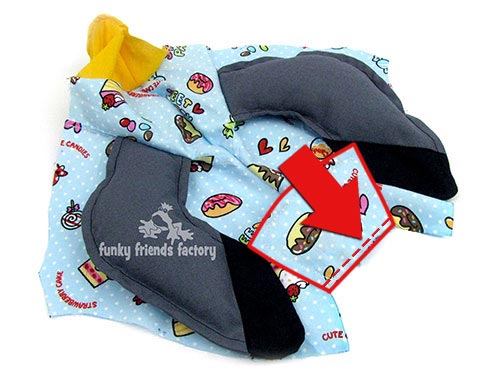
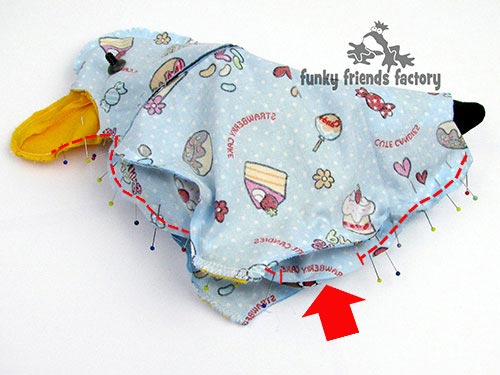
STEP 15
Sew the TAIL to the BODY PIECES, matching point M and E.
*I have outlined the TAIL in red in the photo below.
LEGS
STEP 16
Sew the FOOT PIECES together in pairs. Sew from G – H and J – K.
NB* DON’T FORGET to leave a gap for stuffing them later!
STEP 19a
Pin the FOOT PAD PIECES to the LEG PIECES matching points H and K. Sew right around without a gap.
STEP 19b
Trim the seam allowance at the tip of the ‘toes’ and clip the seams then turn the feet right sides out. Use a wooden chopstick to make sure the seams are turned nicely, especially the ‘toes’.
STEP 20
Pin the LEGS PIECES to the BODY PIECES so the ‘toes’ face to the front (where the beak is!).
GUSSET
STEP 21a
Pin and sew the GUSSET PIECES to the BODY PIECES with the legs sandwiched in between, matching the dots of the pattern markings.
STEP 21b
Sew across the top of the legs a few times.
TIP:I like to also sew across the top of the legs with a zig-zag stitch to make the legs even more secure.
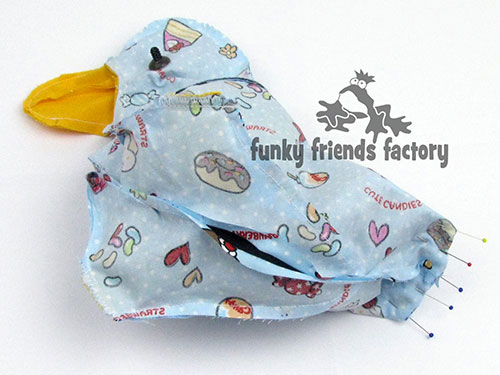
STEP 22
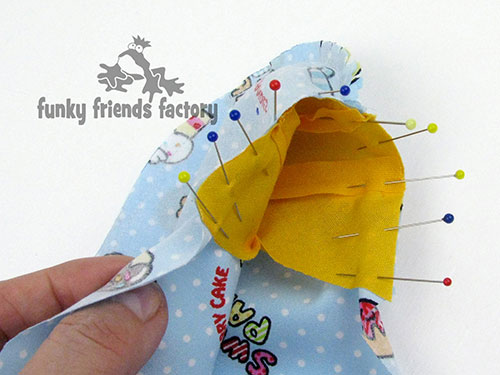
Pin the Seagull along the center edge of the GUSSET PIECES, matching the 3 dots of the pattern markings. Sew from D on the beak down the front of the HEAD PIECES and BODY PIECES, to L on the BODY PIECES. Leave a gap open on the GUSSET PIECES for turning and stuffing.
STEP 23
Fold the body pieces at M so you can pin the body closed at the tail. Pin point L to E. (The tail, legs and wings will all be inside the body of your Seagull.) Sew the body closed at the tail. Sew from M – L/E – M on the other side.
STEP 24
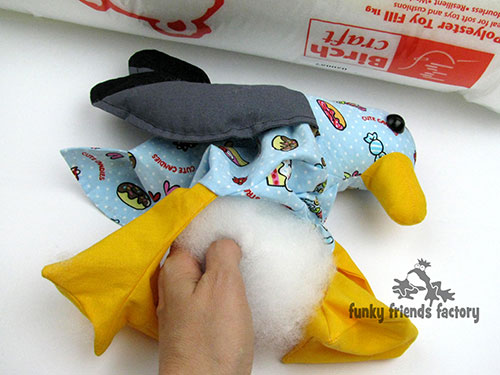
Turn the Seagull right sides out. Stuff the beak well, then stuff the head area and then the neck. Stuff the tail end next, followed by the rest of the body, making sure to stuff the legs firmly.
STEP 25
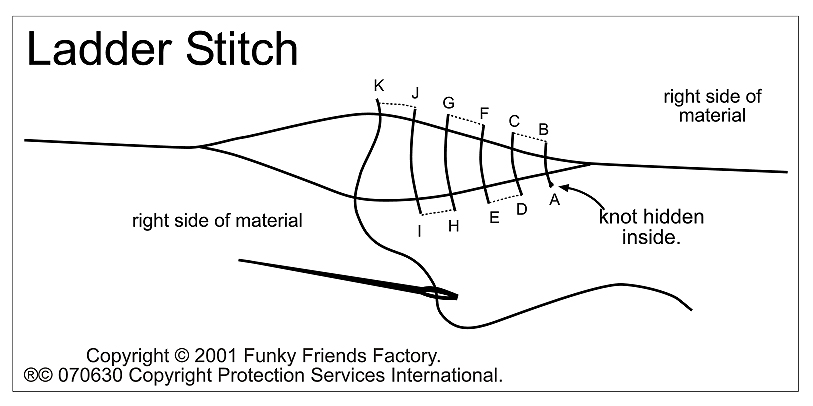
Sew the stuffing gap closed with a ladder stitch using a double strand of machine sewing thread.
Your seagull is ready to LOVE!
![]()
I LOVE to see how your Funky Friends Factory toys turn out!
When you've made your own Seagull softie - please come and paste a photo of your NEW Funky Friend on my Funky Friends Factory Facebook page for me to see!
You could win a FREE PATTERN in the MAKER OF THE MONTH Pattern Giveaway!

Till next time,
Happy Sewing,
Pauline
xxx