
Samantha emailed me as her sewing machine was “eating her fleece” which was making her a little frustrated. I understand the feeling as I have an expensive embroidery machine that seems to jam every time I use it and now I am scared to use it!
I find fleece so easy….. so I am amazed that some people think fleece is a difficult fabric to work with.
I guess I have picked up tips from taking sewing lessons, just from experimenting over the years, that make it seem so simple. So with this in mind, I thought I’d better put together a few tips for those people who haven’t tried sewing with fleece before, so there’s no reason to be afraid!
For hand sewing:
- use a strong thread and small neat back-stitching.
For machine sewing toys:
- Use a universal needle or a ball point needle for kinit fabrics like fleece.
- Use a 1/4inch/5mm seam allowance, unless the pattern instructions say otherwise) if you find your seams are rippling/distorting – you can use a slightly larger seam allowance (5/8 inch/1cm)
- Use a normal or slightly smaller stitch length for cotton fabrics and use a normal or slightly longer stitch length for fleece or fabrics which are quite bulky.*
* To be honest – I really like to keep things simple so I have always used my ‘normal’ stitch setting which, on my sewing machine, is 2.5mm and a 5-6mm seam allowance for EVERYTHING!
And MY 3 best tips…
1. Start and finsh well! Sounds like something your Mum would tell you! : )
Whenever I sew fleecy fabrics, I start about 1 cm along the seam I want to sew and reverse stitch back to the beginning of the seam. I do this with any fabric, to be honest, but occasionally , if I haven’t done this with fleece it can get a bit chewed up. (I also end off using a reverse stitch at the end of the seam too.)
2. Tidy as you go!
Cut off all your ‘starting and finishing’ threads as you go so you won’t end up getting them caught in your seams as you sew. The worst thing I did whilst cutting off threads was to nick a hole in the side of a rhino, which I was making as a gift for a colleague. I didn’t have time to make another one so I patched him with “Fray – Stop” but he didn’t look his best!
Saving the best ’til last – the BEST tip EVER for sewing with fleece!
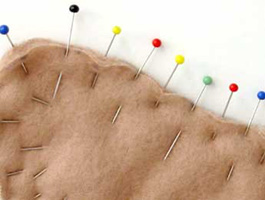
3. PIN, PIN and PIN some more!
Sounds so simple to say, ‘Use LOTS of pins’ BUT it truly is a matter of ‘the more the merrier’!
I find it best to pin on one side… say every 2 cm/inch and then turn the pieces over and pin in between the pins from the other side. (so you end up with one pin from the front, one pin from the back along the whole seam) There’s absolutely no way your pieces can slip and you’ll have beatiful even and accurate seams every time! It’s a real pain to have to unpick the pieces if they slip when you sew and I talk from experience – I’ve had to do it a few times and it’s very annoying. Lop-sided ears aren’t always as cute as you’d think!
I hope these simple tips will help you sew some gorgeous looking toys! Please feel free to share any tips you have discovered yourself, as I like to say, “share the love”
.

.
Happy sewing,
Pauline
![]()

0 Comments