
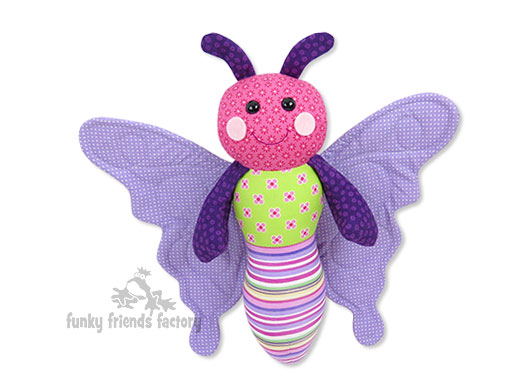
I made this photo tutorial so you can see how to sew my Butterfly Sewing Pattern ~> scroll down for step-by-step photos!
Belinda Butterfly is a fun toy pattern for using up scraps of fabrics from other projects. She is a bit fiddly so I recommend her for more experienced toy makers.
 .
.
*** PLEASE NOTE – this is ONLY a PHOTO TUTORIAL ***
The FULL PATTERN IS NOT included here.It is NOT A FREE PATTERN!
I have made this photo tutorial so people who have purchased my Butterfly Sewing Pattern can SEE how to sew a butterfly toy! (I wanted to explain this so you are not disappointed if you have found this page via a search engine and not from the link in my Belinda Butterfly Toy Sewing Pattern)
Let’s get started!
PREPARE THE MAIN FABRICS
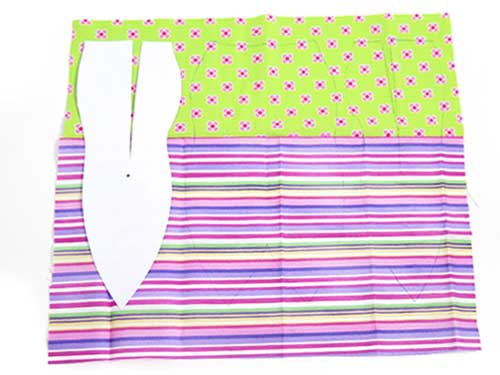
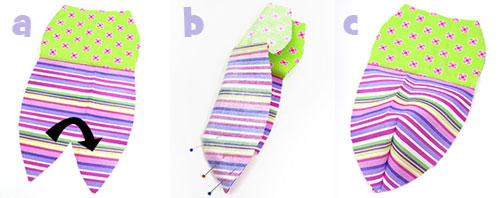
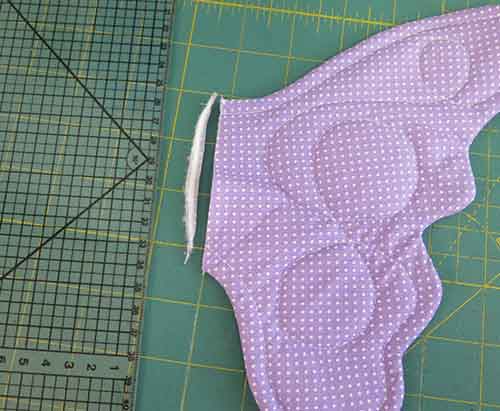
STEP 1a
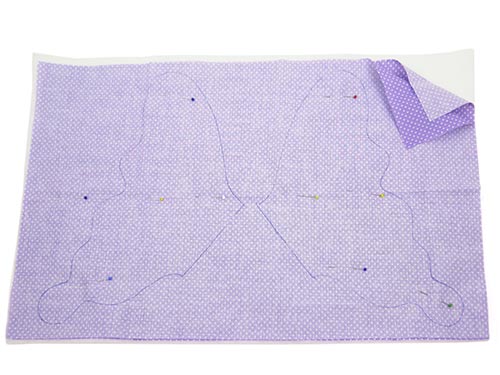
Pin and sew the 2 rectangles of MAIN FABRIC together along the longest side. (Look at the Layout diagram!). Line up the dashed line of the TUMMY and BACK PIECES with this seam to cut them out.
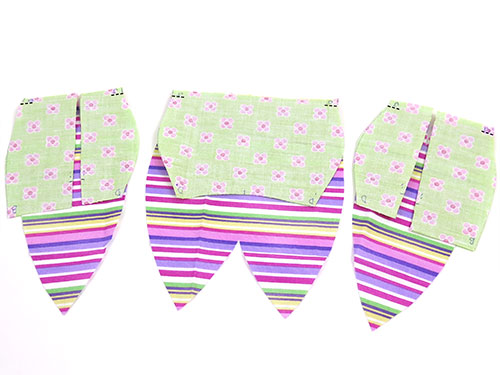
STEP 1b
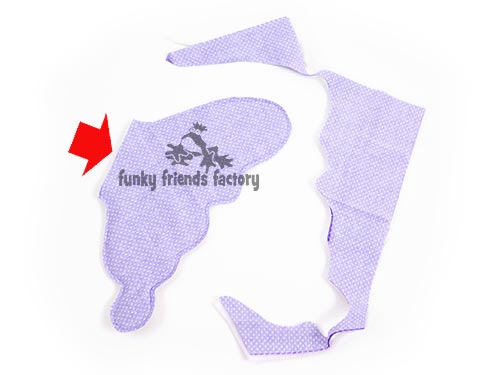
Go back and secure the seams at the edges of the TUMMY and BACK PIECES by sewing back and forth a few stitches at each end of the seam. This is very important so the seams don’t start to come undone as you put the butterfly together!
* The dashed lines at the edges of the pieces
shows you where to sew!
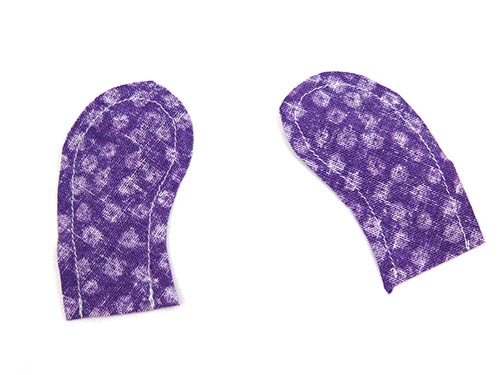
FEELERS
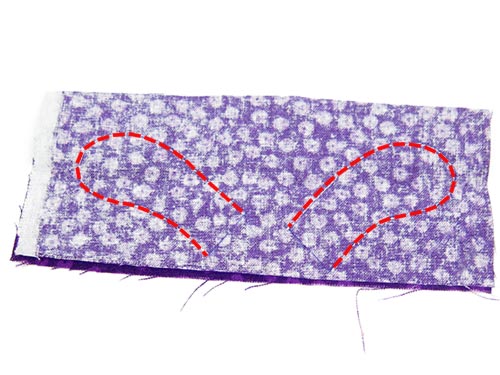
STEP 2
Sew the FEELER PIECES together. (Remember the line you traced is the sewing line!)
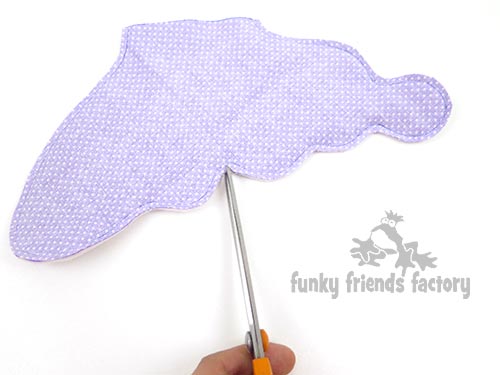
STEP 3
Cut around the sewing line with a 3mm/⅛ inch seam allowance. Clip the seam allowance, especially where it is very curved then turn the FEELER PIECES right sides out.
TIP: I have a blog post to show you my special trick for turning small soft toy pieces ~>
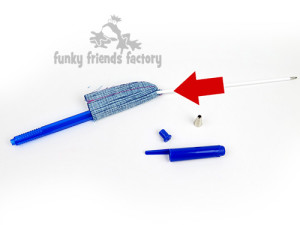
STEP 4
Use a turning tool like a wooden chopstick to turn out the seams nicely and pin them closed at the open edge.
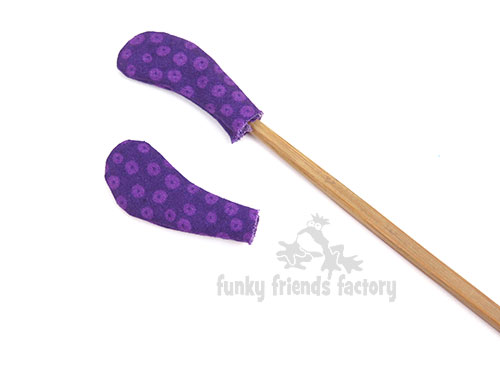
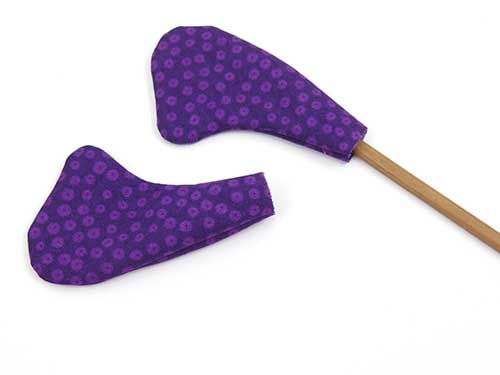
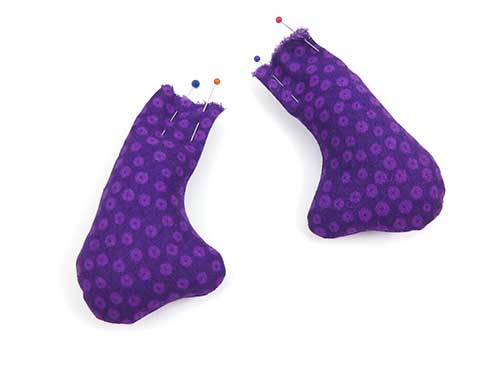
ARMS
STEP 5a
Sew the ARM PIECES together. (Remember the line you traced is the sewing line!) Cut around the sewing line with a 3mm/⅛ inch seam allowance. Turn the ARMS right sides out. Use the chopstick again to turn out the seams nicely.
STEP 5b
Stuff the ARMS with toy stuffing, leaving the top 25mm (1 inch) unstuffed and pin the open edges closed.
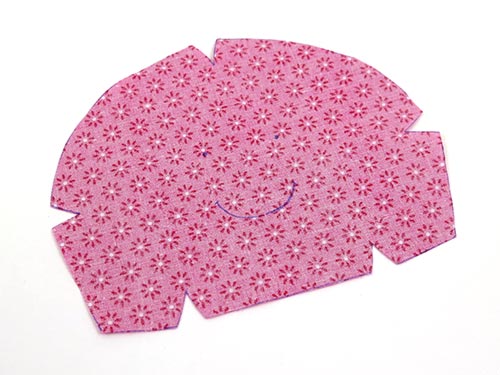
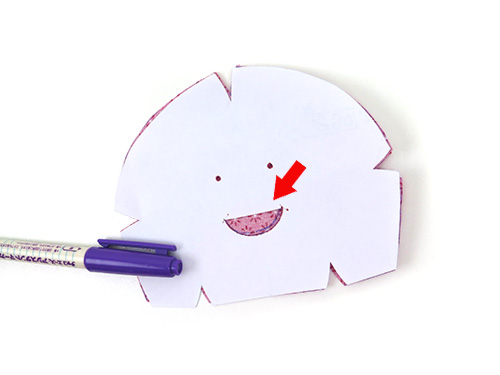
FACE
STEP 6a
If you haven’t transferred the face pattern markings onto the right side (front) of the FACE PIECE , do this now.
TIP: For pale fabric – you should be able to see the face pattern markings through the fabric so you can trace them onto the right side of the FACE PIECE. For darker fabric – make 2 holes where the eye positions are, and cut out a piece of the template above the mouth, so you can draw the face markings (through the template) onto the right side of the FACE PIECE.
STEP 6b
Fold the fabric right sides together and sew the darts in the FACE PIECE. There are 5 darts – sew them ALL now.
STEP 7
Pin the FEELERS to the FACE PIECE using the pattern markings to guide you.
TIP: Make sure the tip of each FEELER is ‘pointing’ OUT to the side.
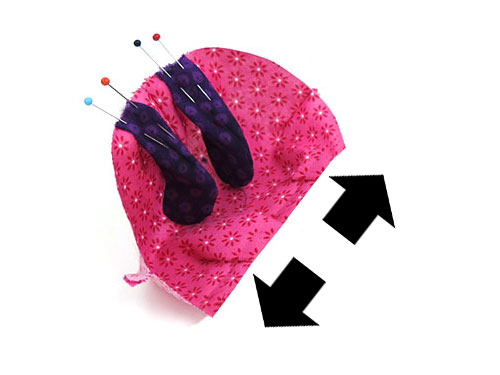
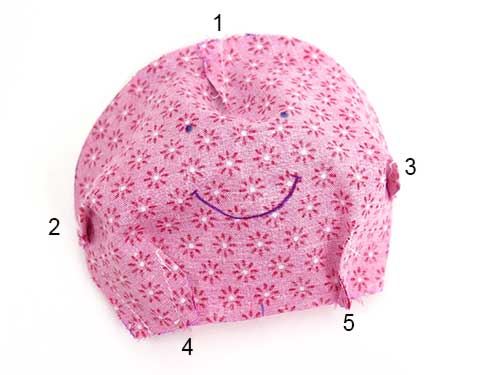
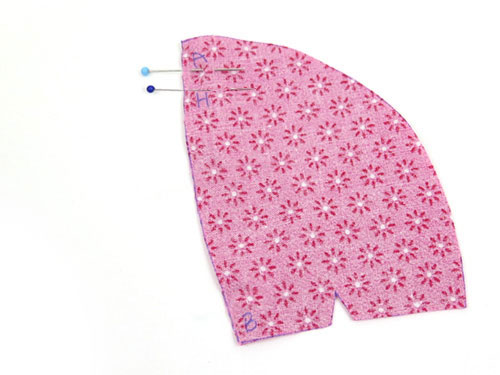
HEAD
STEP 8a
Sew the HEAD PIECES together from A – H. (Leave them open between H and B!)
STEP 8b
Fold the fabric right sides together and sew the darts in the HEAD PIECES.
STEP 9
Sew the HEAD PIECES to the FACE PIECE with the FEELERS in between. Sew from D – A – D.
EYES
STEP 10
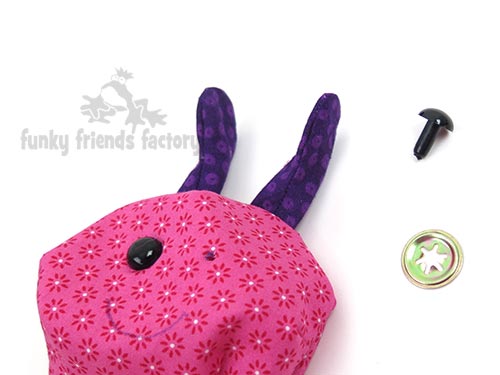
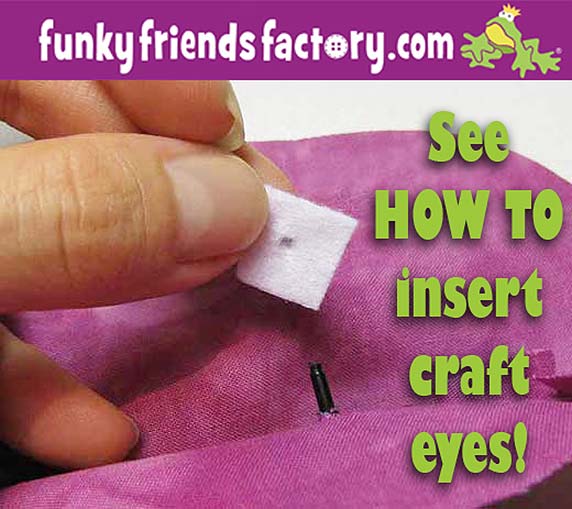
Clip the seams well and turn the HEAD right sides out. If you are using craft eyes, insert them now.
TIP: I have a tutorial to show you how to insert craft eyes on my blog.
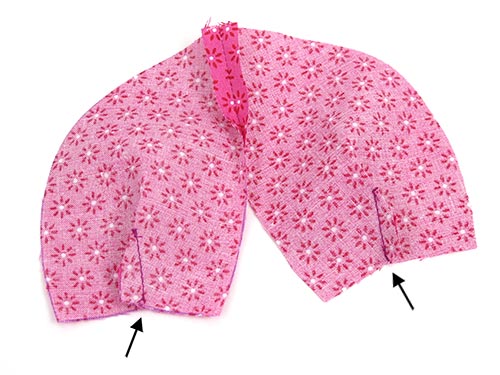
BACK
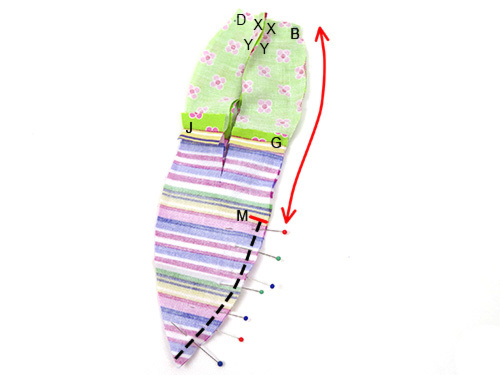
STEP 11
Fold each of the BACK PIECES at the wing dart (fabric right sides together) and sew the from X – Y. (Leave them open between Y and Z!)
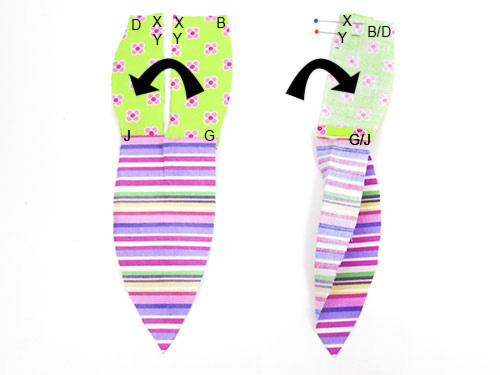
STEP 12
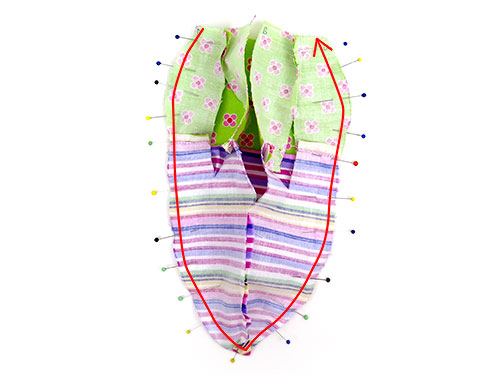
Sew the BACK PIECES together at the bottom, along the back seam from M – K.
(The red arrow shows you where to leave them OPEN
– between B and M!)
TUMMY
STEP 13
Fold the fabric right sides together and sew the dart in the TUMMY PIECE at K.
STEP 14
Sew the BACK PIECES to the TUMMY PIECE along the sides seams from D – K – D on the other side.
STEP 15
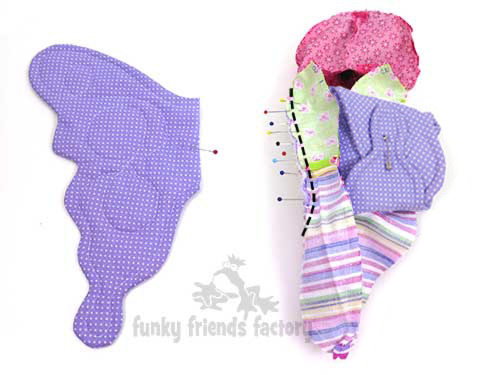
Pin the ARMS to the TUMMY PIECE matching point D and with the ‘thumbs’ to the middle. (The centre of the open edge of the ARMS should line up with the side seams at point D.)
TIP: Push the ARMS into the BODY hands-first!
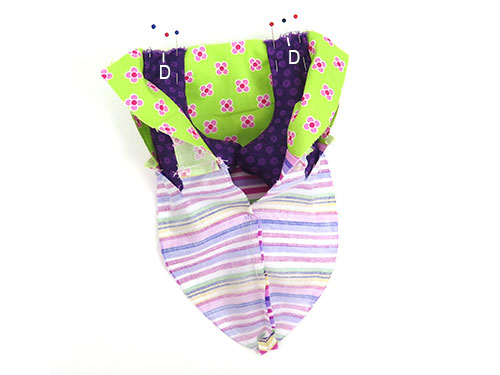
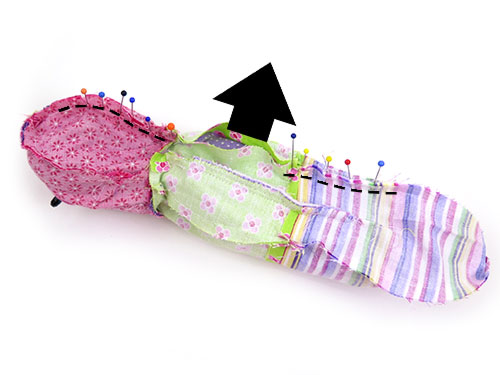
STEP 16
Pin the FACE & HEAD PIECES to the TUMMY & BACK PIECES and sew them together from B – X – D – C – D – X – B. (Along the neck seam!)
TIP: I find the best way to do this is to turn the HEAD & FACE PIECES right sides out and push them ‘inside the body’ so you can pin the pieces together at the neck seam, with the fabric right sides together.
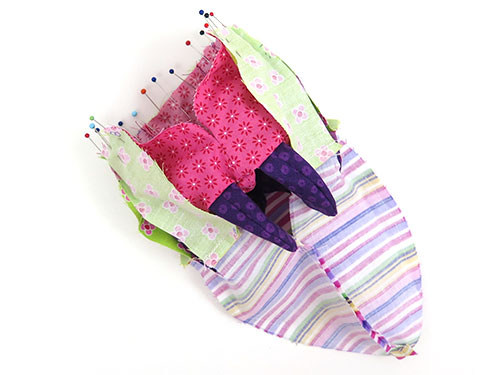
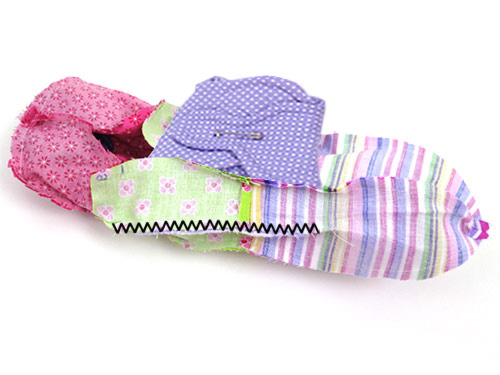
STEP 17
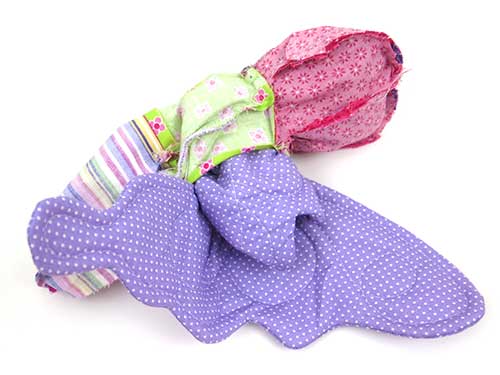
Pull the FACE & HEAD PIECES back out of the body so the PIECES are wrong sides out again.
WINGS
STEP 18
Cut 2 pieces from the wing fabric 30 x 40 cm wide (12x16inches wide) and cut another piece the same size from batting. Trace the WING PIECE onto the wrong side of one of the fabric pieces. (This is
the sewing line.) Pin the WING fabric with right sides facing on top of the piece of batting and sew through all 3 layers, on the sewing line you traced.
STEP 19a
Trim the 3 layers, leaving 5mm (¼ inch) outside the sewing line, and…
STEP 19b
Clip the seam well to help the WINGS turn nicely.
STEP 19c
Turn the WINGS right sides out through the turning gap.

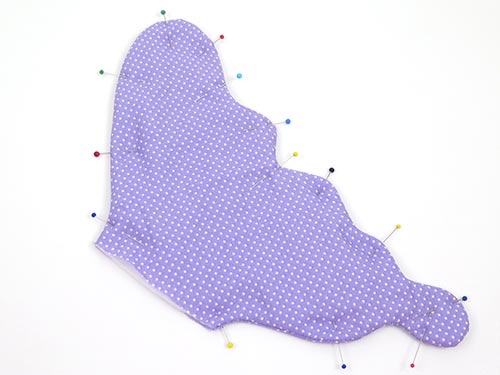
STEP 20a
Pin the WINGS around the edges so they are nice and flat.
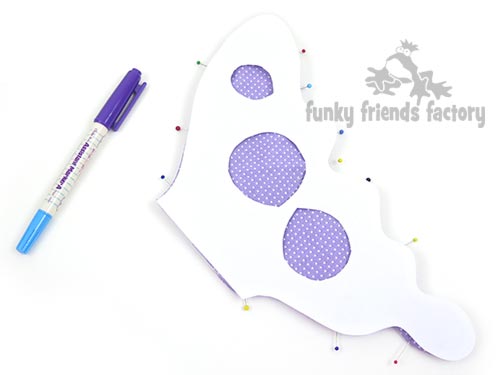
STEP 20b
Mark where to sew the topstitch lines on the WINGS with a fabric pen, or tailor’s chalk, using the pattern markings to guide you. Cut the round shapes out of the WINGS to make it easy to transfer the pattern markings for the top-stitching to the WINGS.
STEP 20c
Connect the round shapes you traced to create the sewing line for the top-stitching on the WINGS. Sew the topstitch lines with a slightly longer than normal stitch as you are sewing through a lot of layers! (You can sew this by hand.)

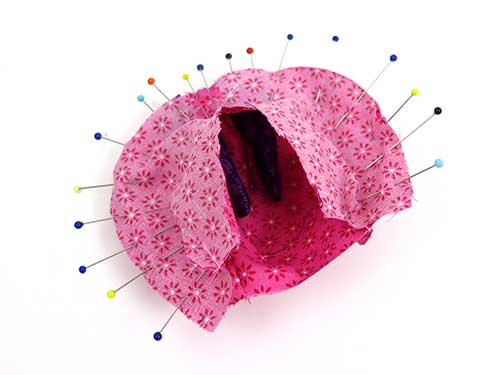
ATTACH THE WINGS
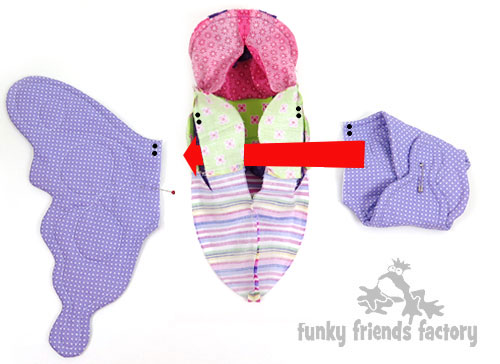
STEP 21
Pin the straight edge (open edge) of one WING ‘inside’ the wing dart, matching Y and Z. (This is a difficult seam to pin so take it slow and use lots of pins so the WINGS won’t slip as you sew them.) I like to fold the top and bottom of the WINGS to the middle and use a safety pin to hold them together.
TIP: Trim the edges of the WINGS so they are neat and straight BEFORE you insert them into the wing darts!
STEP 22
Sew the WING in place from Y – Z.
TIP: Make sure you have caught ALL the layers in the seam now. It’s easier to unpick and sew them again now rather than after the butterfly is all sewn! Secure the WING with a zig zag stitch for extra strength.
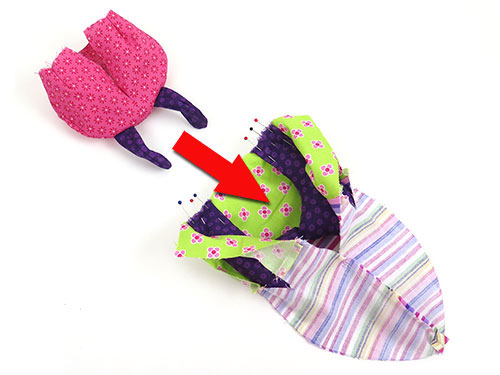
STEP 23
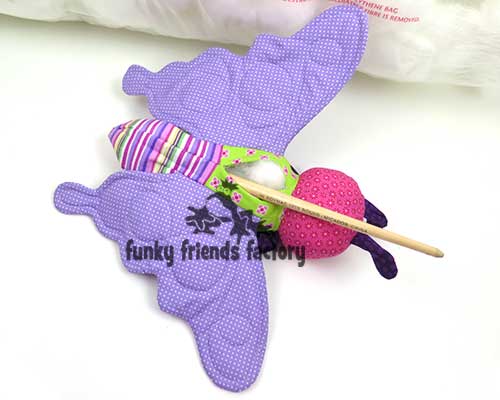
Push the ARMS up into the head to make more space and then sew the second WING in place like you did with the first.
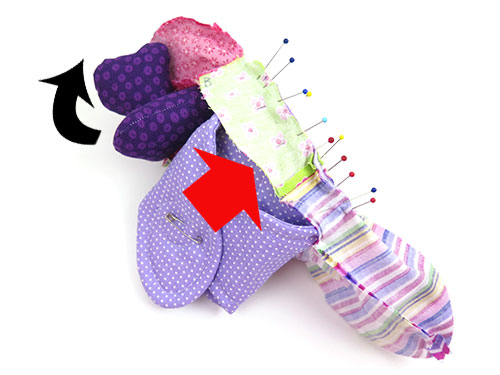
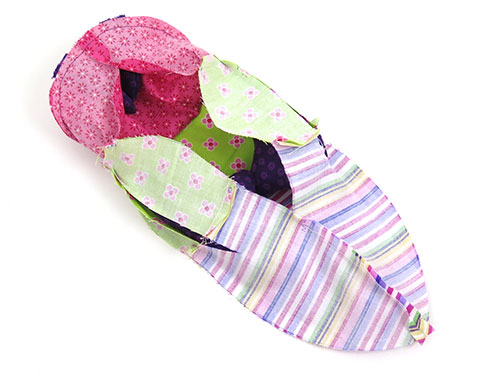
STEP 24
Remove the safety pins and roll up the WINGS as small as you can. With the arms still tucked inside the head, pin the butterfly closed between H and B on the HEAD PIECES and between G and M on the BACK PIECES. This is also a very hard seam to sew. When you sew this seam – use lots of pins or baste together first.
ASSEMBLY
STEP 25
Gently turn the butterfly right sides out through the gap left on the BACK PIECES.
STEP 26
Stuff the head and body very firmly. I like to use a children’s paintbrush to push the toy stuffing in nice and firmly.
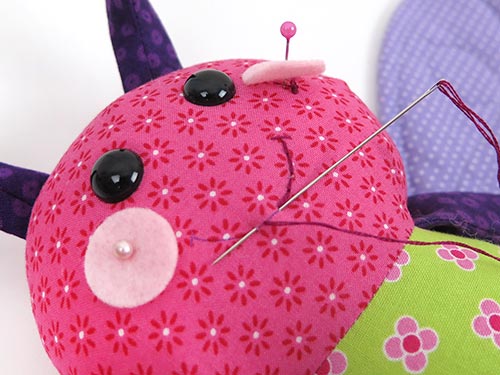
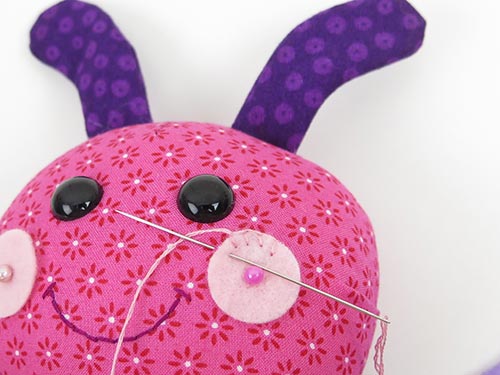
STEP 27a
Embroider a mouth with back stitch thread, hide the knots under the CHEEK PIECES. If the toy is for a young child use embroidery thread and satin stitches to sew the eyes instead of craft eyes.
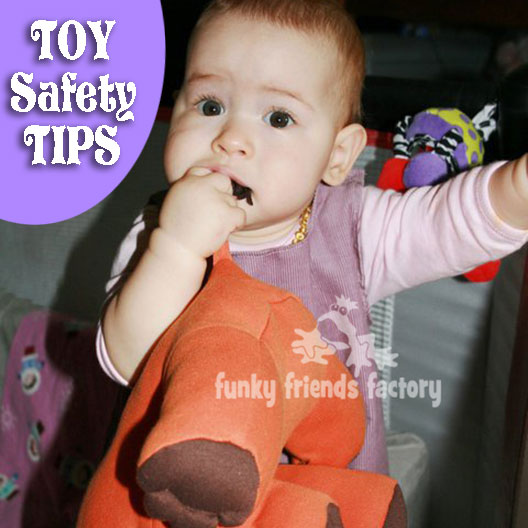
TIP: I have a post about toy safety on my blog with more toy safety tips and guidelines.
STEP 27b
Cut the CHEEK PIECES from felt. Pin them in position and sew them in place by hand.
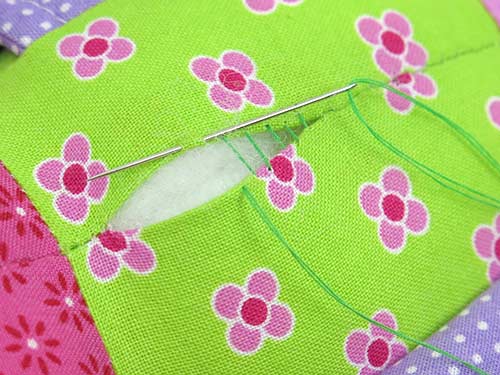
STEP 28
Use a ladder stitch to close the opening on the BACK PIECES.

Your Butterfly is ready to LOVE!
Come join the fun on Facebook!
![]()
I LOVE to see how your Funky Friends toys turn out!
When you’ve made your own toy butterfly you can come show it off ~>
Post a photo on my Funky Friends Factory Facebook page for me to see and YOU could win a FREE PATTERN!

Till next time,
Happy Sewing,
Pauline
