
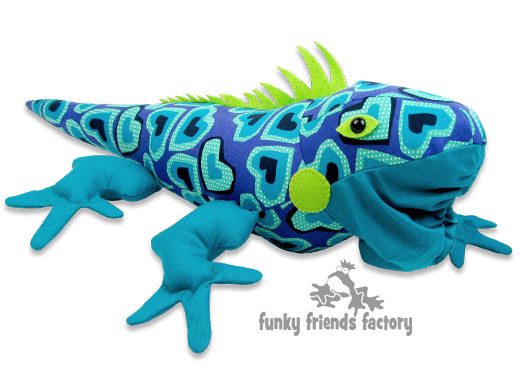
I made this photo tutorial so you can see how to sew my Iguana Sewing Pattern ~> scroll down for step-by-step photos!
*** PLEASE NOTE – this in ONLY a PHOTO TUTORIAL ***
The FULL PATTERN IS NOT included here.
It is NOT A FREE PATTERN.I have made this photo tutorial so people who have purchased the pattern can SEE how to sew a toy iguana (I wanted to explain this so you are not disappointed if you have found this page via a search engine and not from the link in my Igor Iguana sewing pattern!)
* The Iguana Toy Pattern is now available to buy, from the Funky Friends Factory website as an Instant Download PDF Pattern.
First choose some fabric
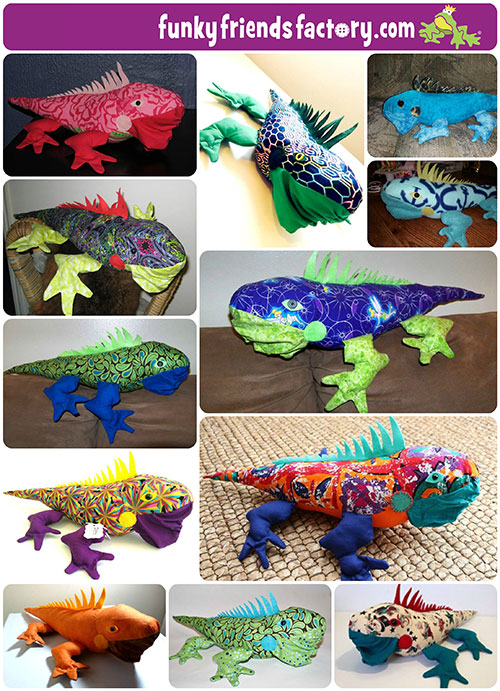
You can sew your Iguana toy from most fabrics, non-stretch fabrics (like cotton, corduroy and quilting fabrics) as well as stretchy/knit fabrics (like fleece, velour, chenille, minky and similar fabrics).
You can sew an iguana in any colour!
Right, let’s get sewing!
We start with the LEGS:
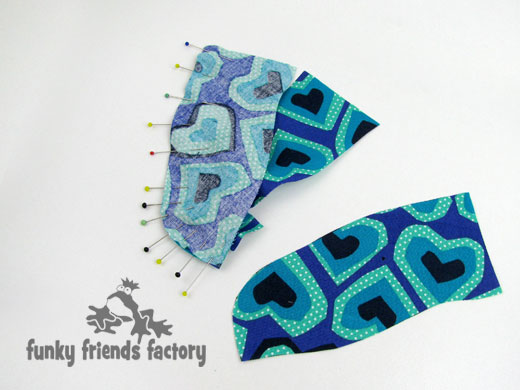
STEP 1
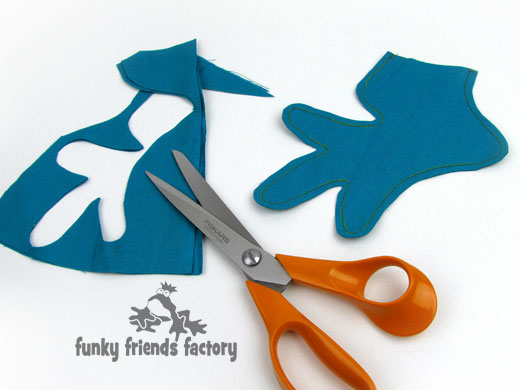
Glue the pattern pages onto card or thick paper and cut out the pattern pieces to make your templates. Place the fabric for the LEG PIECES right sides together and trace out the leg onto the wrong side of the fabric. Do not cut out the LEG PIECES yet!

STEP 2
Sew the LEG PIECES together on the sewing line. Cut around the sewing line with a 5mm/¼inch seam allowance.
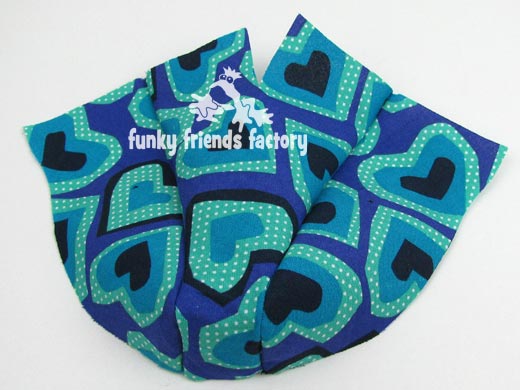
STEP 3
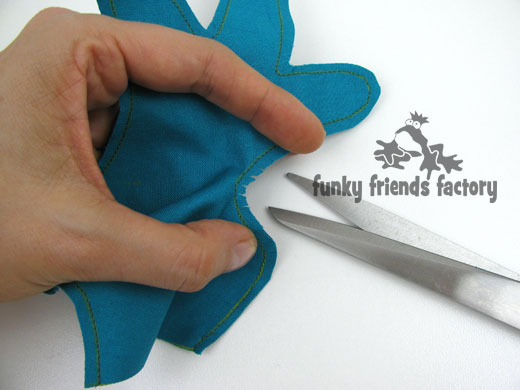
Clip the seam allowance especially where it is really curved and between the toes and turn the LEGS right sides out. I like to use a wooden chopstick to turn the LEGS out nicely!
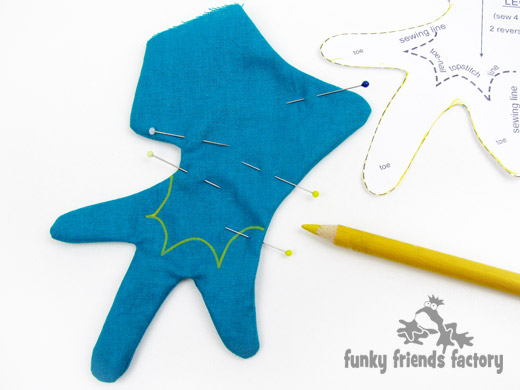
STEP 4a
Pin the LEG PIECES so the LEG is nice and flat then, using the pattern markings as a guide, sew the line of top stitching for the ‘toe-nail line’.
This will give your iguana
nice long nails!
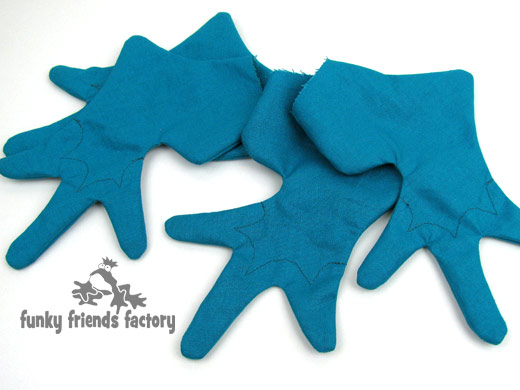
STEP 4b
REPEAT for the other 3 LEGS. Here is a close up picture of the top stitching on the LEG PIECES.
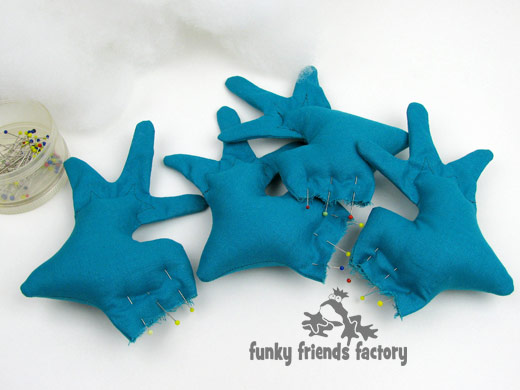
STEP 5
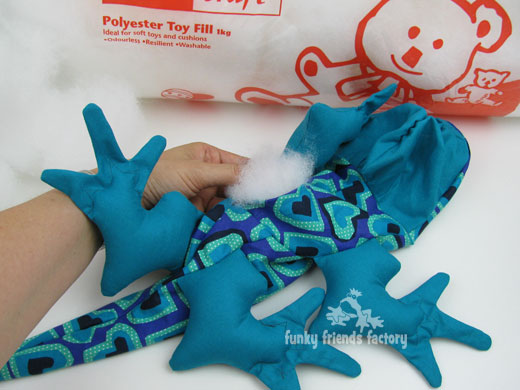
Stuff the legs, leaving the top 10mm/½inch unstuffed. Sew the LEG PIECES closed along the straight edge and put them aside for now.
HEAD:
STEP 6a
Pin one of the HEAD PIECES to the FOREHEAD PIECE.
STEP 6b
Sew this HEAD and FOREHEAD PIECE together from A-B.
STEP 6c
Sew the other HEAD PIECE to the FOREHEAD on the other side.
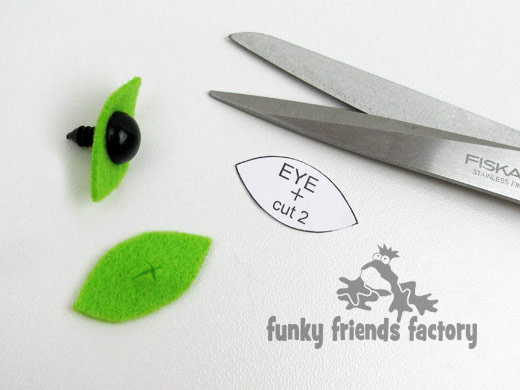
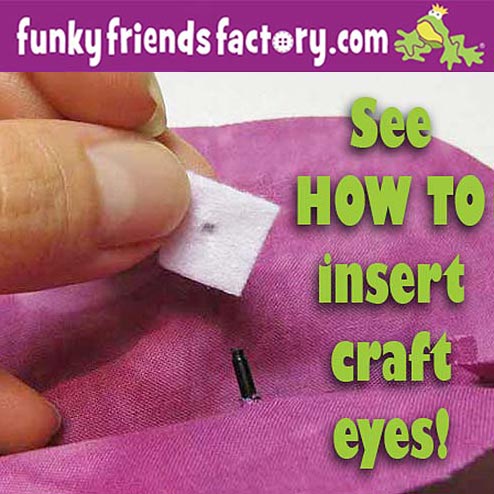
STEP 7a
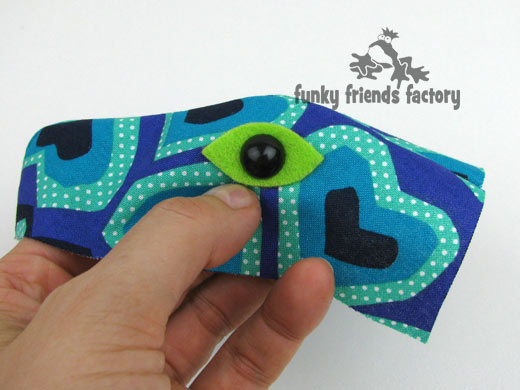
If you are using CRAFT EYES insert them now. Use the FELT EYE TEMPLATE to cut out 2 eye-shaped pieces to go under the craft eyes. (Choose a bright, contrasting colour). Cut a cross in the centre of each felt piece so you can place the EYE PIECES between the CRAFT EYES and the HEAD PIECES when you insert the eyes.
TIP: I have a photo tutorial for inserting craft eyes on my blog.
STEP 7b
Try and line up the FELT EYE PIECE with the seam of the FOREHEAD and HEAD PIECES.
STEP 8
Sew the BEARD PIECES together. Cut a 7½cm/3inch piece of 5mm/¼inch wide elastic.
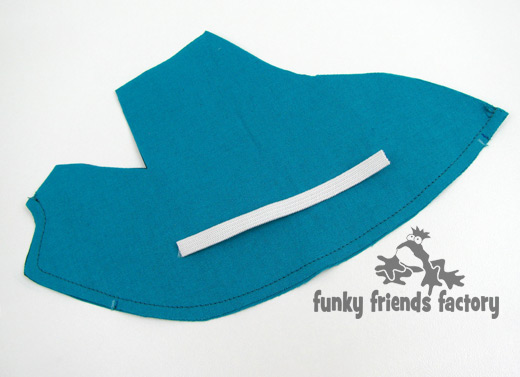
STEP 9
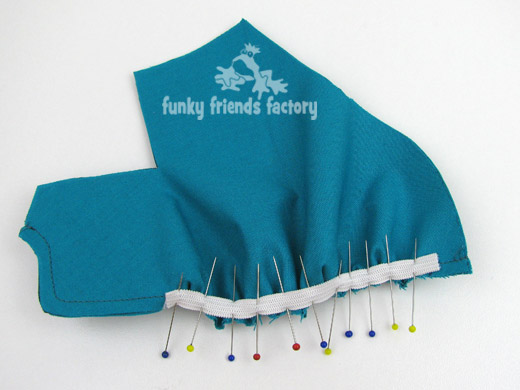
Stretch the elastic so you can pin it in place on the BEARD PIECES as shown on the pattern markings. Sew the elastic to the BEARD PIECES making sure to secure the ends well.
TIP: STRETCH the elastic out as you sew it, so the fabric and elastic are flat. It will ”bounce back” to create the wrinkles when you have sewn it onto the BEARD PIECES!
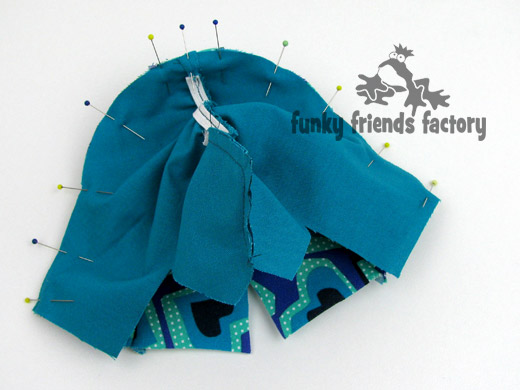
STEP 10
Sew the BEARD PIECES to the FOREHEAD & HEAD PIECES with right sides together, matching points C and D.
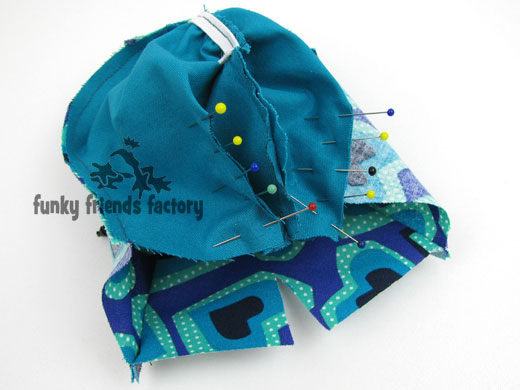
STEP 11a
Fold the BEARD PIECES right sides together at the darts and pin the darts closed.
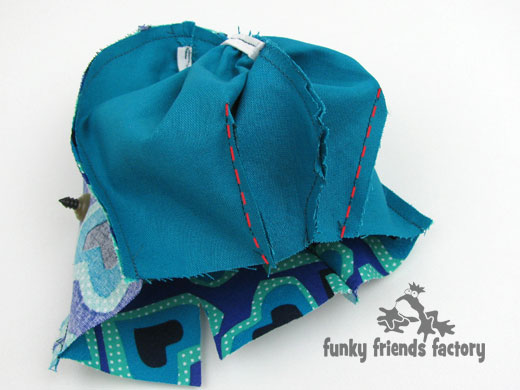
STEP 11b
Sew the darts closed. I’ve added a red dashed line in this photo to make it easier for you to see where to sew the darts!
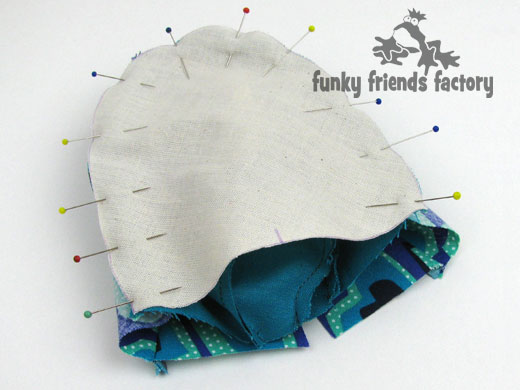
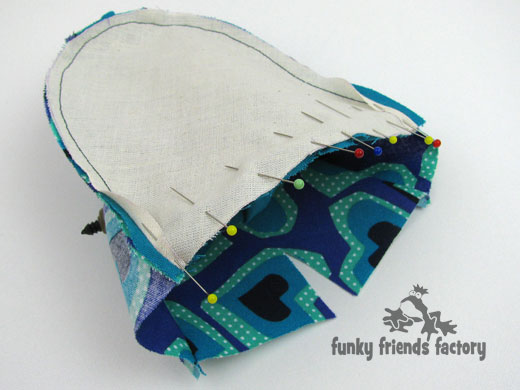
STEP 12a
Place the LINING PIECE on top of the BEARD PIECES. Pin through all 3 layers – the LINING PIECE, the BEARD PIECES, and the bottom layer which is made up of the FOREHEAD AND HEAD PIECES.
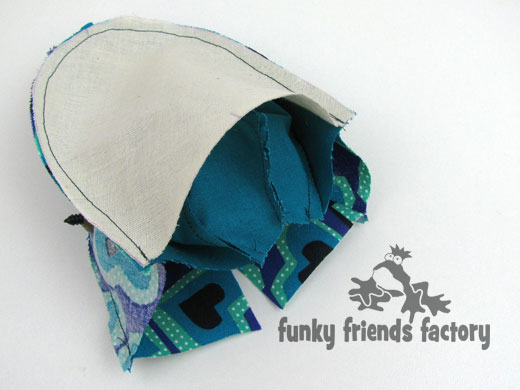
STEP 12b
Check that you have the BEARD PIECES sandwiched in between the other 2 layers, then sew all 3 layers together. (The LINING PIECE, the BEARD PIECES, and the FOREHEAD AND HEAD PIECES.)
STEP 13
Pin the LINING PIECE and BEARD PIECES together at the neck seam. (You don’t need to sew the LINING to the BEARD, it will be sewn when the head is sewn to the body!) Put the head aside.
BODY:
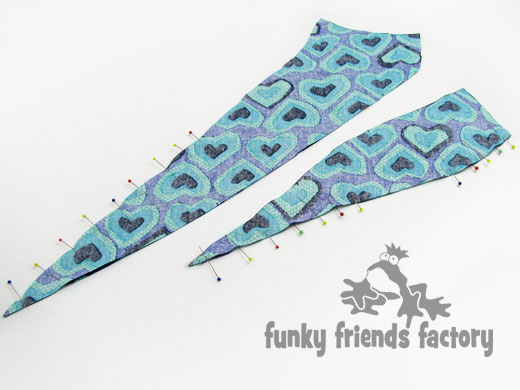
STEP 14
Sew the TUMMY PIECES together from G – H, leaving the gap open for turning. Sew the BODY PIECES together from J – K.
STEP 15
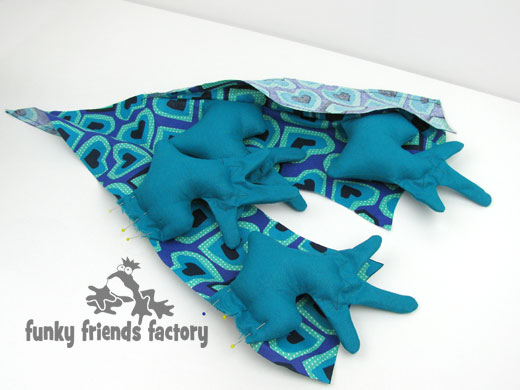
Pin 2 LEGS to one BODY PIECE making sure the toes face towards the front of your iguana!
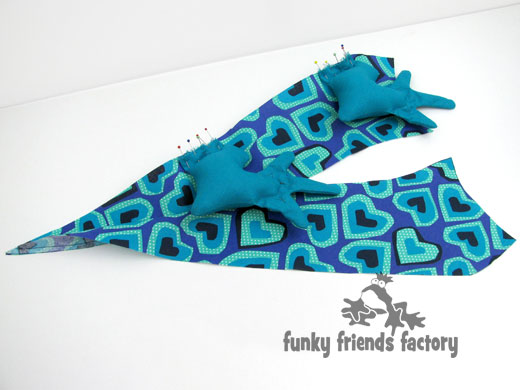
STEP 16
Pin and sew the TUMMY PIECES to the same BODY PIECE, sew them together from L – H, with the LEGS sandwiched in between.
TIP: I find it’s much easier to do the legs on one side of the iguana first, then the other side so that I am not working with 4 dangling legs at once!
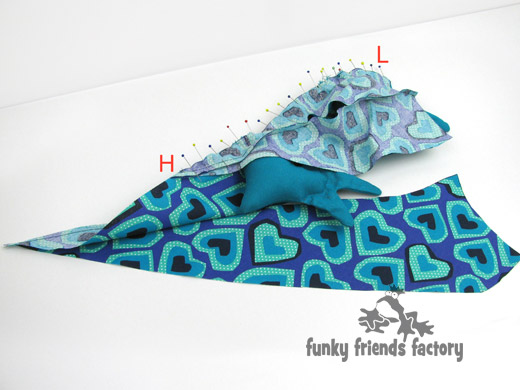
STEP 17
Pin the other 2 LEGS to the other BODY PIECE.
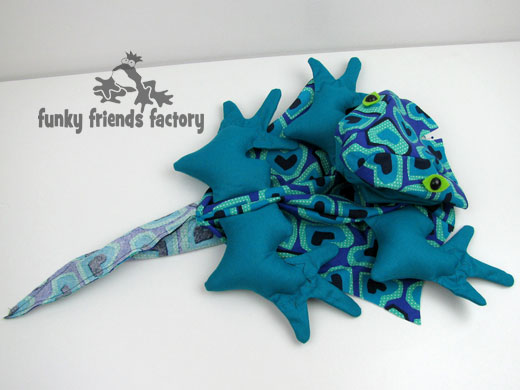
STEP 18a
Pin the TUMMY PIECES to the other BODY PIECE from L – H and pin the BODY PIECES together from H – K.
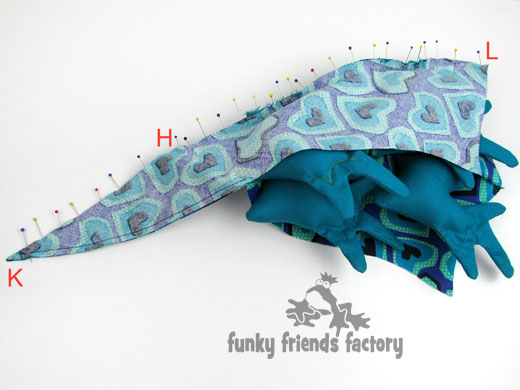
STEP 18b
Sew this seam closed from L – H – K at the tail.

NECK SEAM:
STEP 19a
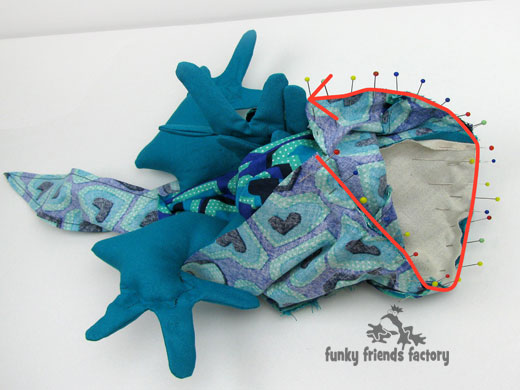
Pin and sew the head to the body at the neck seam. I find the best way to do this is to turn the head right sides out and place it on top of the body, facing towards the tail.
STEP 19b
I’ve added a red line for you to see where to sew the head to the body.
STEP 20a
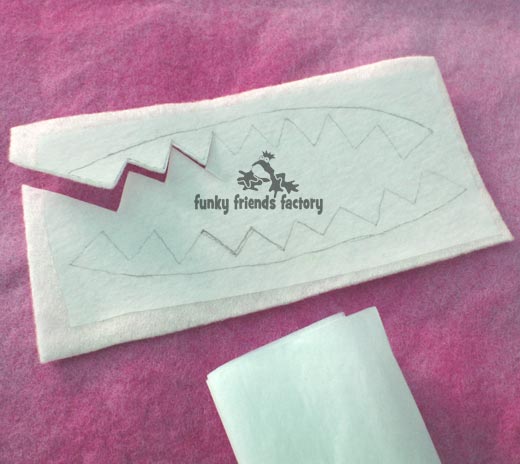
Cut the SPIKE PIECE from felt.
TIP: I used tape to help me cut out the SPIKE PIECE. To find out more about how to cut out felt you can visit my blog. I have a blog post about 5 easy ways to cut out felt pieces accurately.
STEP 20b
Pin the SPIKE PIECE in place between N on the FOREHEAD PIECE and J on the BODY PIECES. (You may need to push the LEGS down firmly to get them inside the Iguana’s body!)
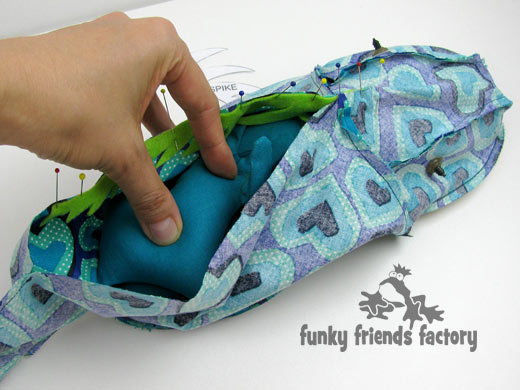
STEP 21
Sew the Iguana closed with the felt SPIKE sandwiched in the seam. (You can just see the green felt sticking out a tiny bit along the row of pins in the photo.)
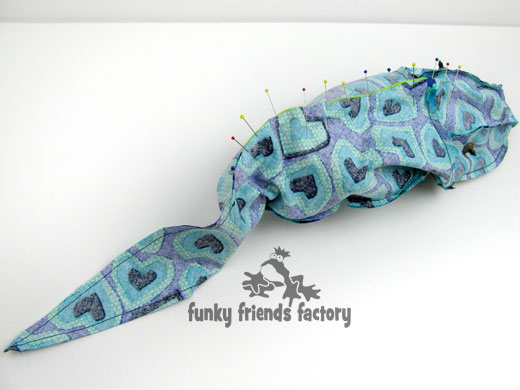
ASSEMBLY:
STEP 22
Turn the Iguana right side out through the gap left on the TUMMY PIECES.
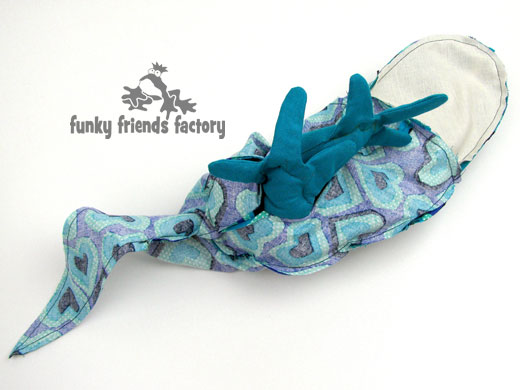
STEP 23
Stuff the tail first, using small bits of stuffing for the tail tip. Stuff the head and chest area firmly next. Finish stuffing the body/tummy of your Iguana.
STEP 24
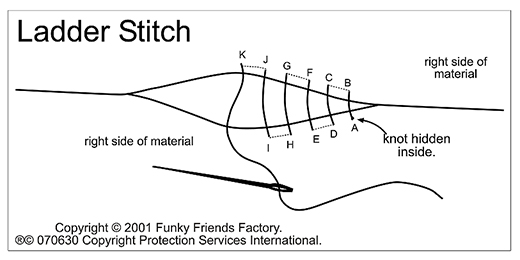
Sew the gap closed on the TUMMY PIECES with a ladder stitch.

STEP 25
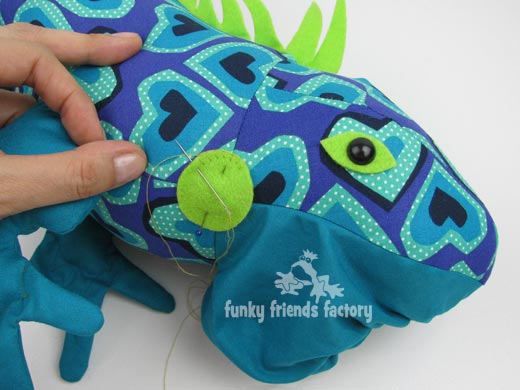
Cut out the SPOT PIECES from felt. Pin them on the side of the Iguana so they cover the seams where the BODY, TUMMY, BEARD and HEAD PIECES meet up. Sew the SPOT PIECES on with embroidery thread using a blanket stitch. I leave the felt EYE PIECES as they are but you can also sew them down with a blanket stitch, if you like.
Your Iguana is ready to LOVE!
![]()
Come join the fun on Facebook!
When you’ve made your own toy iguana – come and post some photos of your NEW Funky Friend for me to see on my Funky Friends Factory Facebook page.
You could WIN a FREE PATTERN in the MAKER OF THE MONTH Pattern Giveaway!
I can’t wait to see the Funky Friends you sew!

bye for now,
Pauline
![]()
