
Memories are made of this!
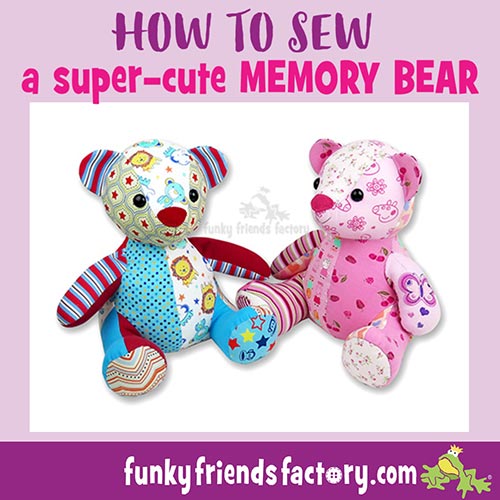
I made this photo tutorial so you can see how to sew my Melody Memory Bear Sewing Pattern ~> scroll down for step-by-step photos!
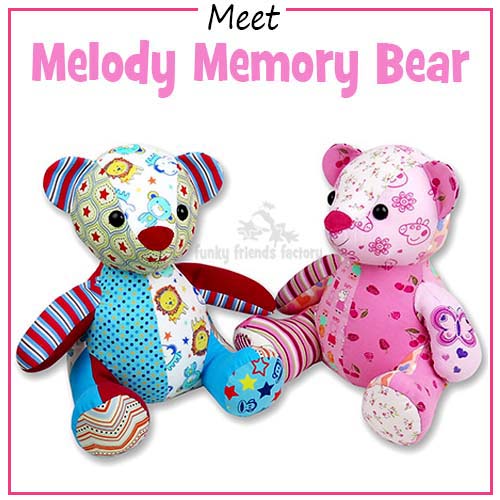
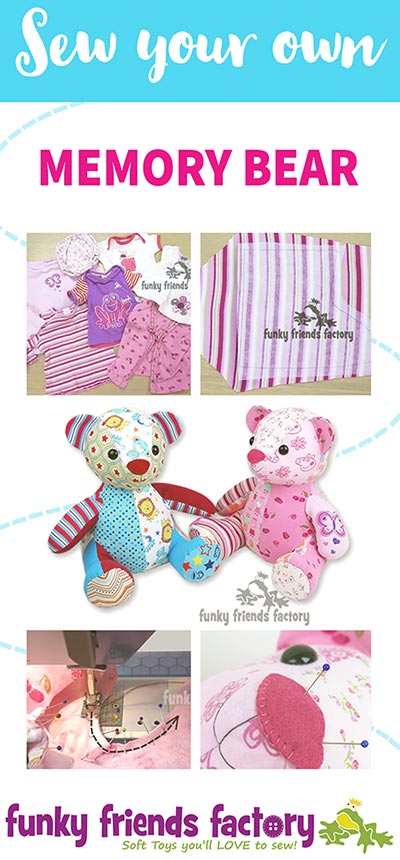
You can use this memory bear pattern to transform your child’s clothes into an everlasting keepsake!
How cool
is that?
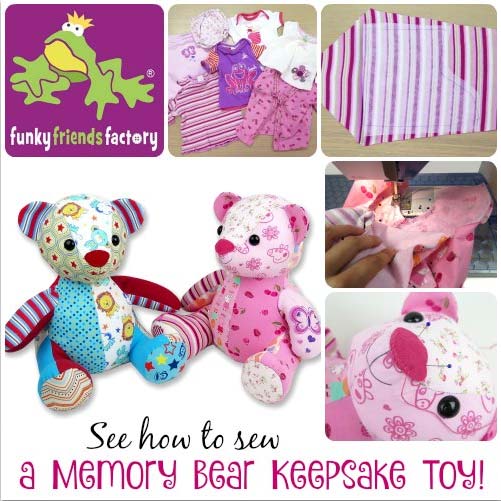
I have taken step-by-step photos to create a photo tutorial to show you just how much fun it is to sew your own Memory Bear!
.
*** PLEASE NOTE – this is ONLY a PHOTO TUTORIAL ***
The FULL PATTERN IS NOT included here.
This is NOT a FREE PATTERN.I have made this photo tutorial so people who have purchased my Melody Memory Bear Sewing Pattern can SEE how to sew this memory bear! (I wanted to explain this so you are not disappointed if you have found this page via a search engine and not from the link in my memory bear sewing pattern)
*The pattern is available to purchase here – Melody Memory Bear Sewing Pattern
First choose some fabric…
STEP 1
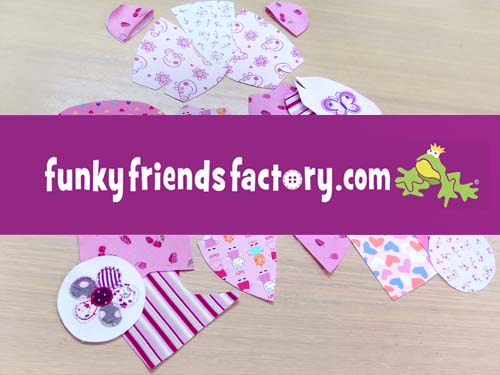
You can use one main fabric from a single item of clothing for most of the pieces and use another contrast fabric for the EAR and FOOT PAD PIECES… but I prefer to create a ‘patchwork’ effect by using…
lots of different items of
pre-loved baby clothes!
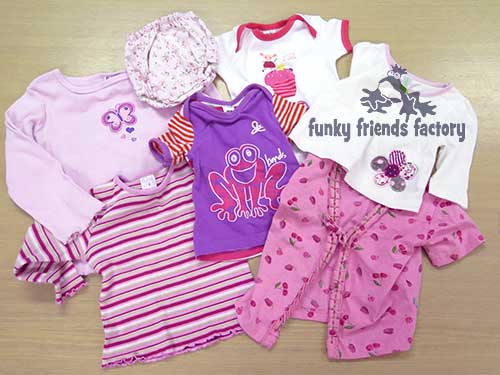
F.A.Q: How many pieces of clothing
do you need for a memory bear?You will need between 6 and 8 items of baby clothes for a baby keepsake bear. For an adult memory bear it totally depends on the size of the item… I would say a minimum of 2 items of adult clothing should be enough.
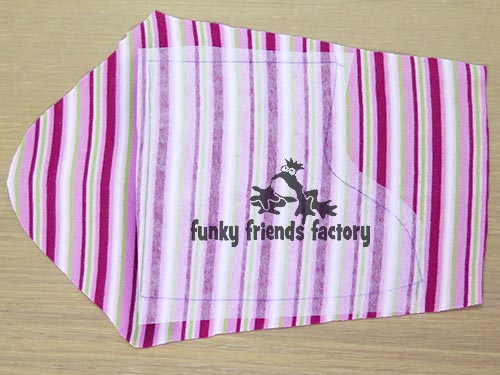
Prepare the pieces:
STEP 2
Decide if your fabrics need to be lined with interfacing. This is not always needed – see the FAQ box below to see if you need to line your fabrics.
F.A.Q: Must fabric pieces be lined with interfacing?
I don’t like to make EXTRA work for myself – so I DON’T normally interface toys. MOST of the time it is NOT necessary! 🙂
NO: When you DON’T NEED interfacing
From experience I’ve found that I don’t need to use interfacing when ALL of the fabrics I’m using are the SAME TYPE. For example:
- I don’t use interfacing if the fabrics I’m using are ALL woven fabrics (like quilting cottons and corduroy) because they do not stretch out of shape.
- I also don’t use interfacing if the fabrics are ALL knit fabrics (like fleece, minky or Cuddle) because they will all stretch the same amount BUT I take care not to over-stuff my bear – if these fabrics stretch too much he’ll be very chubby!
YES: When you NEED to use interfacing
- If I am making Melody from clothing items , very thin or stretchy fabrics or fabrics that fray easily.
- or when I am using a MIX of woven (non-stretchy) and knit (stretchy) fabrics.
HOW TO use iron-on interfacing:
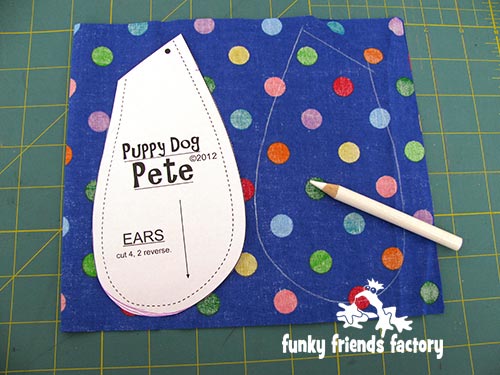
STEP 1: Trace all the pieces, including all the ‘reversed pieces’, onto the smooth (NON-STICKY) side of the iron-on interfacing.
STEP 2: Cut out the pieces adding about 5mm (¼ inch) around them.
STEP 3: Iron the interfacing pieces onto the fabric of the clothing items, with the STICKY (GLUE) side facing the BACK of the fabric.
STEP4: Cut the pieces out on the traced lines.
Why not
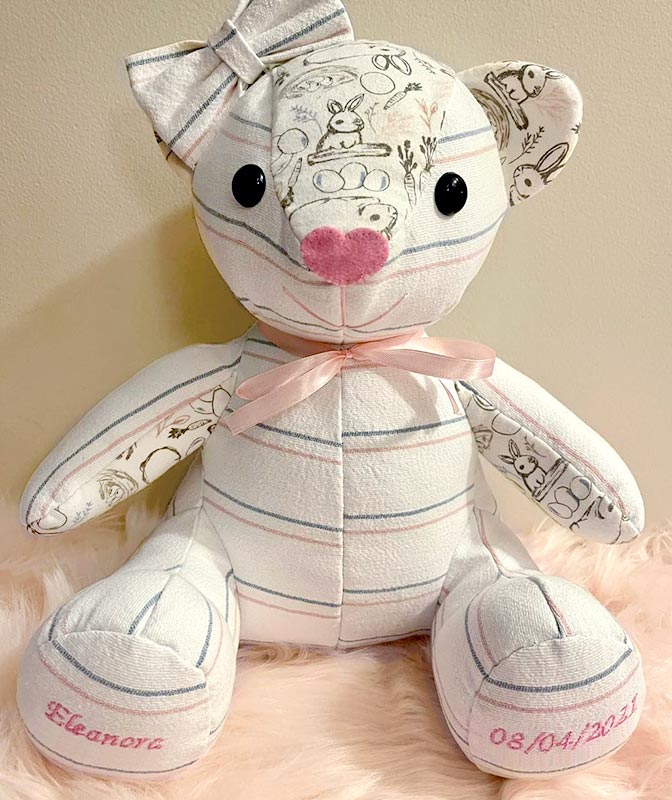
Embroider some fun details!
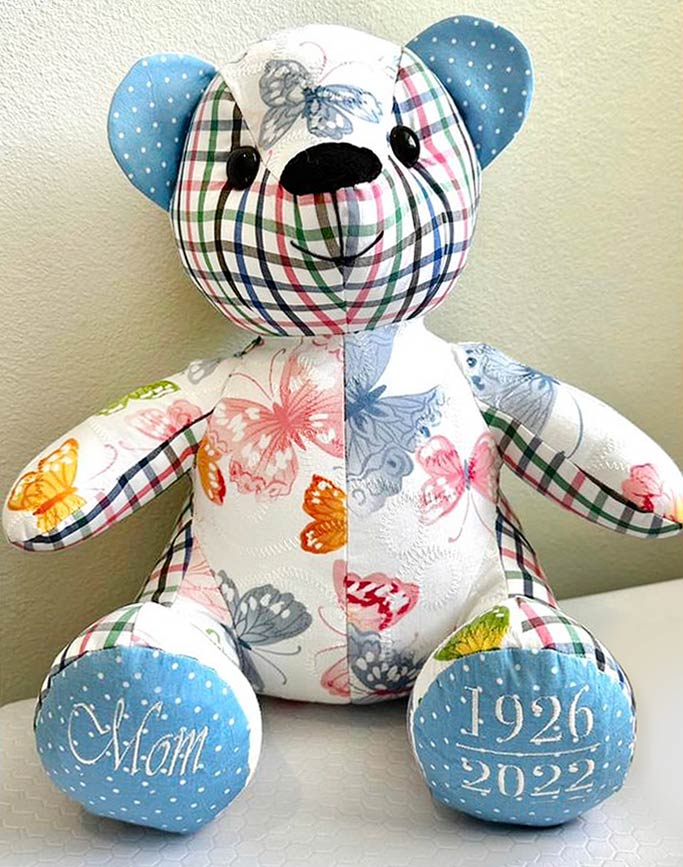
Melody Memory Bear makes a beautiful baby keepsake bear. She has a lots of flat areas that are great for embroidery. Jenell Wilbanks out of a baby’s receiving blanket and embroidered the baby’s name and birth date embroidered on the FOOT PAD PIECES.
Melody Memory Bear is often made from adult clothing as a memory bear when someone precious who has passed. Jonell heart used a mother’s precious garments to make this beautiful memory bear.
Ooooh!
have you seen?
I have a *FREE*
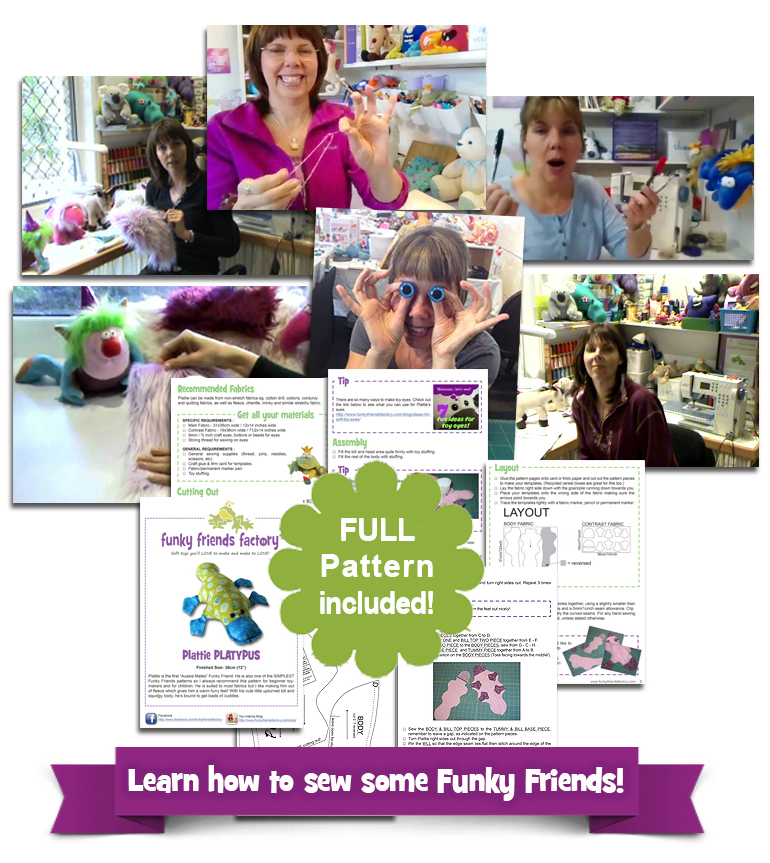
🥳 Toy-Making Course! 🥳
I know you’re keen to get sewing your first bear BUT take a look at my FREE toy-making Course first, especially if you’re NEW to sewing toy patterns – I share ALL the tips & tricks I’ve learned about sewing soft toys over the last 20+ years in a daily email series packed with photos, diagrams and videos. This FREE toy-making Course includes everything you need to know about sewing toys from how to read a pattern to how to stuff a toy AND includes my easiest pattern – Plattie Platypus.
(Yes! It’s FREE!)
Even if you’re NOT a NEW sewer,
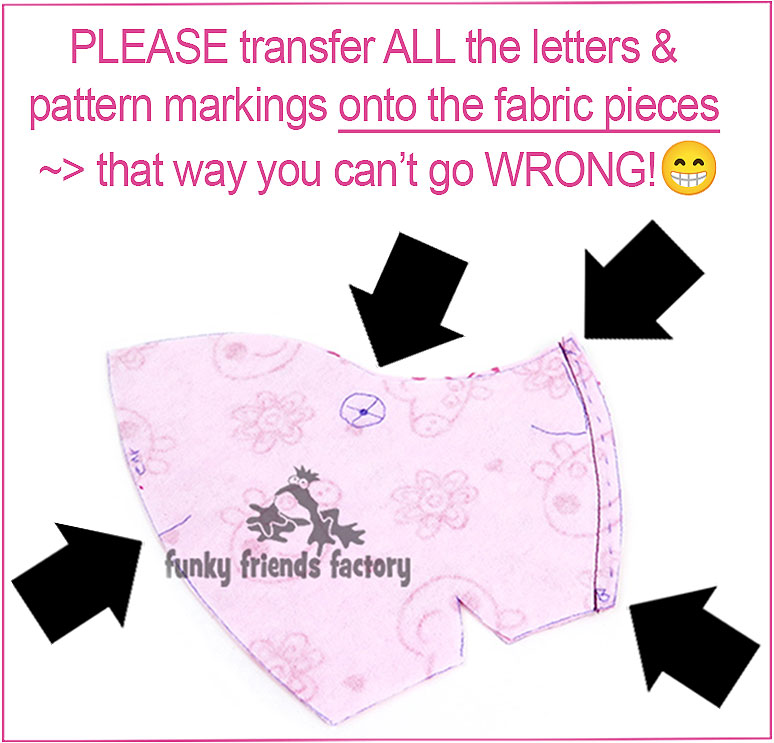
you’ll find great tips like this in the course ~>My # 1 Tip
to avoid getting stuck!Transfer ALL THE MARKINGS & LETTERS from the pattern pieces onto the fabric, then you can’t go wrong because it’s like snap – all you have to do is match up the letters! I know it seems so simple BUT don’t let this fool YOU! It’s my BEST tip EVER ~> because it seems to help 99% of people who get stuck!
OK, let’s sew a memory bear!
GENERAL SEWING INSTRUCTIONS
for Melody Memory Bear:
- Always sew the fabric pieces with the right side of the fabric together, UNLESS the instructions tell you to do something different.
- A 5mm(¼inch) seam is included so you will sew 5mm(¼inch) INSIDE the lines you traced. Do not add on a seam allowance UNLESS the instructions say so!
- Look at each pattern piece – the dashed line on the pattern piece is a useful guide to show you the FIRST seam you will sew on each piece.
TICK THE BOX FORMAT:
- Tick the boxes as you do each step so you get the PIECES sewn together in the right order AND you don’t miss out any steps.
SEW THE HEAD:
STEP 3
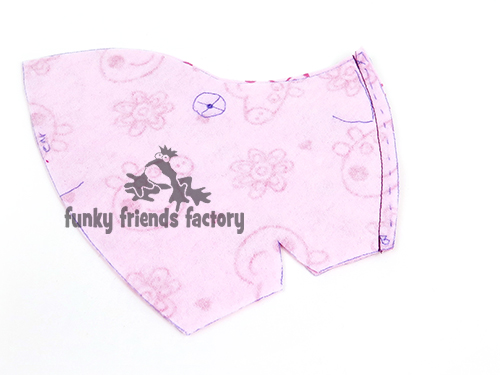
Sew the FACE PIECES together from A – B.
* I have used a dark pink thread in my photo tutorial so you can see my stitching but I recommend using a matching thread or plain white if you have lots of different fabrics.
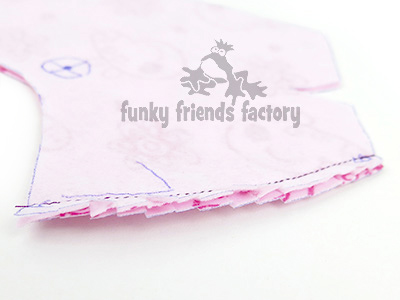
TIP: Clip all the seams very well, especially the very curved seams. (This is IMPORTANT if you are using interfacing or woven/non-stretch fabrics like quilting cottons.)
STEP 4
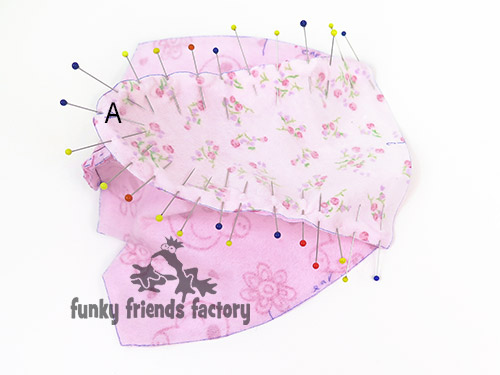
Pin the FOREHEAD PIECE to the FACE PIECES, matching point A.
TIP: This seam is right in the middle of your memory bear’s face, so take your time and use LOTS of pins – especially around the front of the FOREHEAD PIECE because it is very curved there and this will help prevent puckering.
STEP 5
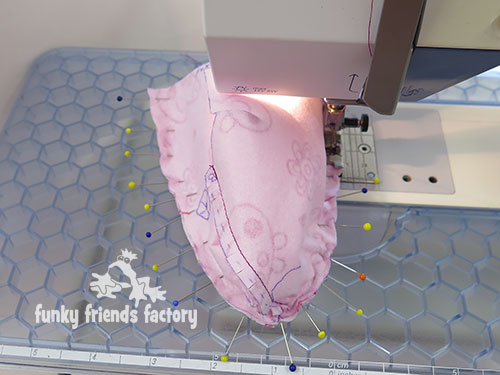
Sew the FOREHEAD PIECE to the FACE PIECES with the FOREHEAD PIECE facing down so you can smooth out any ‘wrinkles’ in the FACE PIECES as you sew.
STEP 6
Fold and pin the FACE PIECES with the fabric right sides together and sew the face darts as shown on the pattern markings. (See the FAQ box about DARTS below!)
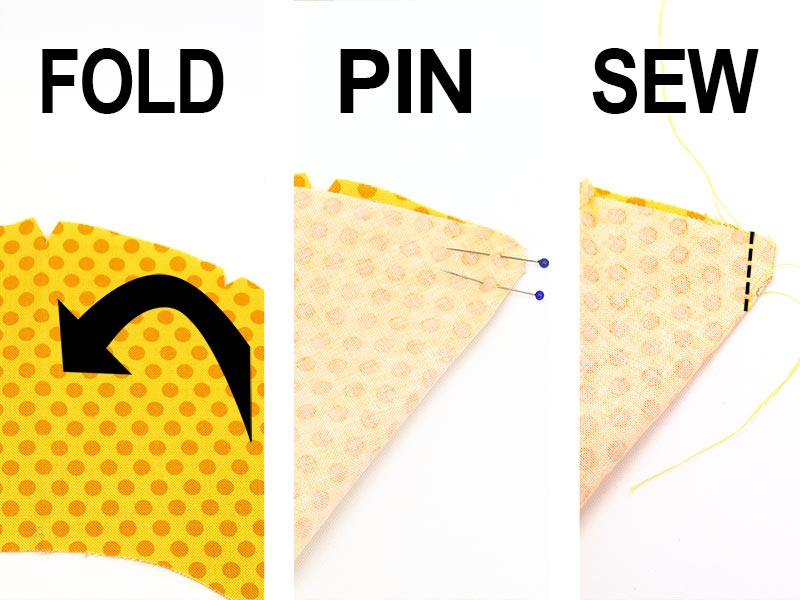
F.A.Q: How to sew darts?
(Don’t worry darts are EASY!
A dart creates a fold or “tuck” in the fabric to give a piece a rounder shape. If you are a beginner, you might be thinking that darts are scary?
Please RELAX!
It’s as easy as 1-2-3.
1. Fold edges together.
2. Pin them closed.
3. Sew the seam.
EYES:
STEP 7
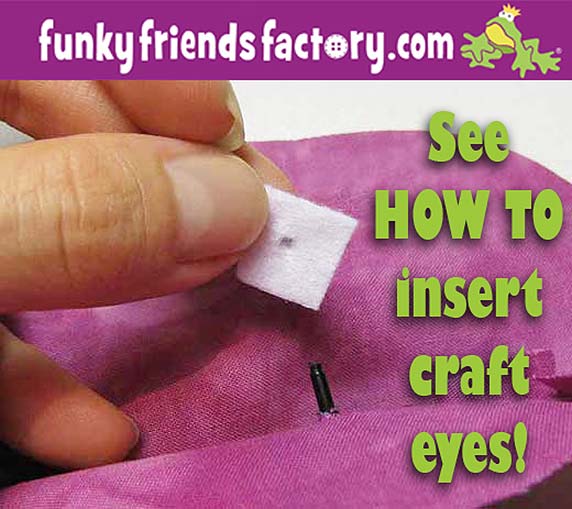
If you are using craft eyes, insert them now.
TIP: I have a tutorial to show you how to insert craft eyes HERE on my blog.
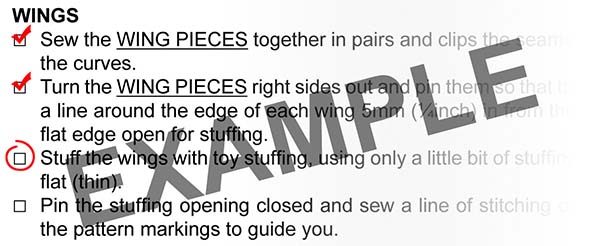
EARS:
STEP 8a
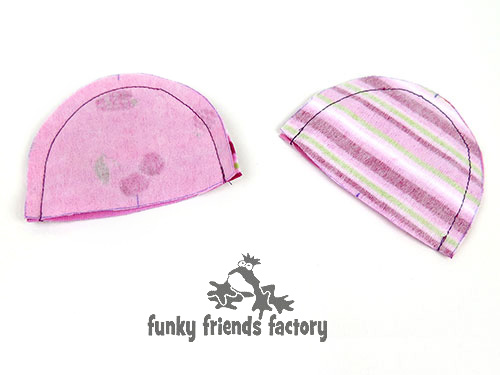
Sew the EAR PIECES together in pairs, leaving the straight edge open.
STEP 8b
Trim the seam allowance of the EAR PIECES to 3mm (1/8 inch) and turn the EARS right sides out.
*Do NOT stuff the EARS!
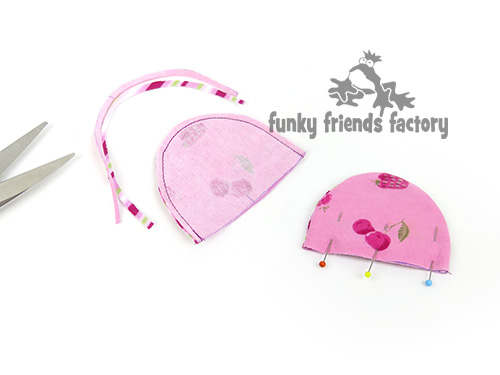
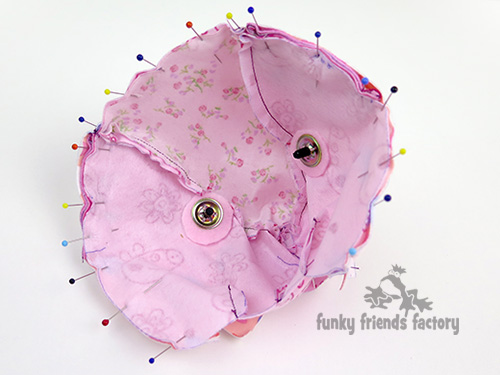
STEP 9
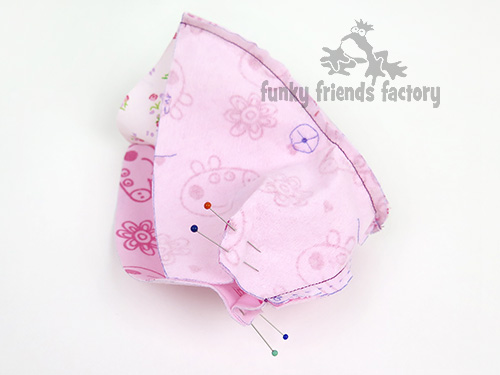
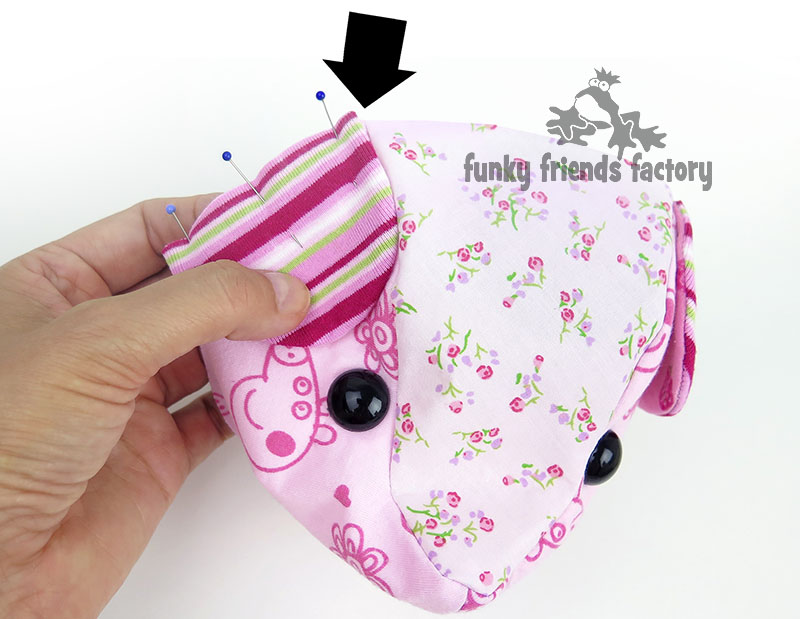
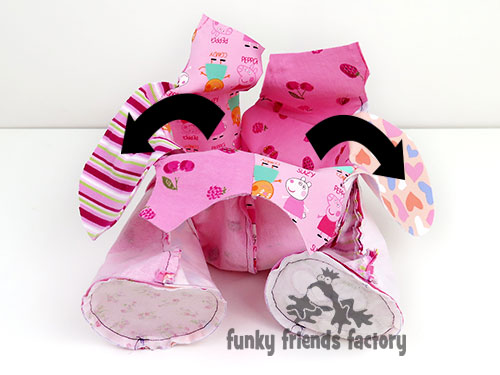
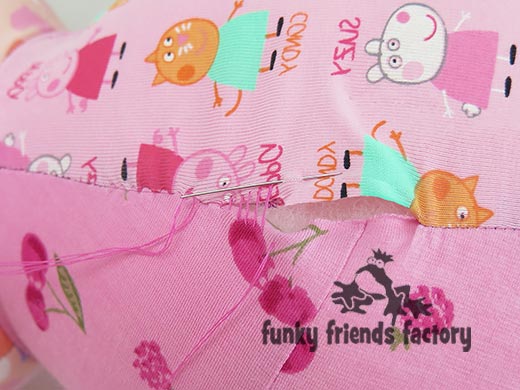
Pin the EARS to the FACE PIECES, using the pattern markings to guide you with the placement.
*Line up the edge of the EAR with the face seam
( see the black arrow in the photo below).
BACK HEAD:
STEP 10a
Please use the diagram below to check that you have the SIDE HEAD PIECES and BACK HEAD PIECE lined up correctly BEFORE you pin them. (It’s VERY easy to get them wrong – a LOT of people do this!😭Please don’t do it too!😖)
TIP: The head won’t fit on the body if these pieces are not correct!
Please double check that you have transferred the letters onto the fabric pieces and matched them up correctly.👍
STEP 10b
Sew one of the SIDE HEAD PIECES to the BACK HEAD PIECE from D – E.
STEP 10c
Sew the other SIDE HEAD PIECE to the BACK HEAD PIECE from D – E, on the other side, matching the letters of the pattern markings.


STEP 11
Sew the FOREHEAD&FACE PIECES to the BACK HEAD&SIDE HEAD PIECES with the EARS in between.
STEP 12
Fold and pin the SIDE HEAD PIECES with the fabric right sides together and sew the side head darts as shown on the pattern markings.
* Put the HEAD aside while you sew the BODY.
FRONT BODY & LEGS:
STEP 13
Sew the TUMMY PIECES together along the center seam from F – G.
STEP 14
Sew the INNER LEG PIECES to the TUMMY PIECE from H – J.
BACK BODY & LEGS:
STEP 15
Sew the BACK PIECES together from L – G.
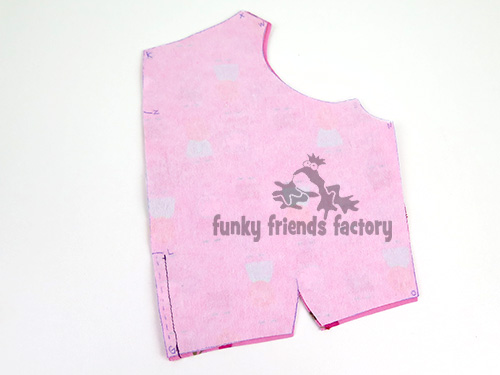
STEP 16
Fold and pin the BACK PIECES with the fabric right sides together and sew the back darts as shown on the pattern markings.
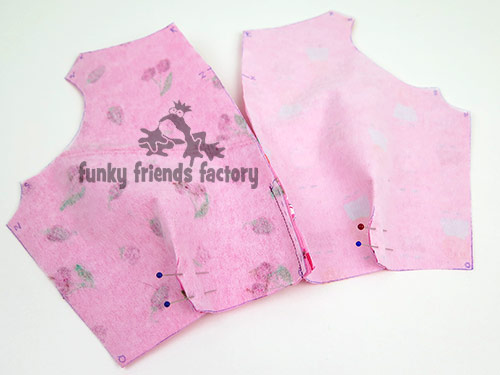
STEP 17
Sew the OUTER LEG PIECES to the BACK PIECES from N – O.
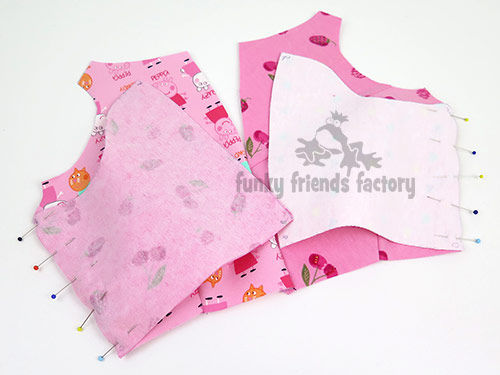
STEP 18
Sew the TUMMY & INNER LEG PIECES to the BACK & OUTER LEG PIECES at the bottom from P – G – P.
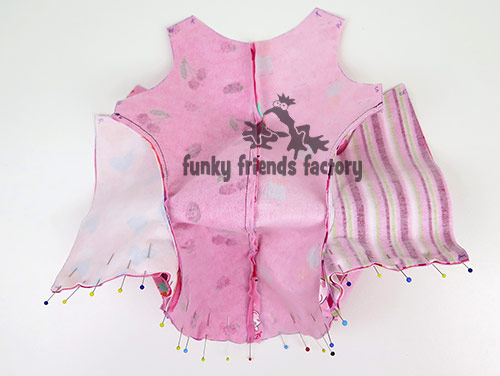
STEP 19
Sew the TUMMY& INNER LEG PIECES to the BACK PIECES& OUTER LEG at the sides from R – S on each side.
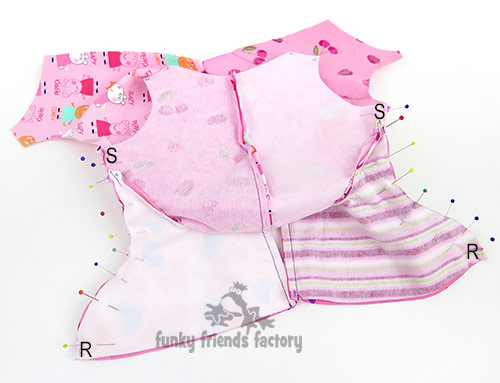
FOOTPADS:
STEP 20
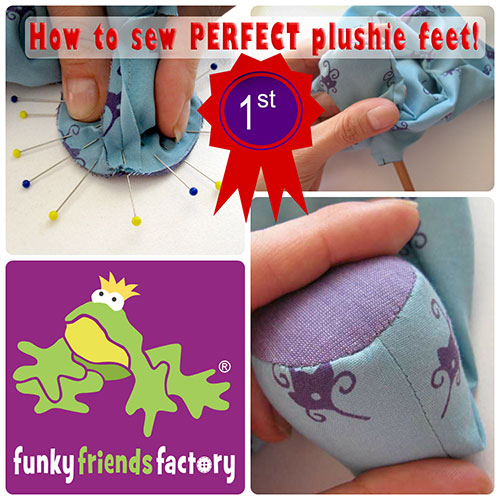
Pin and sew the FOOT PAD PIECES to the INNER&OUTER LEG PIECES, matching point R and P.
TIP: I have a tutorial to show you how to sew the FOOT PADS in place. Click HERE to check it out!

ARMS:
STEP 21
Transfer the ALL of the letters and pattern markings to the fabric pieces now (if you haven’t done this already)…
***THIS IS A VERY IMPORTANT STEP!***
So…
I have a favour to ask you!😍
Melody Bear’s ARMS are where a LOT of people get stuck. (I think it’s confusing because the arms are sewn ‘inside out’). There IS a very simple thing that will help you HEAPS but I know lots of people don’t do it – so this is why I’m asking you to do this EASY thing as a favour! ~>
Pretty please!!!
PLEASE transfer all of the letters and pattern markings onto your FABRIC pieces!
I know I keep saying this, BUT this time, with this pattern – I think it’s REALLY IMPORTANT that you do it!!!!! It’s the EASIEST way to guarantee you’ll get it right first time, and won’t end up UNPICKING pieces….😵💫

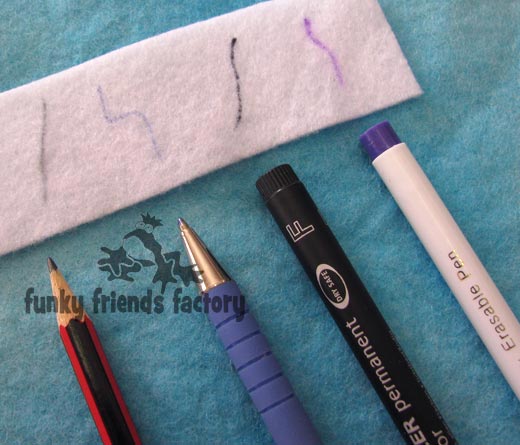
F.A.Q: What can I use to write the pattern markings onto fabric?
There are LOTS of options for writing the pattern markings on the fabric pieces – I use pencil, ball point pen, permanent markers and erasable fabric pens.
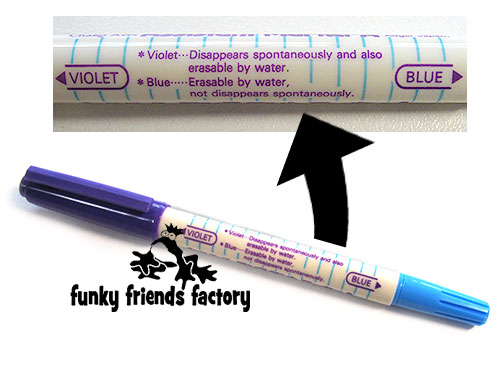
There are 2 types of erasable fabric pens –
AIR ERASABLE MARKERS (disappears after a little while) are used when you don’t want your markings to be visible forever. This is great for drawing on the facial features before you embroider them BUT not when you want to see the markings LATER while you’re sewing the toyand WATER ERASABLE (you need to apply water to make this disappear) are used for pattern markings on the wrong side of the fabric pieces that you don’t need to remove because they won’t be seen from the outside of the toy!)
For dark fabrics I have used a white pencil crayon, a light coloured fabric chalk pen, and even a paint marker (which I took from my husband’s tool box!!!!).
STEP 22a
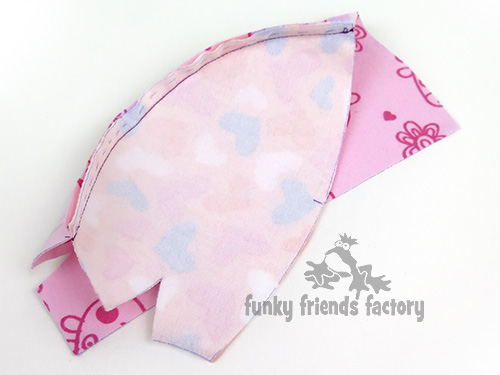
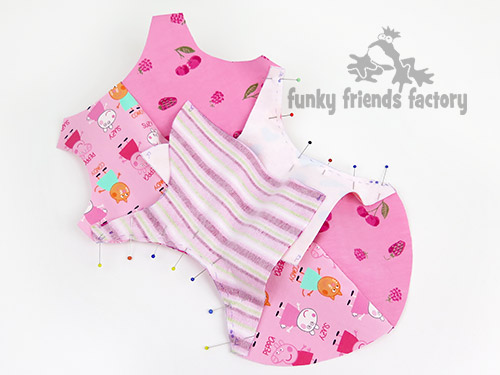
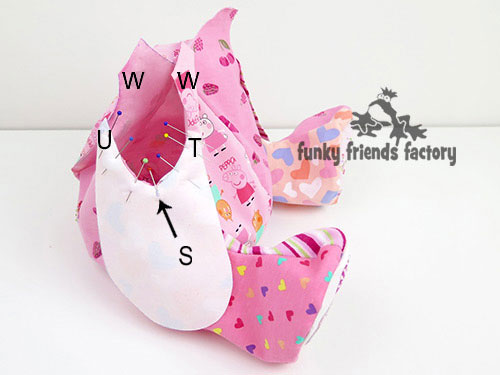
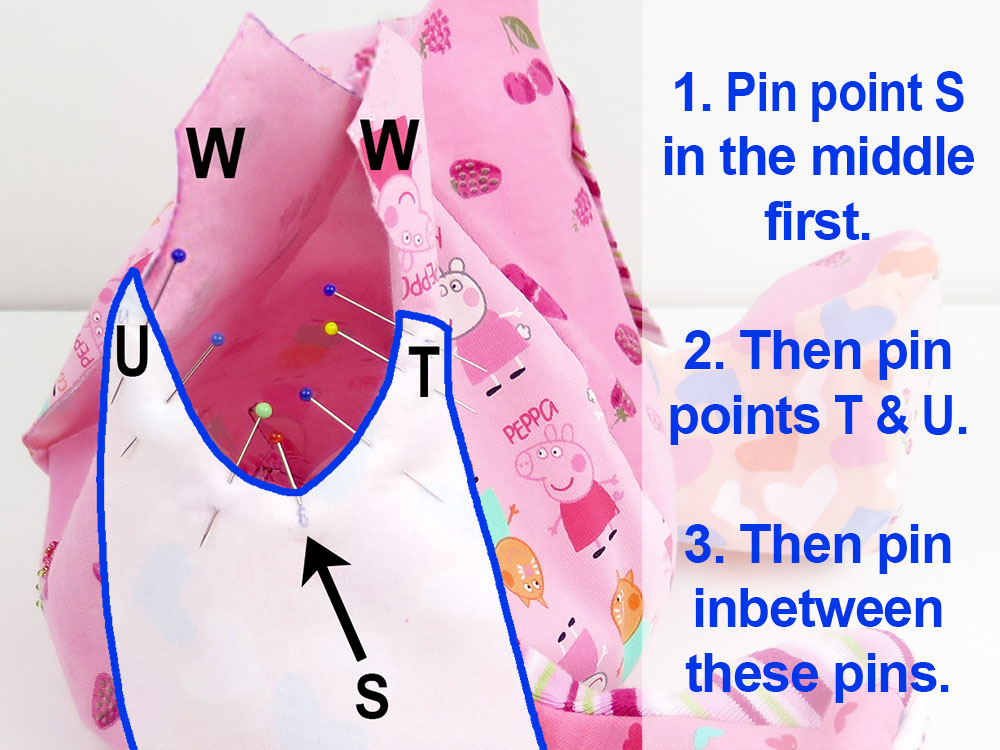
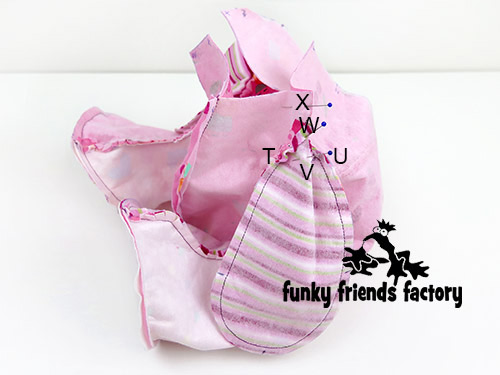
Turn the body and legs right sides out first. Pin the INNER ARM PIECES to the TUMMY & BACK PIECES, matching point U, S and T.
(PLEASE NOTE* The INNER ARM PIECE does NOT
reach up to point W on each side!).
Here is a close up photo with the ARM PIECE outlined in BLUE ~>
so you can see how to pin it in place.
STEP 22b
Sew the INNER ARM PIECES to the TUMMY&BACK PIECES with the INNER ARMS down.
TIP: This is a hard seam to sew, so take it slow. I like to sew a few stitches at a time, leave the needle down and lift the presser foot up so I can swivel the pieces around then put the presser foot down and continue.
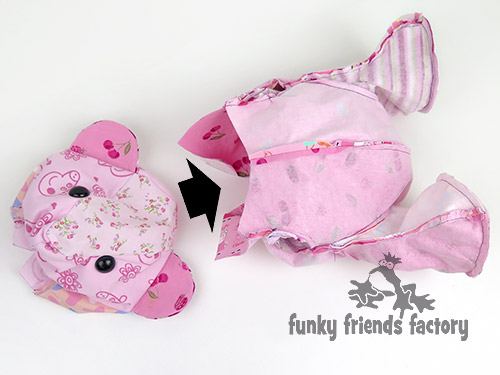
STEP 23
Turn the body and legs wrong sides out so the INNER ARM PIECES ‘flop’ out of the TUMMY&BACK PIECES, at the sides.
***DON’T MISS THIS VERY IMPORTANT STEP!***
It makes it much easier to pin the pieces together correctly!
STEP 24
Pin and sew the OUTER ARM PIECES to the TUMMY, BACK & INNER ARM PIECES matching points W, U, T and W on the other side.
TIP: I find it is easiest to sew this seam with the OUTER ARM PIECE facing DOWN.

STEP 25a
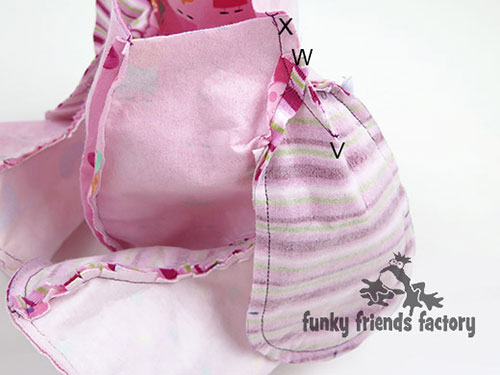
Fold and pin the OUTER ARM darts closed between V and W (fabric right sides together). Continue pinning the TUMMY and BACK PIECES together between W – X.
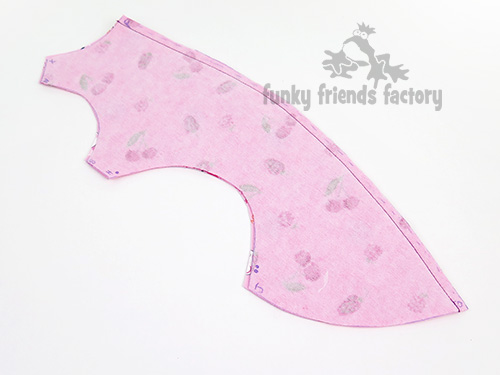
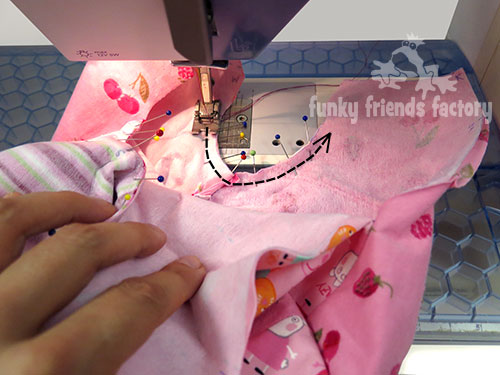
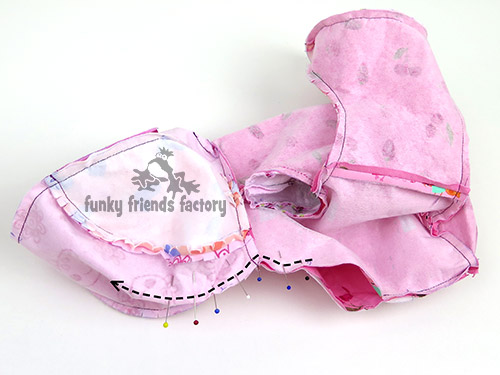
STEP 25b
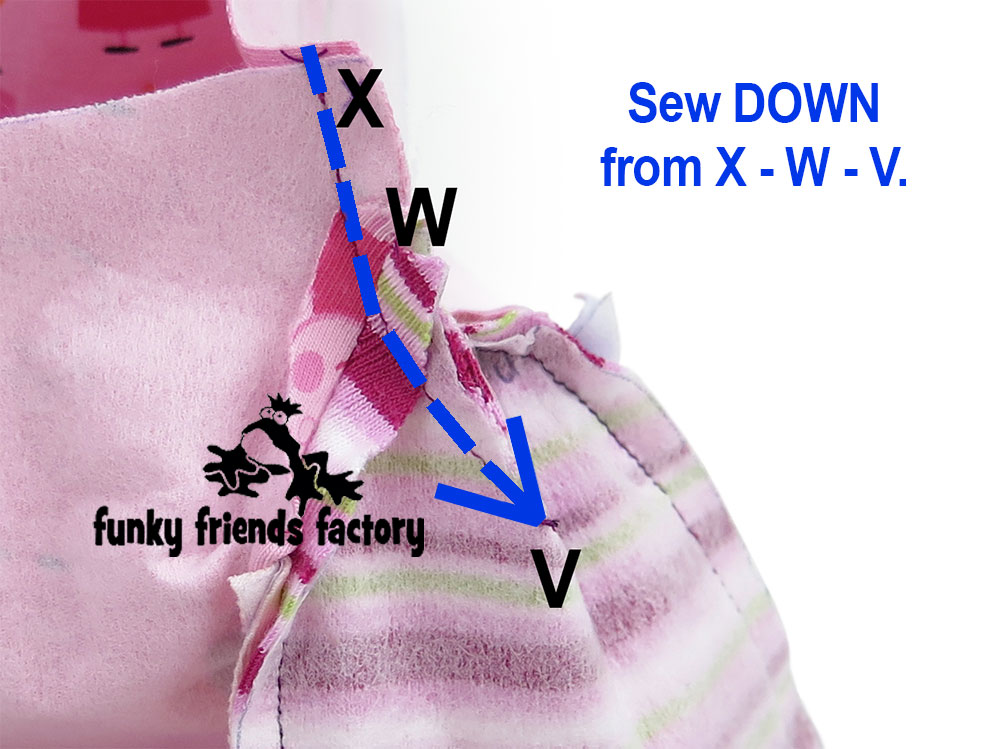
Sew TUMMY and BACK PIECES together from X – W and the OUTER ARM darts closed from W- V.
Here is a close-up photo with a dashed BLUE arrow ~>
to highlight the stitched seam.
JOIN THE HEAD TO THE BODY:
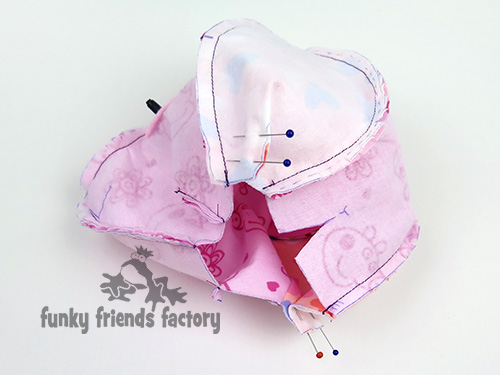
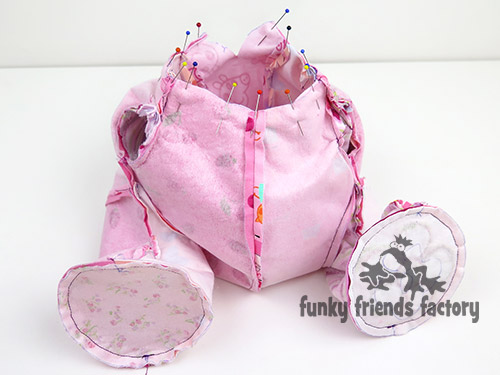
STEP 26
Pin and sew the head to the body at the neck seam. (Pin the FACE, SIDE HEAD&BACK HEAD PIECES to the TUMMY&BACK PIECES.)
TIP: I find the best way to do this is to turn the HEAD right sides out and position it ‘inside the body’ (top first) so you can pin the pieces together at the neck seam, and sew them with the fabric right sides together.
STEP 27
Pull the HEAD back out of the body so the PIECES are wrong sides out again. Pin and sew the bear closed at the back from Y – K on the BACK HEAD PIECE continue on to Z on the BACK PIECES, leaving the gap open for turning.
ASSEMBLY:
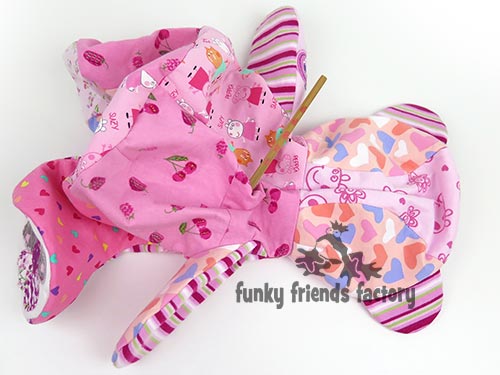
STEP 28
Check that you have clipped all the seams well before turning, especially the very curved seams. (This is VERY IMPORTANT if you are using interfacing or woven/non-stretch fabrics like quilting cottons.)Turn your memory bear right sides out through the turning gap. I like to use a wooden chopstick to make sure the seams are nicely turned.
STEP 29
Stuff the legs, arms then the head area really well. Stuff the tummy area last.
TIP: Make sure the nose and face area is stuffed well so that it makes it easy to sew on the NOSE PIECE and embroider the mouth.

STEP 30
Sew the gap on the BACK PIECES closed with a ladder stitch.
FACE:
STEP 31
If you are embroidering the eyes by hand, sew these now.
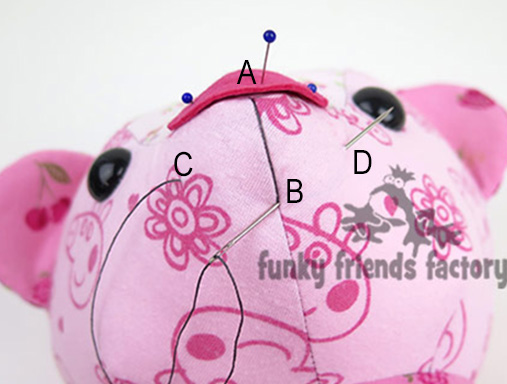
Cut the NOSE PIECE from felt and pin this in position.
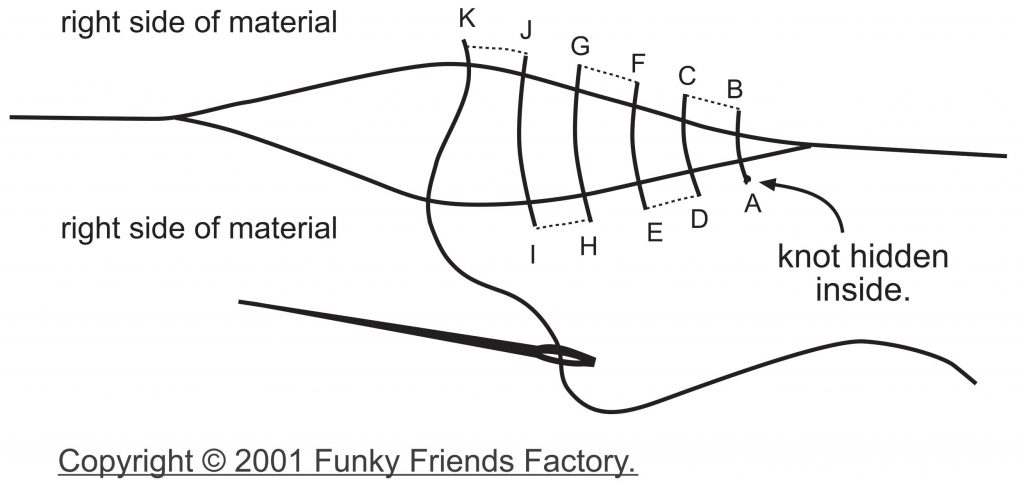
Sew the mouth and hide the starting and finishing knots under the felt of the NOSE PIECE.
- Sew the mouth, beginning by securing the thread with a thick knot.
- Sew into the face under the NOSE PIECE (to hide the knot!) and come out at A.
- Sew in at B and come out at C.
- Keeping the tension firm but not too tight, sew in at B and come out at D.
- Making sure you keep the mouth stitches rounded, sew in at B and out again at A.
- Finish off with a knot.
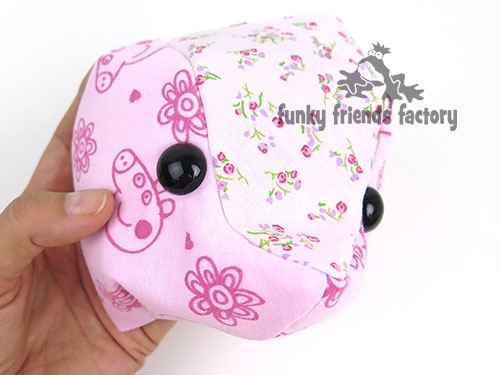
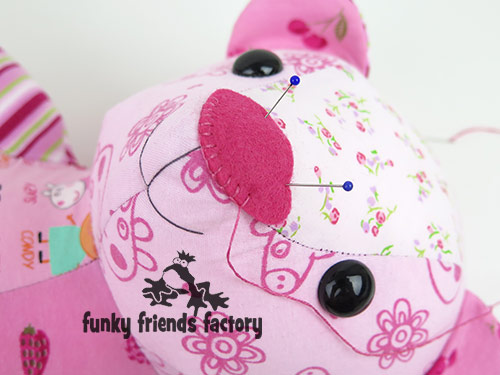
STEP 32
Sew the felt NOSE PIECE in place with matching embroidery thread and a blanket stitch.
Your Memory Bear
is ready to LOVE!🧸
Want to win a
FREE toy pattern?
It’s so EASY to enter our Pattern GIVEAWAY!
![]()
ALL you need to do is post a photo of a FUNKY FRIENDS FACTORY toy that you have made on the Funky Friends Factory Facebook Page .
At the end of each month I draw a winner and post the winner’s name on the Blog the following MONTH. I have an Album on Facebook for all the MAKEROFTHEMONTH winners. You can check it out HERE!
NOT on Facebook? ENTER by email! 😀
*** You can send me your photos by email too!
So come on! Share your photos ~>
The next winner could be YOU!!!
 .
.
Till next time,
Happy Sewing,
Pauline
xxx
![]()
