
I have been asked to design a flat cap pattern by people sewing my teddy bear patterns. I have created this step-by-step photo tutorial so you can see how to sew my FREE flat cap sewing pattern…
~> scroll down for
step-by-step photos!
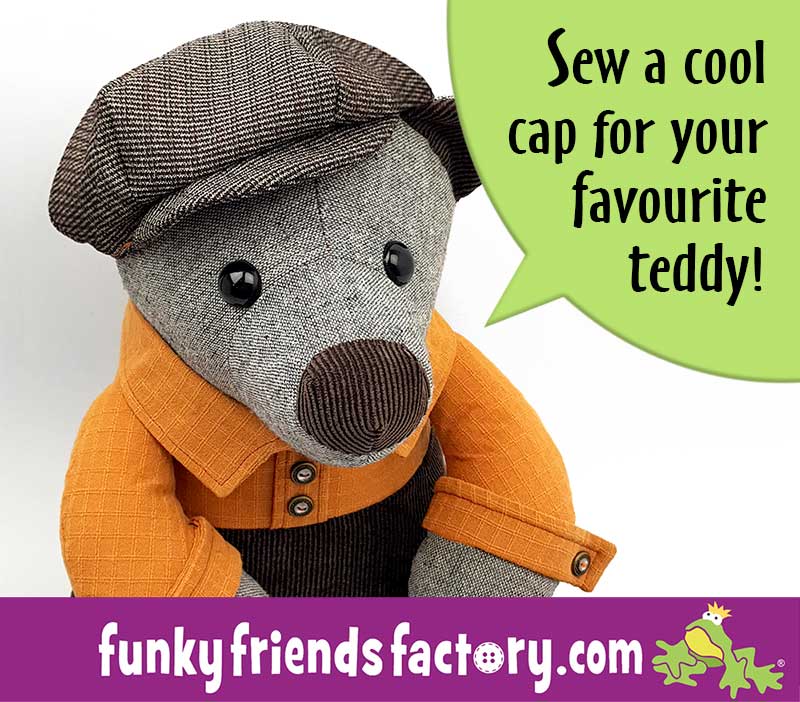
There are so many variations and names for the simple flat cap – Gatsby cap, ivy cap, driving cap, sixpence cap, duckbill cap, paddy cap, cabbie cap, golf cap, bicycle cap and peaky blinders hat!?!?😯 It was almost too confusing so I chose the version with the 6-pieced top like Thomas Shelby wore in Peaky Blinders.

Choose fabric for your flat cap:
Traditionally flat caps are made out of thick, warm tweed or wool. You can sew this flat cap from most fabrics BUT I recommend soft fabrics that will give you a floppy (sloppy?) look. Corduroy fabric is awesome for a flat cap as it’s soft and will flop nicely. Soft denim or cotton fabrics can be good too – only if they’re not too stiff!
Some really cool feedback pics of the flat cap:
Look at this smart fellow sewn by Natalie Booysens.
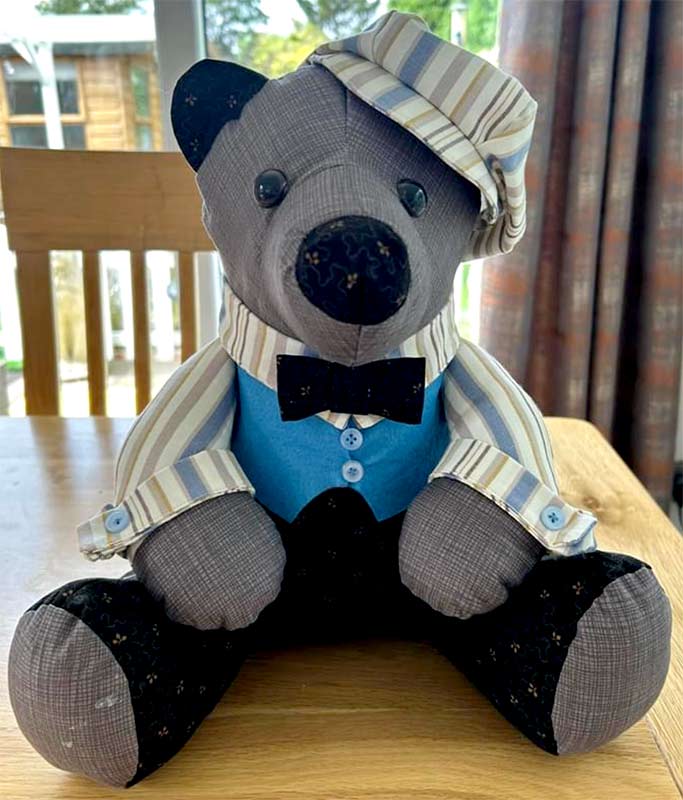
This adorable Buttons the BEST DRESSED Bear sewn by Jennifer Taylor –
look how cute a flat cap is in stripes!
Click HERE to buy the BEST DRESSED Bear pattern.
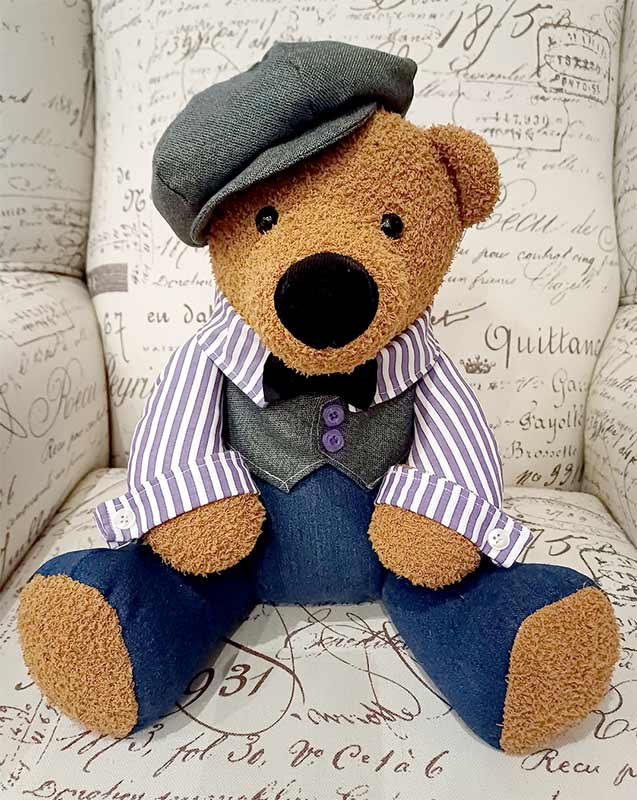
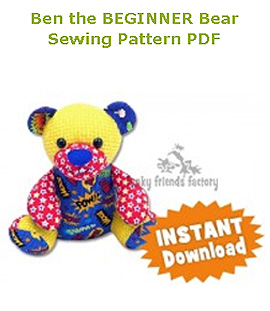
I think of Ben the BEGINNER Bear as my ‘baby bear’ BUT even he looks great wearing a flat cap!
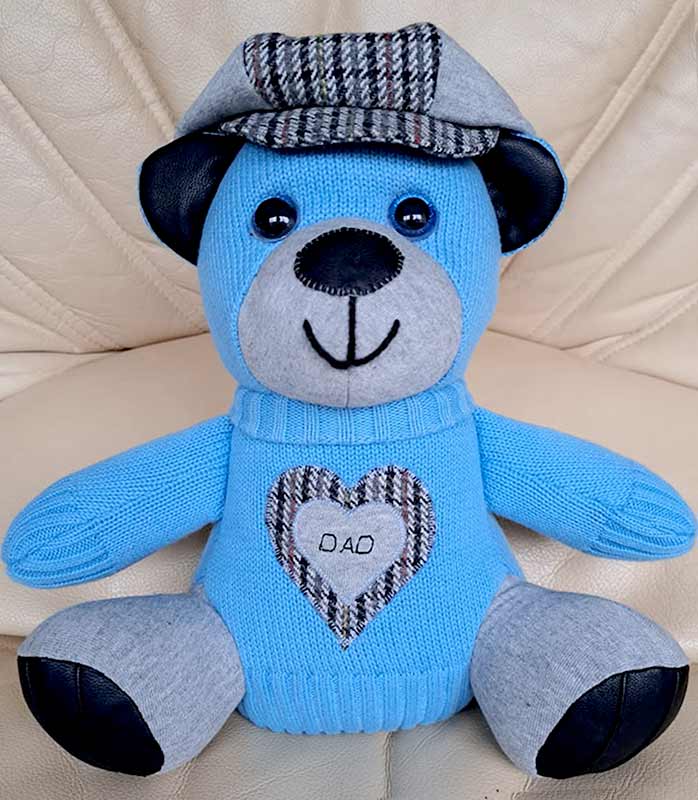
This keepsake bear was sewn by Sue Plant.
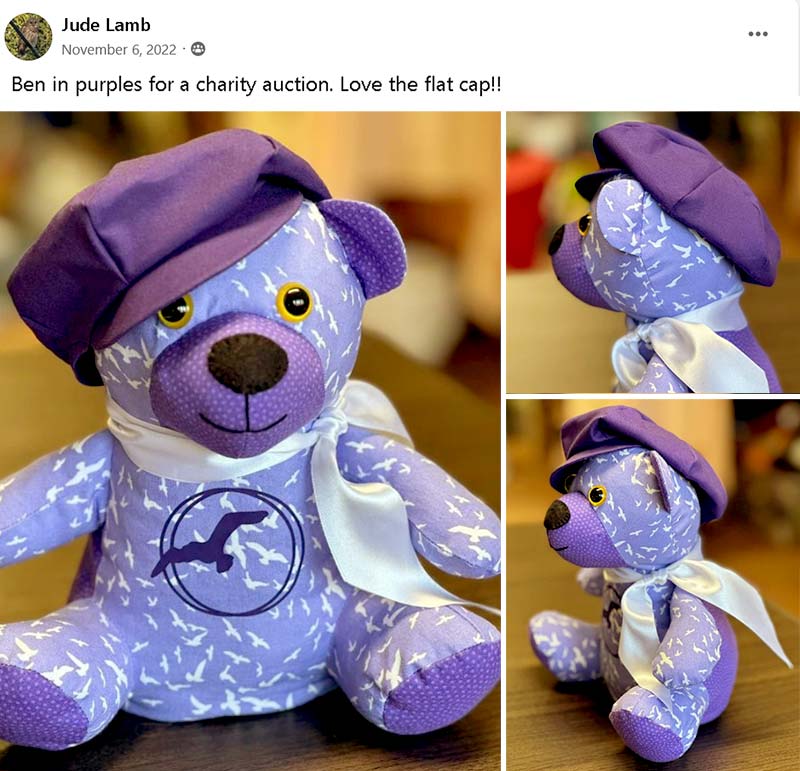
Ben the BEGINNER Bear sewn by Jude Law
– love the purple flat cap!!! 💜
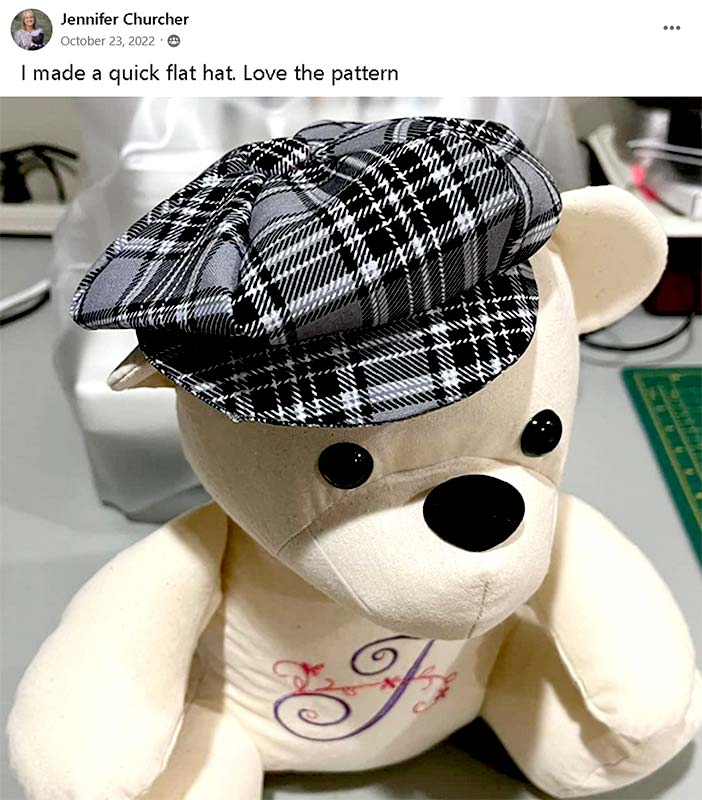
The flat cap pattern ALSO looks great in black and white too!
Ben the BEGINNER Bear sewn by Jennifer Churcher.
Click HERE to buy the BEGINNER Bear pattern.
Right, let’s get sewing!
Flat Cap sewing Pattern instructions:
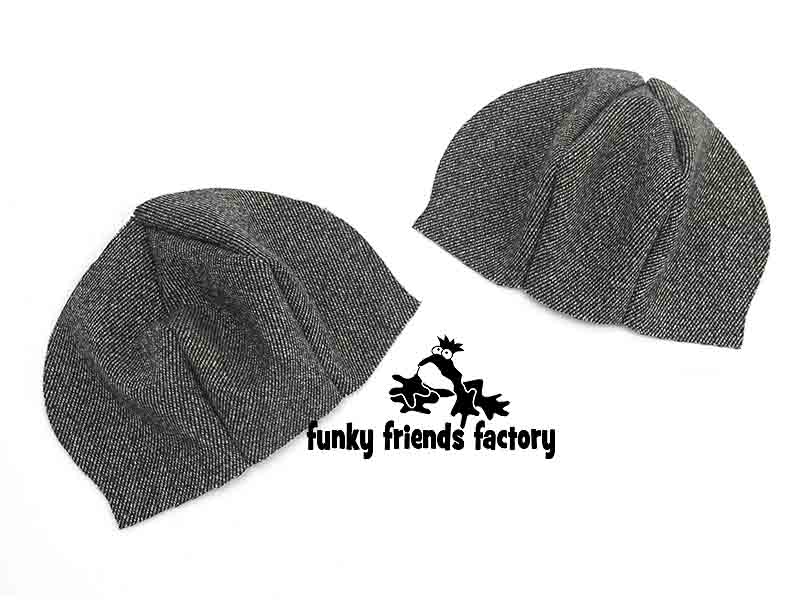
I designed a 6-pieced top flat cap pattern because I think this makes a really easy flat cap. ALL 6 pieces of the flap cap top, are the SAME shape.
STEP 1
Download my free flat cap sewing pattern for teddy bears and toys!
*** PLEASE NOTE ***
The sewing instructions are HERE
(on this page!)
Scroll down to see HOW to sew a flat cap!
CLICK HERE
to DOWNLOAD my
FREE Flat Cap Pattern
STEP 2a
Sew 2 of the CAP PIECES together along the side.
STEP 2b
Sew a 3rd CAP PIECE to the side of one of the 1st two pieces. to form one side of the cap.
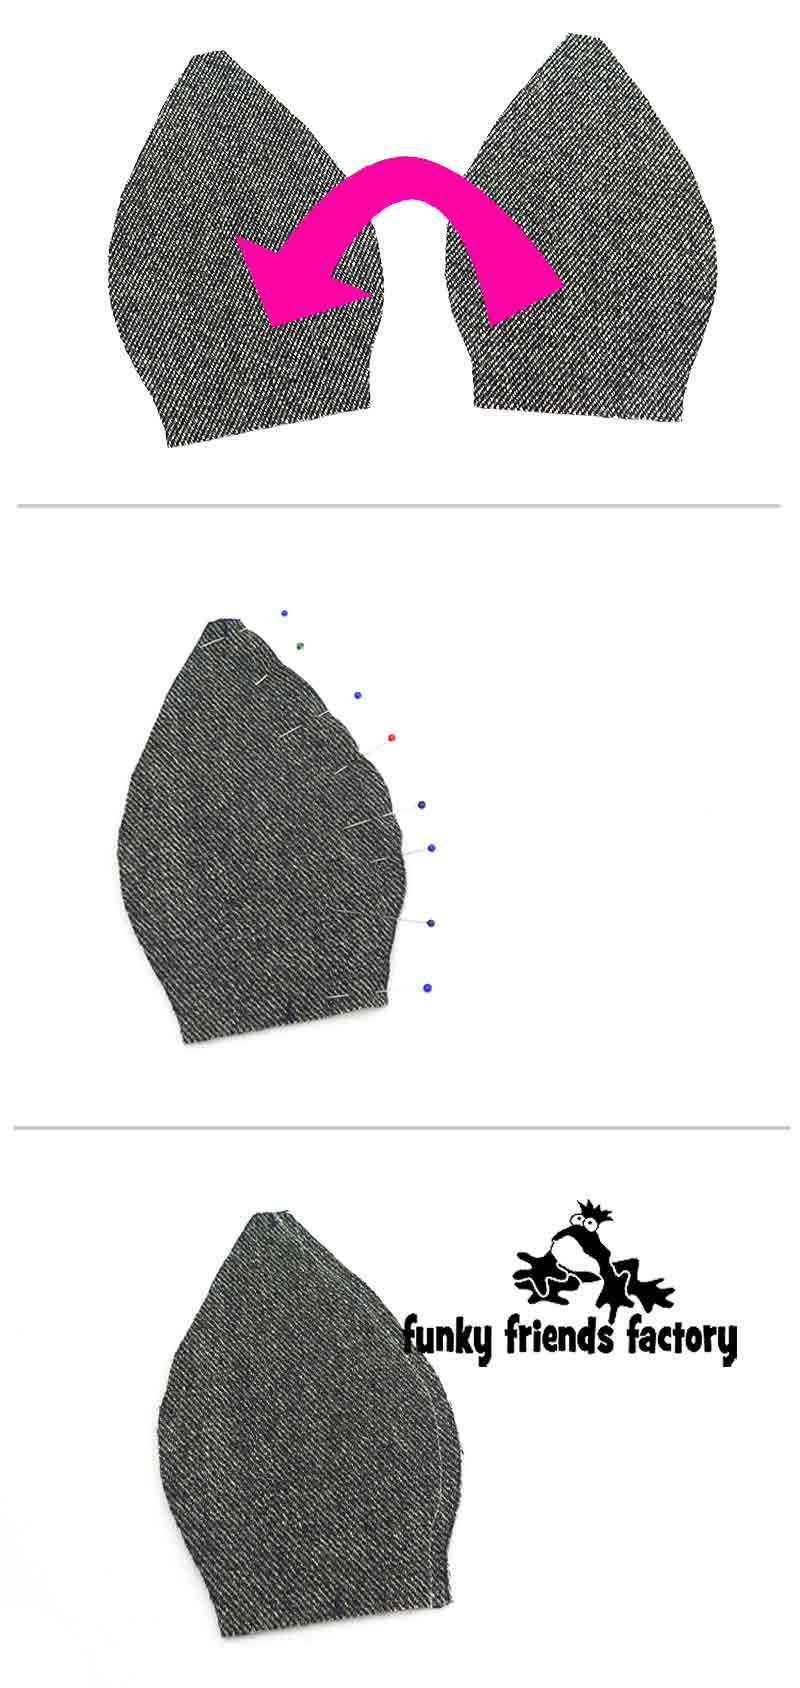
STEP 3
Repeat step 1a and 1b for the remaining three CAP PIECES.
TIP: You now have 2 halves of the cap sewn.
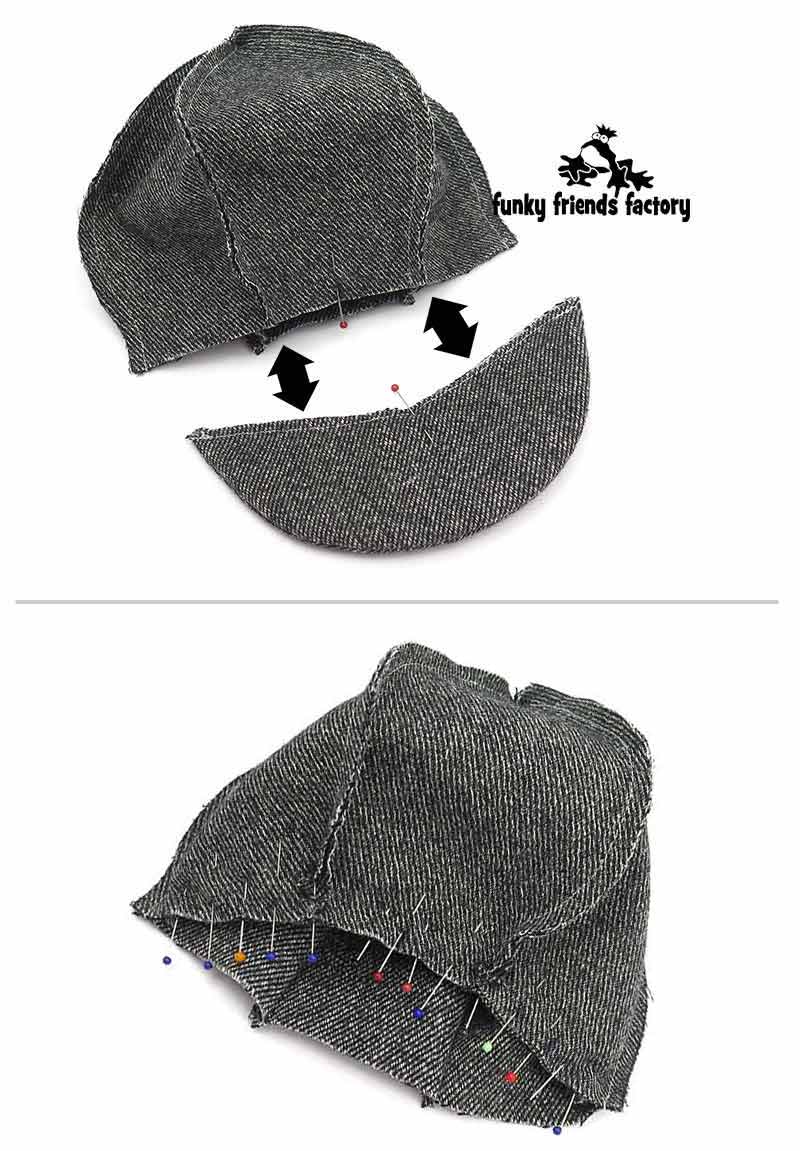
STEP 4
Sew the 2 halves of the CAP PIECES together along the sides, to form the top of the flat cap.

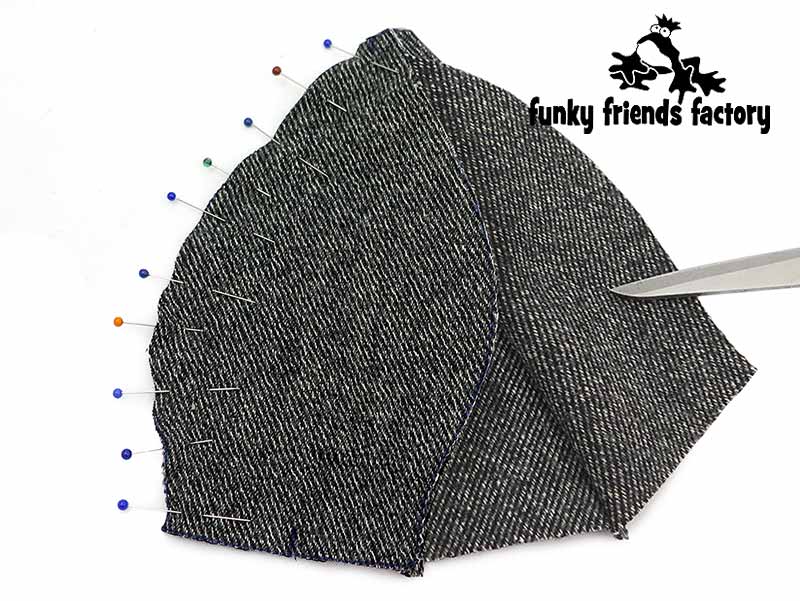
STEP 5a
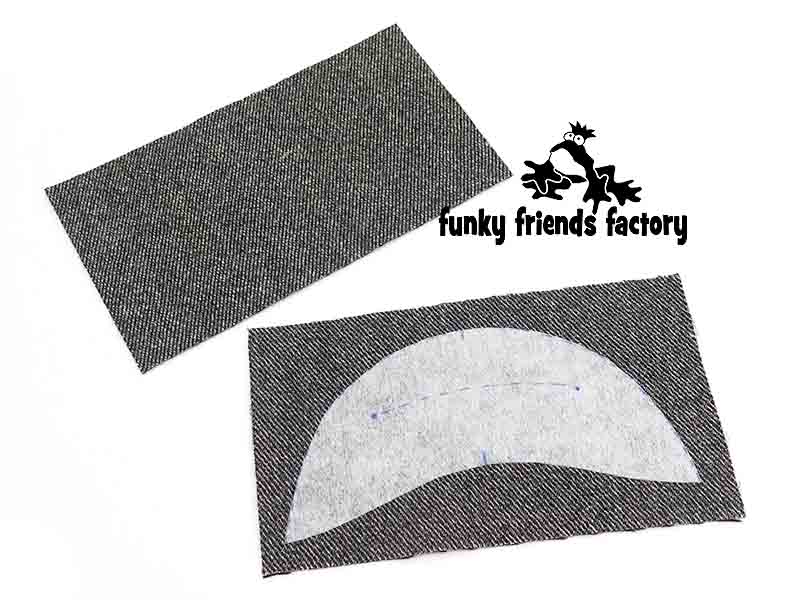
Cut 1 PEAK PIECE from medium interfacing and iron it to the wrong side of the fabric.
TIP: Test the iron on a scrap of fabric first to make sure it’s not too hot. You don’t want to melt the fabric like I did first time! 😱 You can prevent melting by covering the fabric with a piece of calico/muslin (or similar cotton fabric) when you iron on the interfacing.
STEP 5b
Pin the fabric piece with the interfacing PEAK PIECE ironed to it, to another piece of fabric, with the RIGHT SIDES FACING TOGETHER. Sew around the outside of the PEAK PIECE.
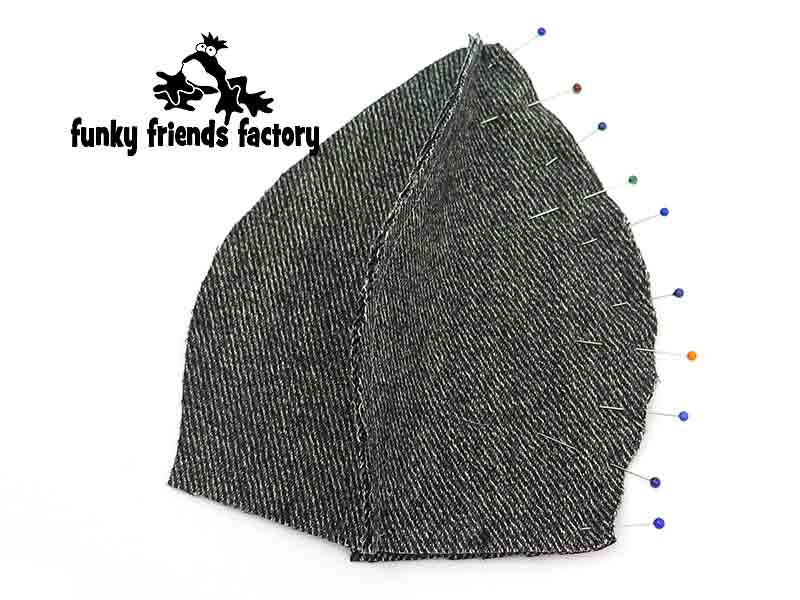
STEP 6a
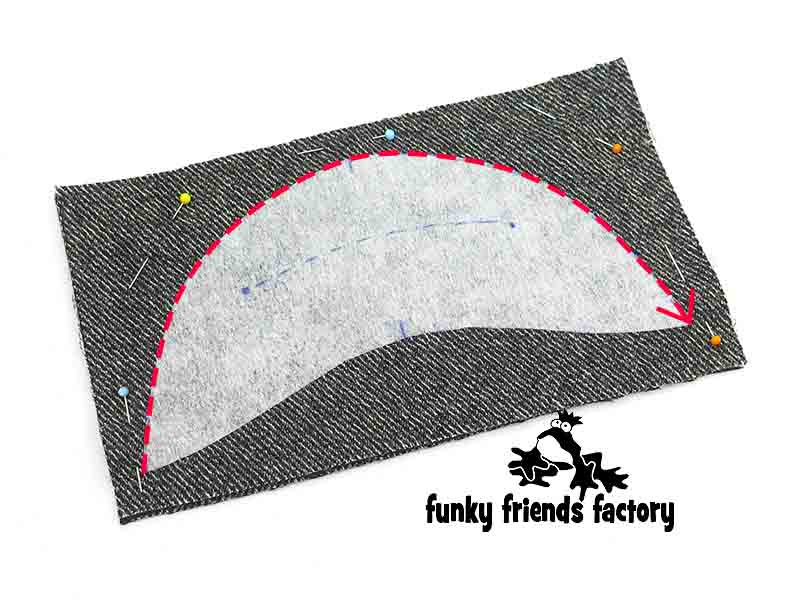
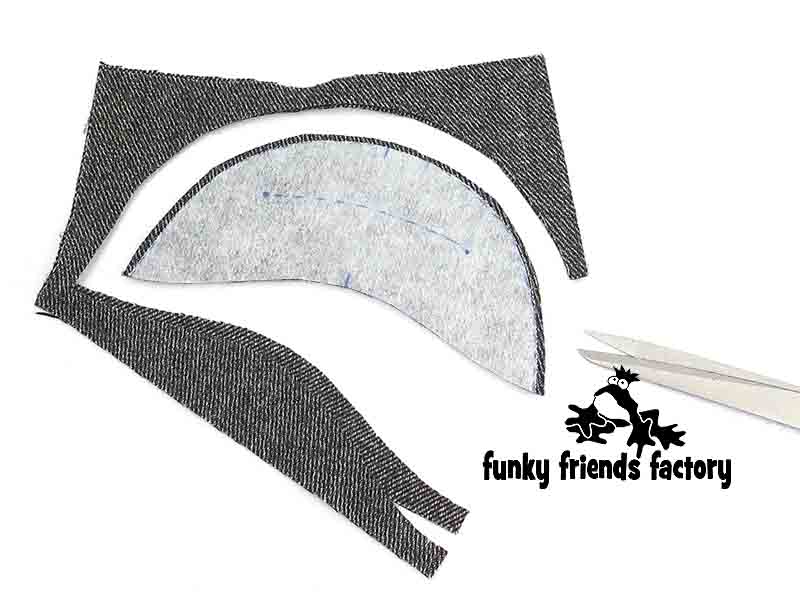
Cut out the PEAK PIECES leaving a 3mm seam allowance around the outside.
STEP 6b
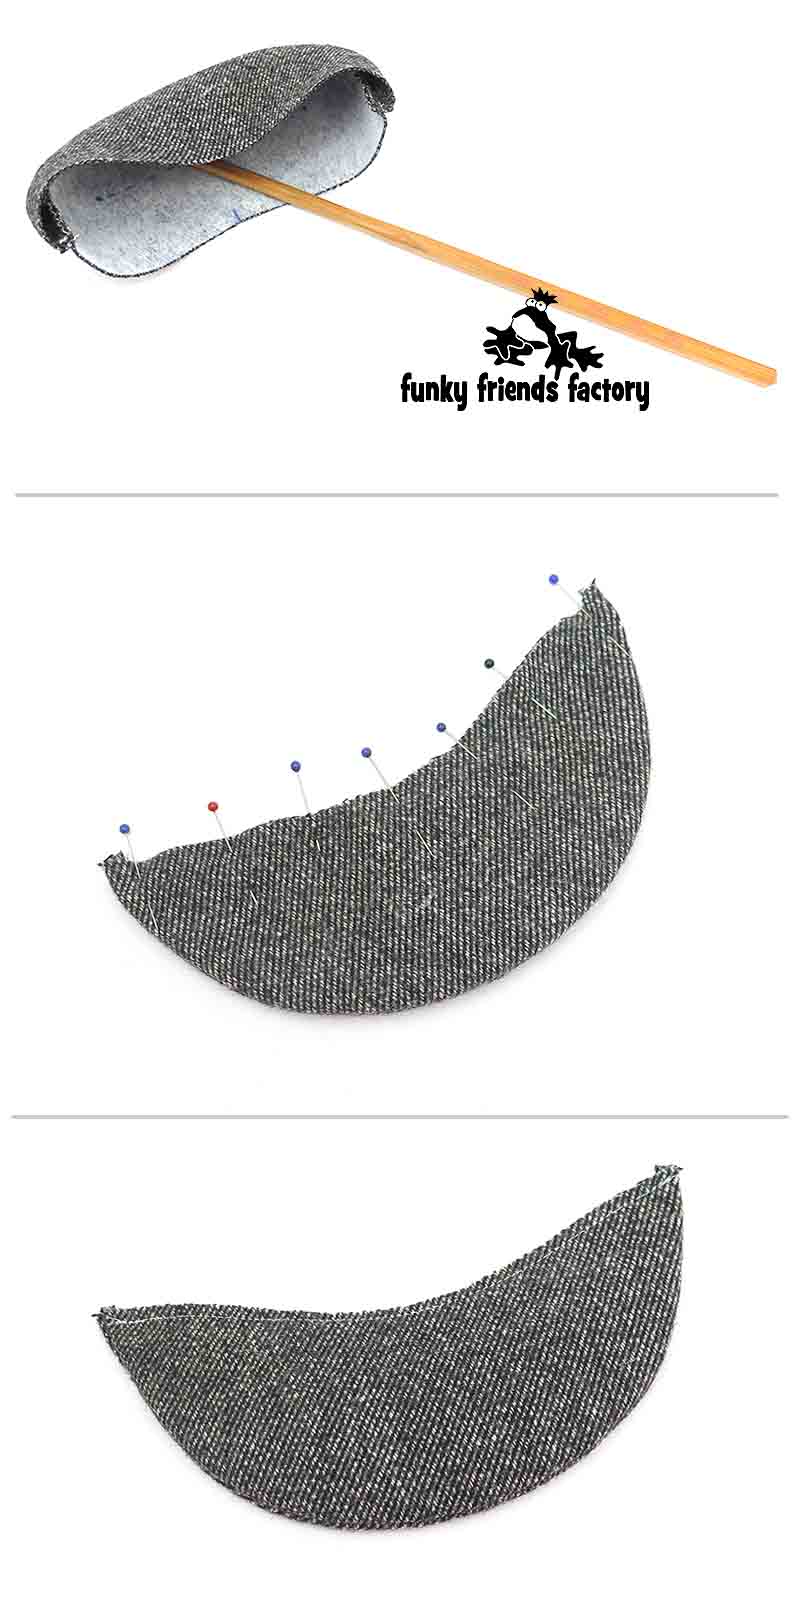
Turn the PEAK right sides out, pin it closed along the open edge and sew it closed, with a 3mm(1/8 inch) seam allowance.
STEP 7a
Pin the PEAK to the right sides of the CAP PIECES, matching up the middle of the PEAK with the middle of one of the CAP PIECES and sew the PEAK to the right sides of the CAP PIECES.
STEP 7b
Sew the PEAK to the right sides of the CAP PIECES.
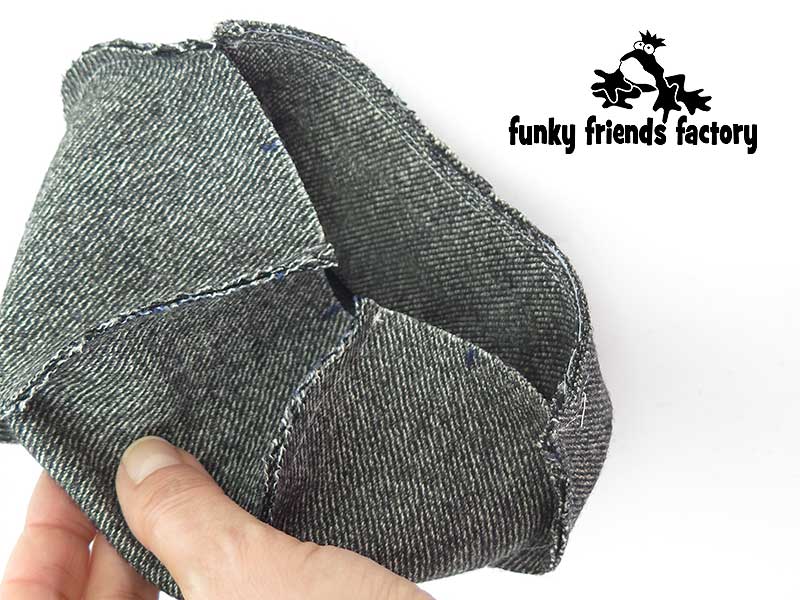
STEP 8a
Pull the PEAK out of the cap. Transfer the sewing line to the PEAK PIECE.
STEP 8b
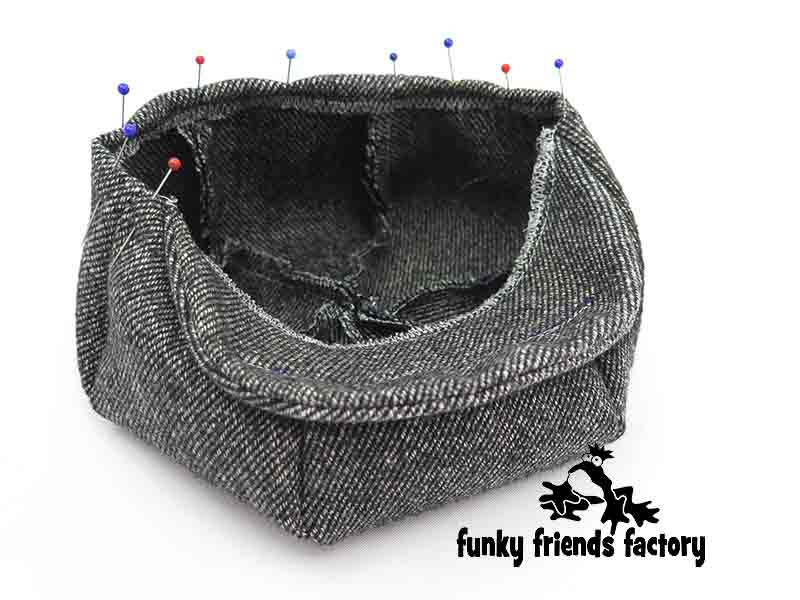
Push the PEAK back inside the CAP and pin it to the right sides of the CAP PIECES. Sew the PEAK to the CAP PIECES along the peak sewing line.
TIP: This is difficult to sew as you have to hold the other cap pieces out of the way as you sew. If this is too hard, you can sew the PEAK to the CAP PIECES by hand.
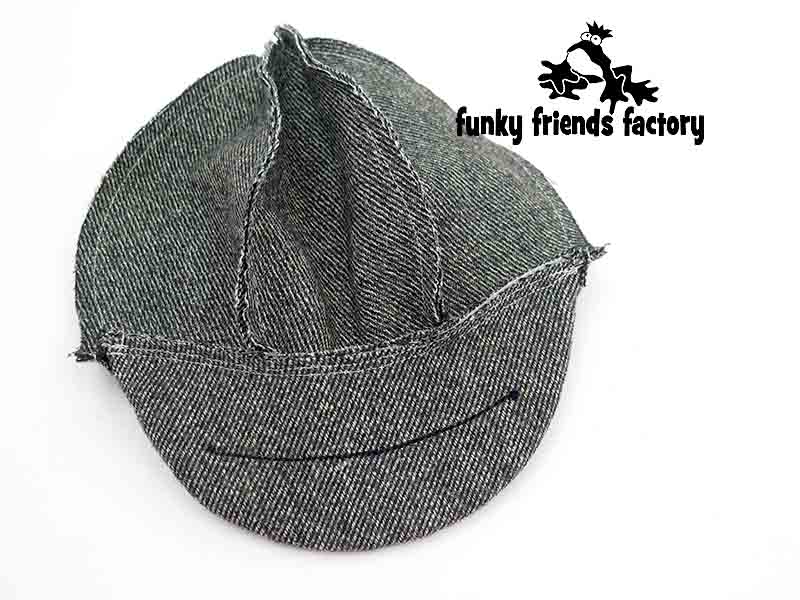

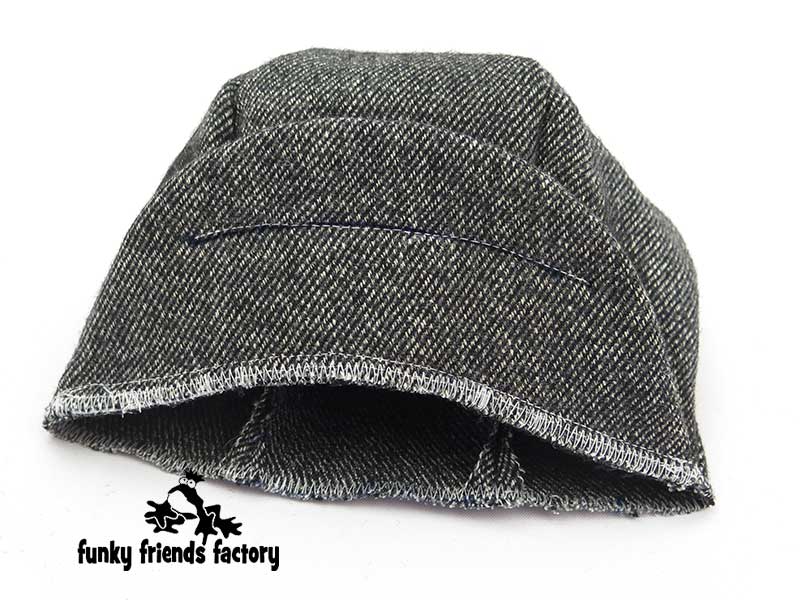
STEP 9a
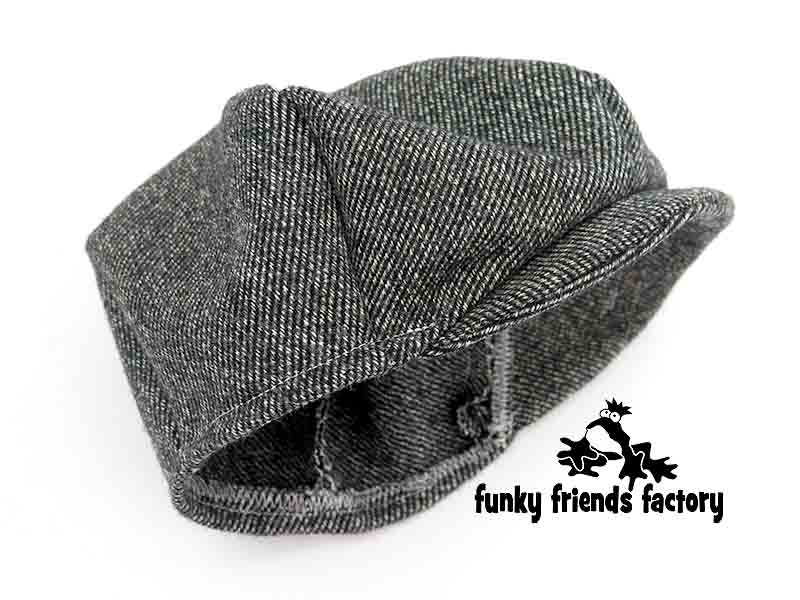
Sew around the unfinished edges with a zig-zag stitch (or a serger/overlocker).
STEP 9b
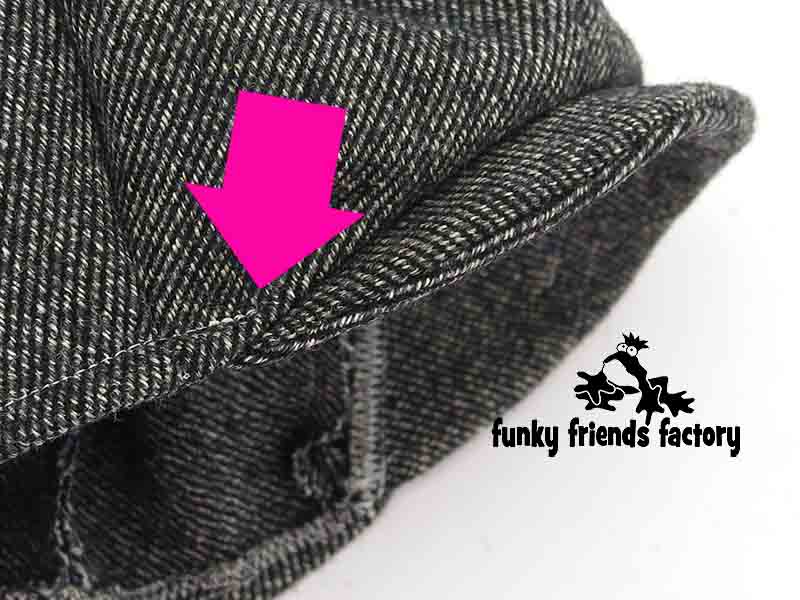
Fold the CAP PIECES in, about 12mm(½ inch), to form a ‘hem’.
STEP 9c
Sew a line of stitching 12mm (½ inch) in from the edge to hold the the edge under.
TIP: Make sure to sew onto the PEAK a little bit on each side to hold it under at the edges.
STEP 10
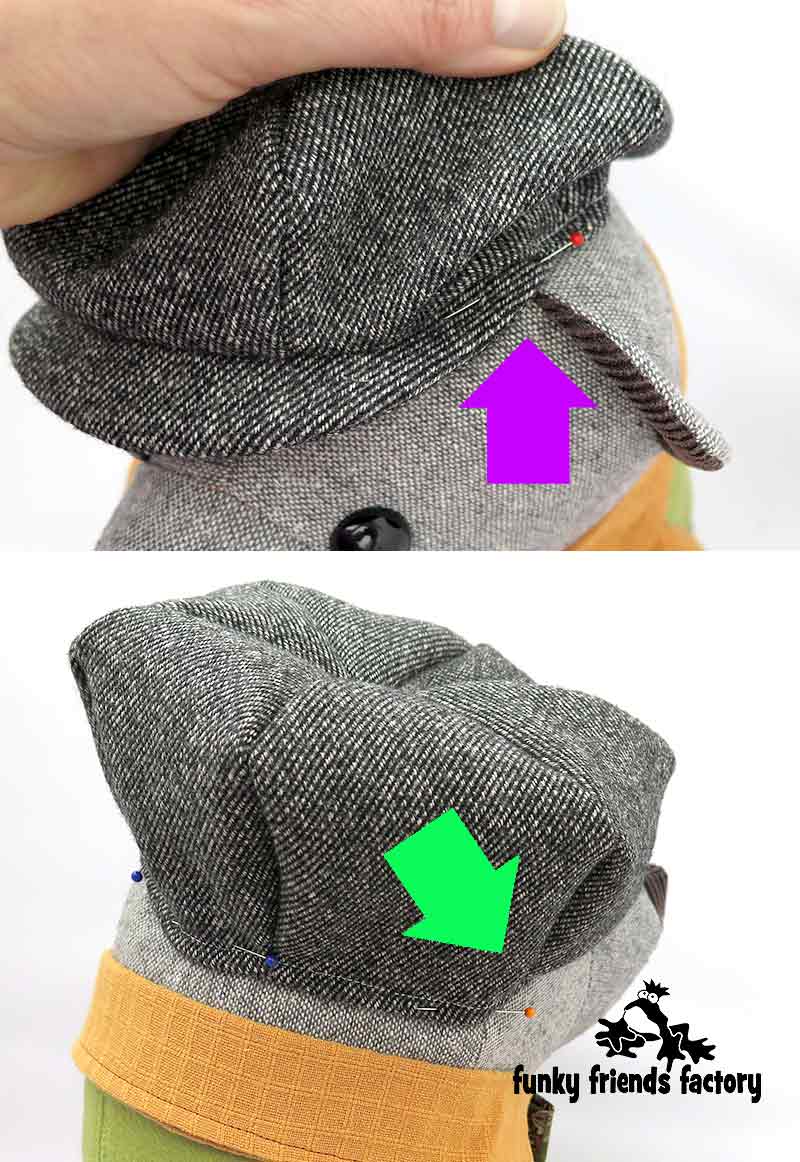
Pin the Flat Cap onto your teddy bear. Make sure to pin it above one ear (see the purple arrow in the photo below) and below the other ear (see the green arrow in the photo below).
STEP 11
Hand sew the flat cap in place by hand.
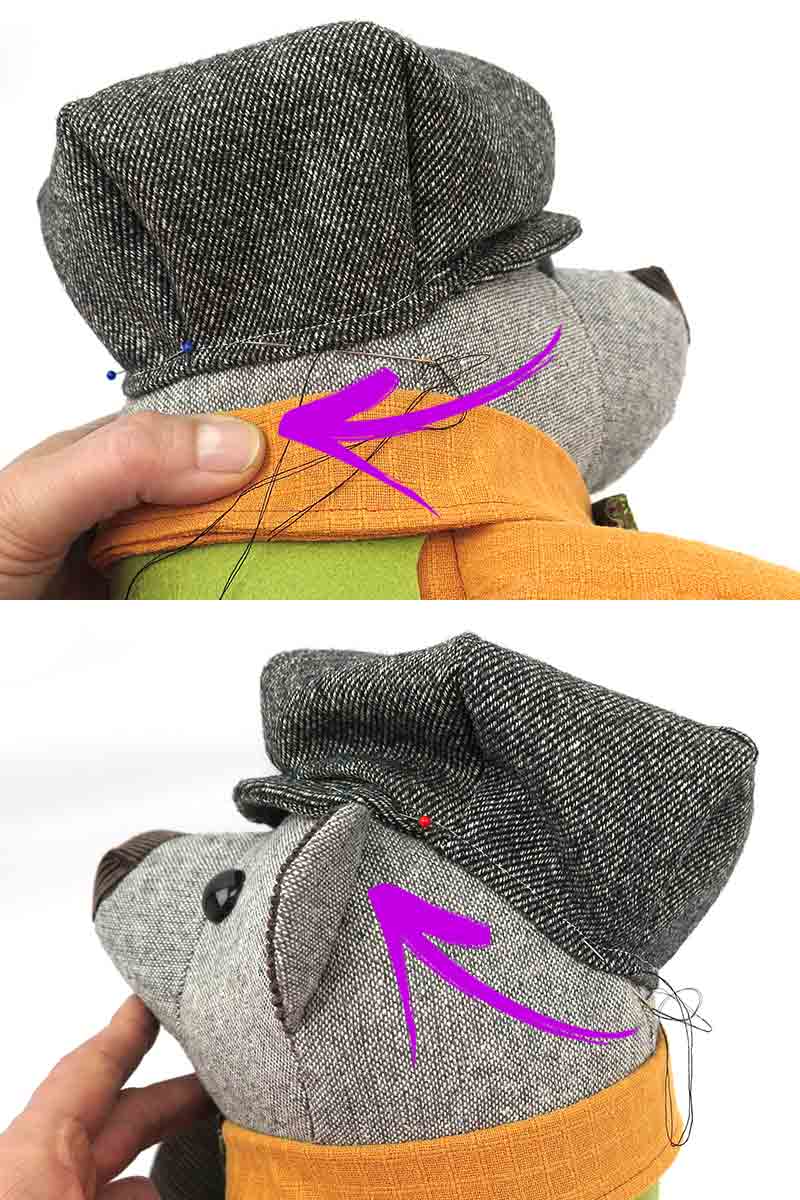
STEP 12a
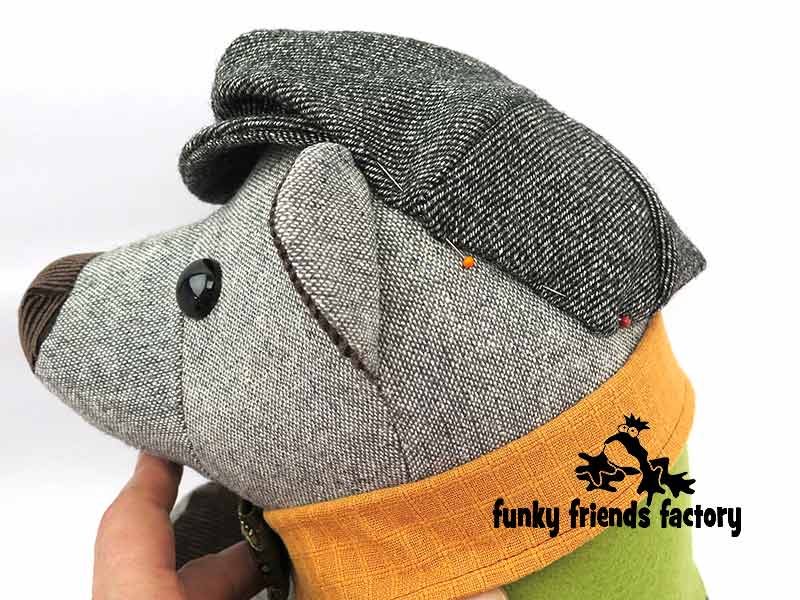
Push the cap down so it covers the head like a flat cap.
STEP 12b
Pin the sides down and when you are happy with how the flat cap is looking – sew them to the head in this position.
TIP: If you absolutely hate hand sewing I guess you could use fabric glue (or a hot glue gun) to secure the flat cap to your bear’s head.

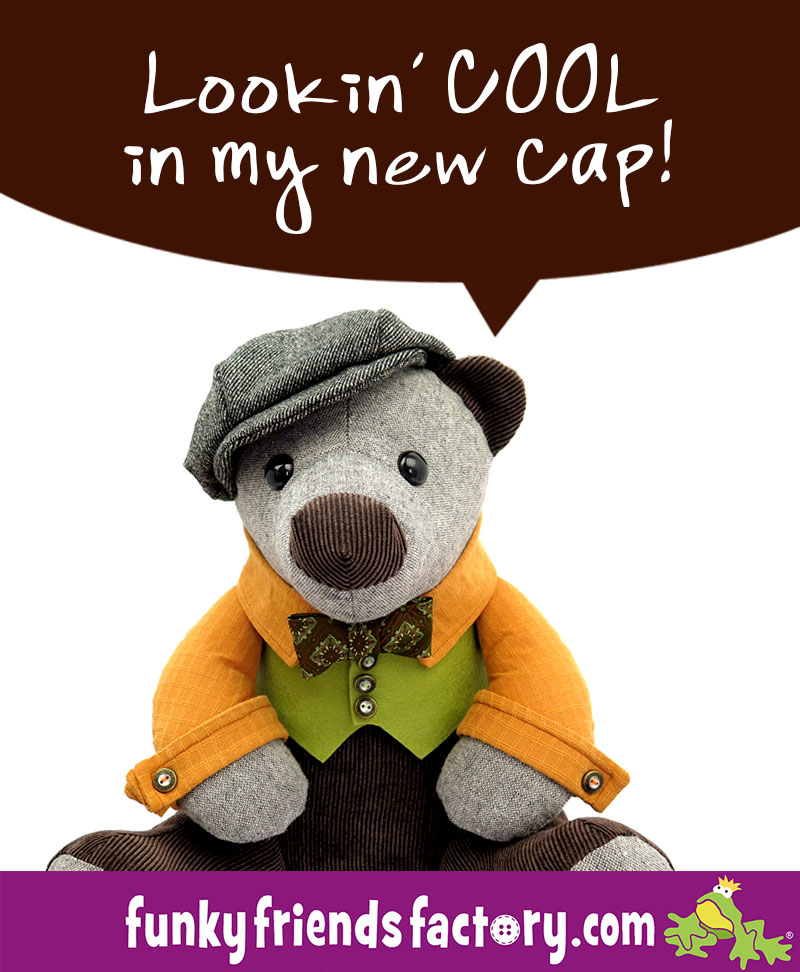
Your teddy bear
(in his dashing flat cap)
is ready to LOVE!
Want to win a
FREE Funky Friends Factory
toy pattern?
It’s so EASY to enter our Pattern GIVEAWAY!
![]()
ALL you need to do is post a photo of a FUNKY FRIENDS FACTORY toy that you have made on the Funky Friends Factory Facebook Page .
At the end of each month I draw a winner and post the winner’s name on the Blog the following MONTH. I have an Album on Facebook for all the MAKEROFTHEMONTH winners. You can check it out HERE!
NOT on Facebook? ENTER by email! 😀
*** You can send me your photos by email too!
So come on! Share your photos ~>
The next winner could be YOU!!!
 .
.
Till next time,
Happy Sewing,
Pauline
xxx
![]()
