
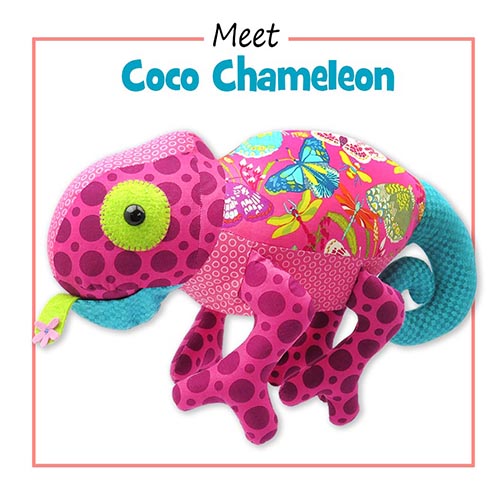
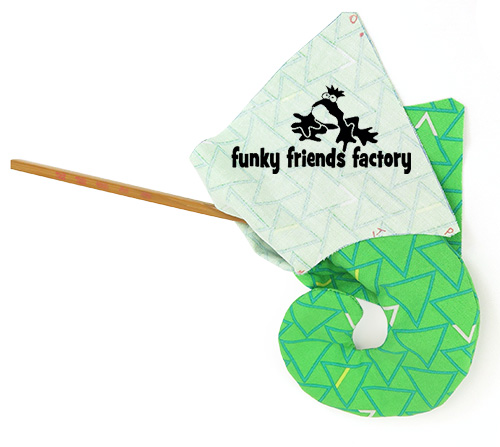
I made this photo tutorial so you can see how to sew my Chameleon Sewing Pattern ~> scroll down for step-by-step photos!
*** PLEASE NOTE – this in ONLY a PHOTO TUTORIAL ***
The FULL PATTERN IS NOT included here.
It is NOT A FREE PATTERN.I have made this photo tutorial so people who have purchased the pattern can SEE how to sew a toy chameleon (I wanted to explain this so you are not disappointed if you have found this page via a search engine and not from the link in my Coco Chameleon sewing pattern!)
* The Chameleon Pattern is available to buy, from the Funky Friends Factory website as an Instant Download e-Pattern.
First choose some fabric
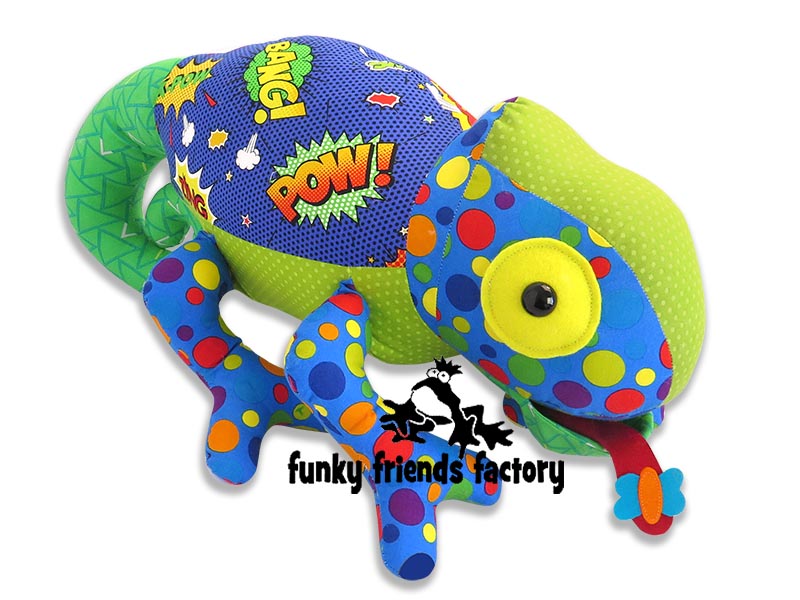
The Chameleon can be sewn in most fabrics. I sewed Coco out of quilting cottons but knit (stretchy) fabrics like fleece or Cuddle would be nice and snuggly! Good quality felt was used for her eye, tongue and felt food!
Right, let’s get sewing!
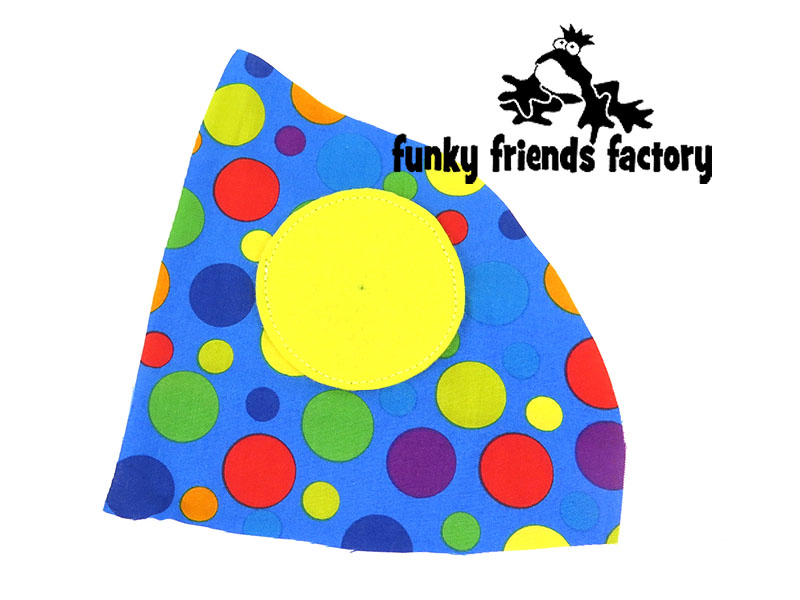
We start with the EYES:
STEP 1a
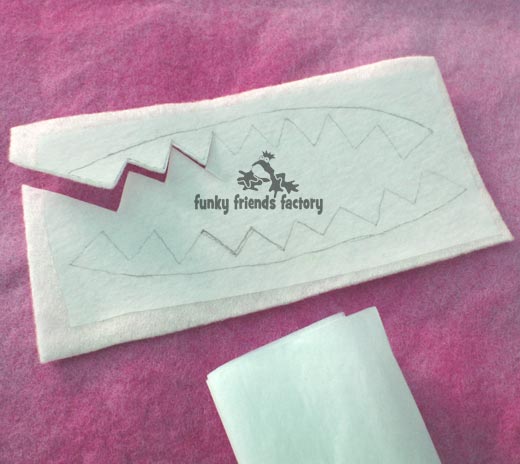
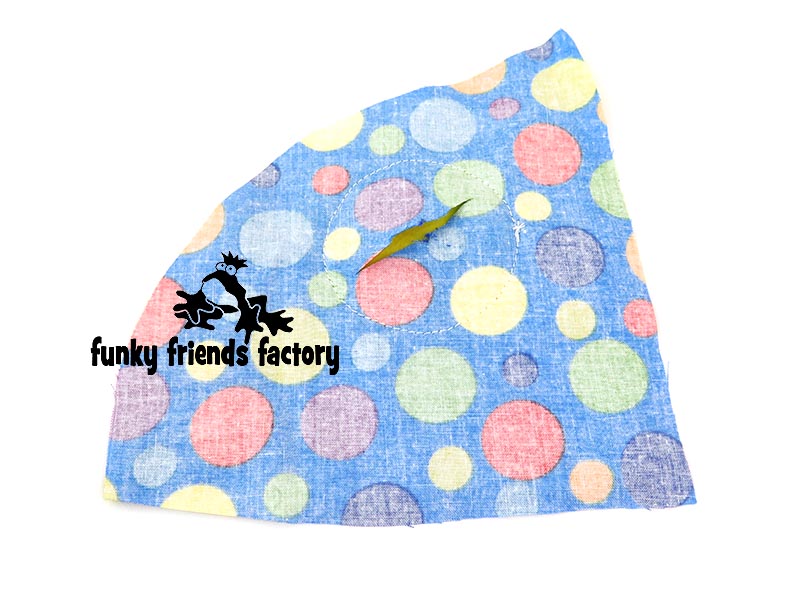
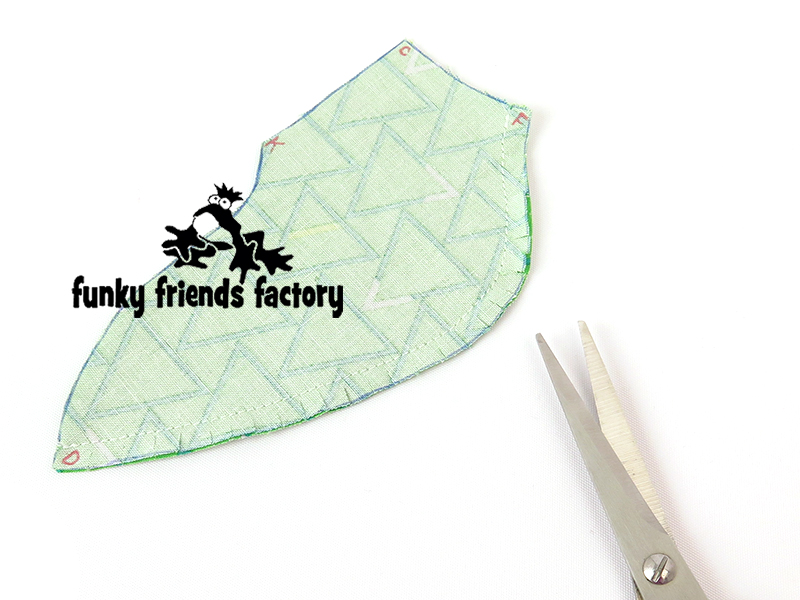
Cut a small hole in the FACE PIECES for the craft eyes, using the pattern markings to guide you.
STEP 1b
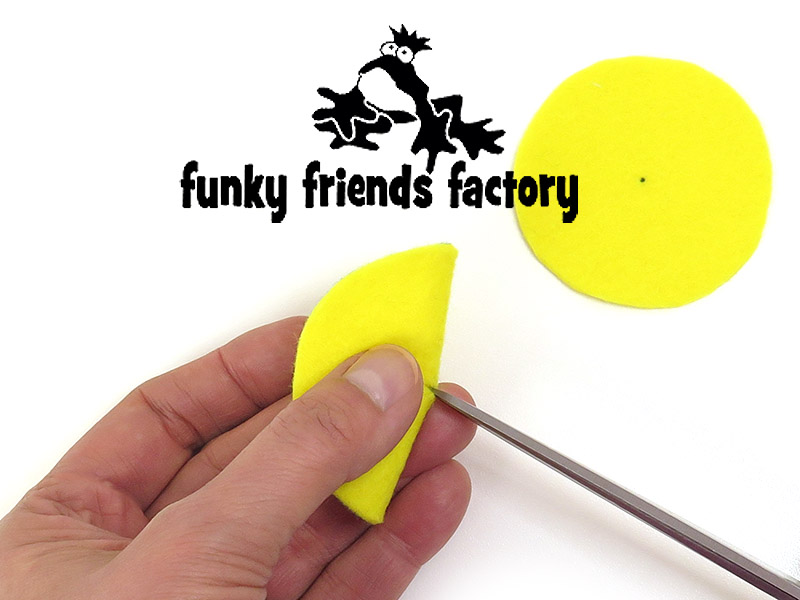
Cut the EYE PIECES from felt and cut a small cross at the centres (at the cross).
TIP: I like to trace my felt pieces with a fabric marker. If you don’t have one you can check out this blog post for other methods for cutting out felt pieces accurately HERE.
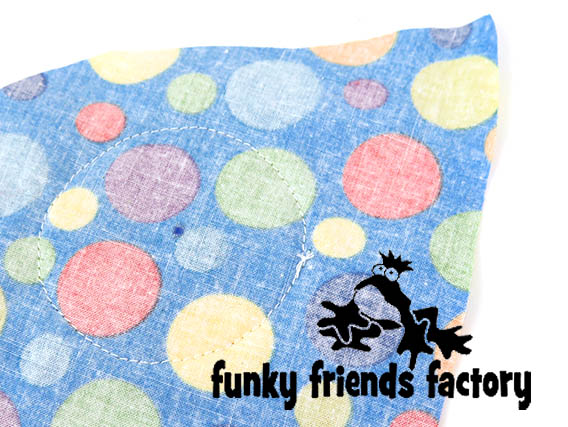
STEP 1c
Pin the felt EYE PIECES to the FACE PIECES using the pattern markings to guide you. Sew the EYE PIECES to the FACE PIECES.
TIP: This can be done by machine or hand sewn. I like to hand sew a decorative blanket stitch with a bright contrasting thread. If you sew by machine – pull the threads to the back and tie them off with a knot.
*** STOP! PLEASE NOTE:
You can choose how to finish the EYES. There are 2 options – 1.Flat(easy) or 2. Bulging(a bit tricky!).
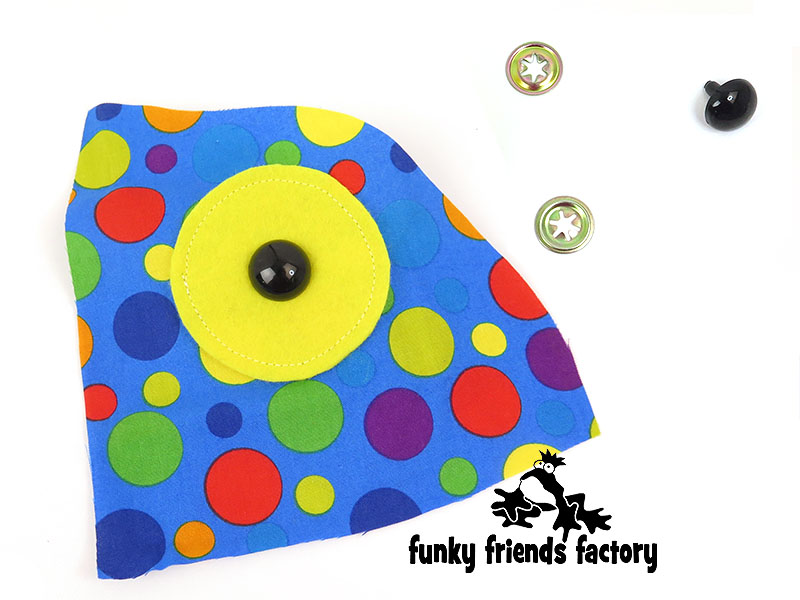
Eye Option 1 – FLAT (easy):
STEP 2
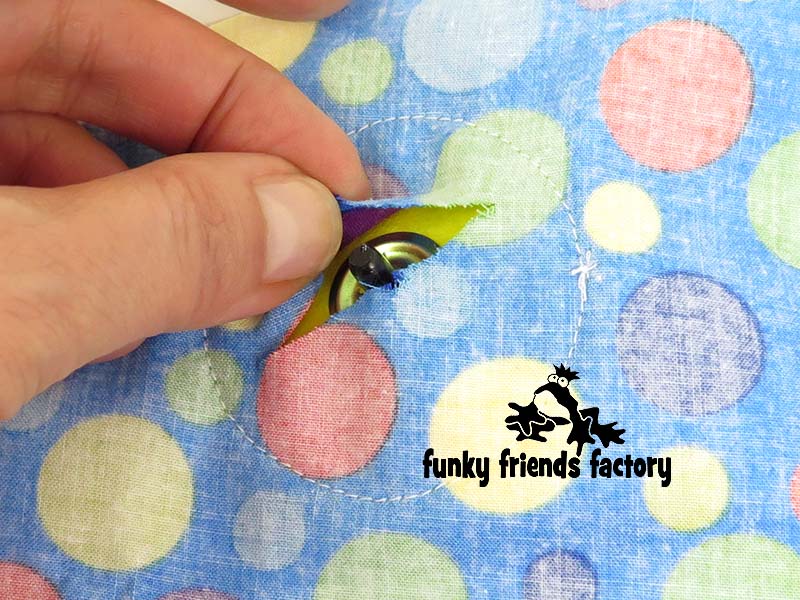
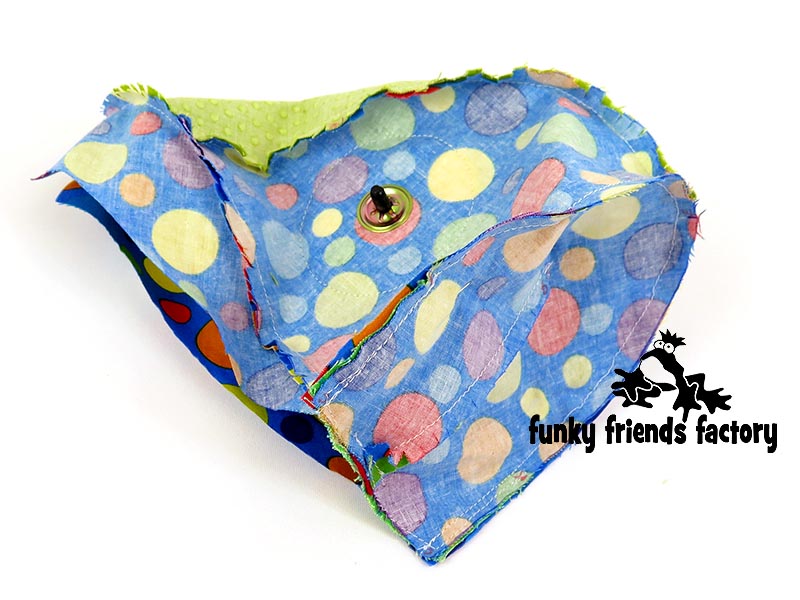
Push the shafts of the CRAFT EYES through the felt EYE PIECES & FACE PIECES from the front (right side) and secure them in place with their washers. (Chameleons can look in different directions with their eyes so you don’t have to worry to get them even on both sides!)
TIP: If the toy is for a child under the age of 3 it is safest to use a black felt circle or embroider a black circle instead of a CRAFT EYE. I have a blog post here with more tips on toy safety.
Eye Option 2 – BULGING (bit tricky!)
STEP 3a
Cut the holes in the FACE PIECES so they are about 4cm(1½inches) long.
STEP 3b
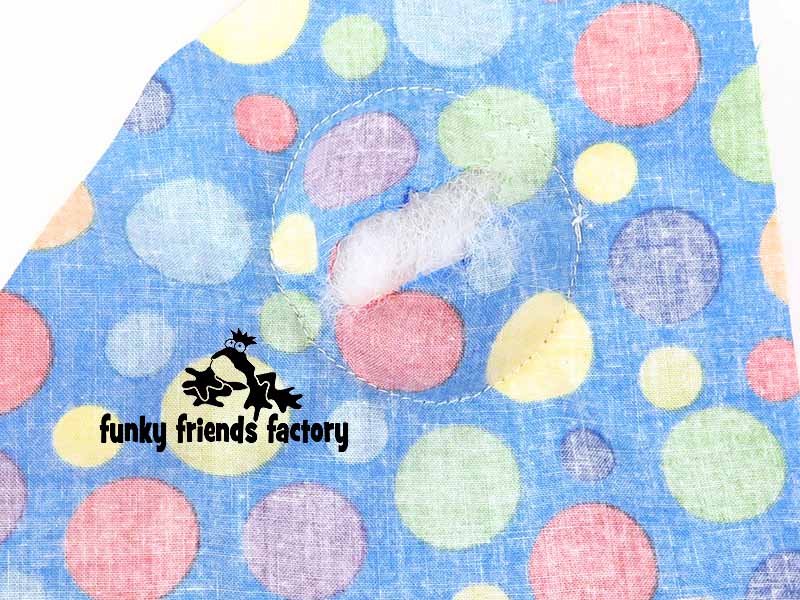
Push the shafts of the CRAFT EYES through the felt EYE PIECES ONLY from the front (right side). Secure them in place with their washers – this is tricky!
STEP 3c
Stuff the space between the felt EYE PIECES and FACE PIECES with toy stuffing.
STEP 3d
Sew the holes in the FACE PIECES shut by hand. (No need to be neat – this won’t be seen as it’s inside the toy!)
FACE & FOREHEAD:
STEP 4
Sew one of the FACE PIECES to the FOREHEAD from A – B, matching the star pattern marking.
(***If you match the stars
then you can’t get the forehead
sewn in UPSIDE DOWN!!!!!)
STEP 5
Sew the other FACE PIECE to the FOREHEAD from A – B, matching the star.
TIP: You can already see your cute critter coming to life! (Check that the FOREHEAD is the right way up – widest at the top/back)
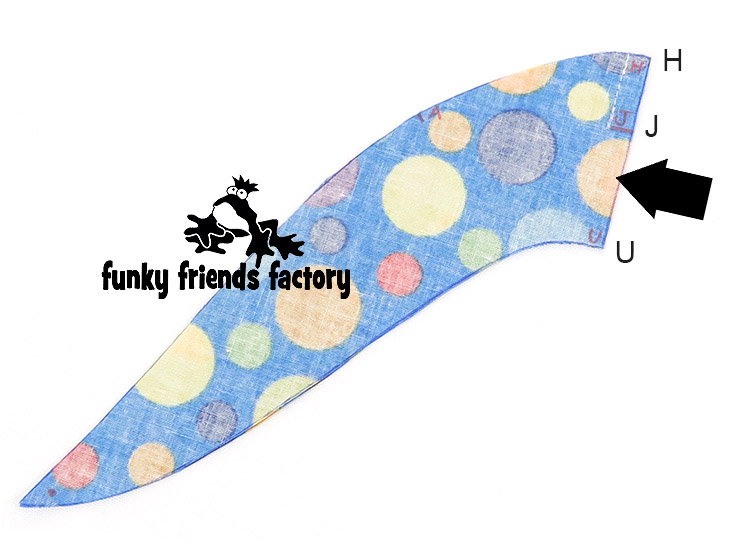
BACK HEAD:
STEP 6
Sew the BACK HEAD PIECES together from H – J (Do NOT sew them together between J and U, or it will be hard to sew the neck seam later).
STEP 7
Sew the BACK HEAD PIECES to the FOREHEAD & FACE PIECES from L – A – H – A – L. .
TIP: Make sure to start and stop at the dot pattern marking (at L, not the edge of the fabric).
*** STOP! PLEASE NOTE:
The Pattern Testers got confused with me calling “the bottom part of the mouth” the CHIN PIECE. So I have change the CHIN PIECE to the PALATE PIECE. This is why I have got CHIN in brackets!!!
PALATE (CHIN) & TONGUE:
STEP 8
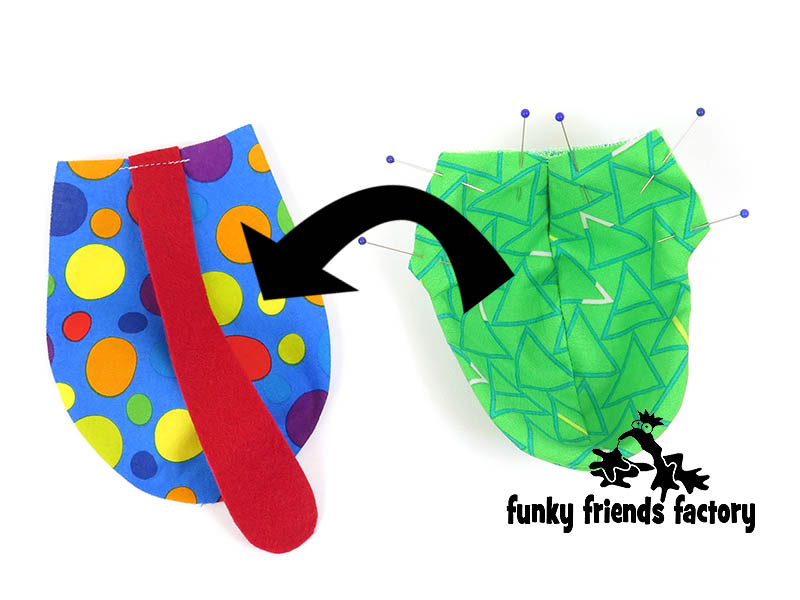
Fold the PALATE(CHIN) PIECE (with the fabric right side together) at G and sew the PALATE(CHIN) PIECE from F – G.
STEP 9a
Cut the TONGUE PIECE from felt and pin it to the right side of the fabric of the PALATE(CHIN) PIECE, matching point F.
STEP 9b
Sew the TONGUE PIECE to the PALATE(CHIN) PIECE.
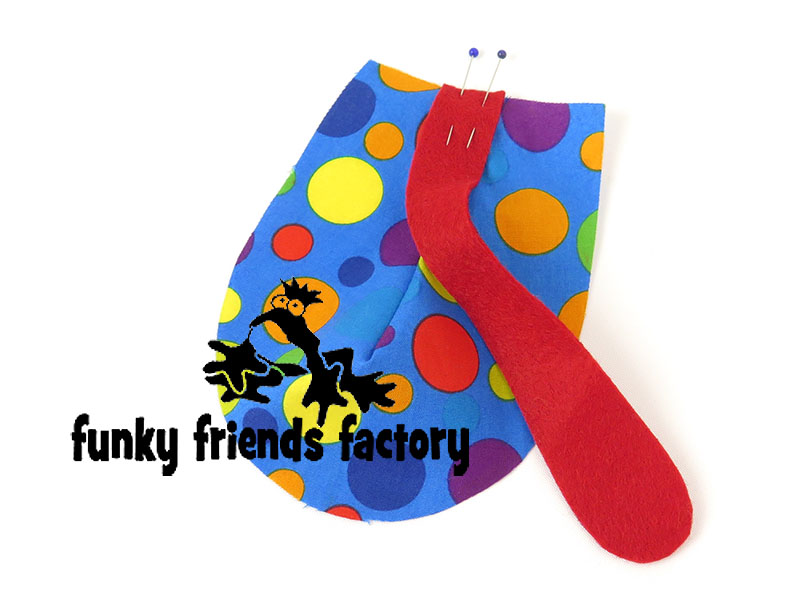
LIP:
STEP 10a
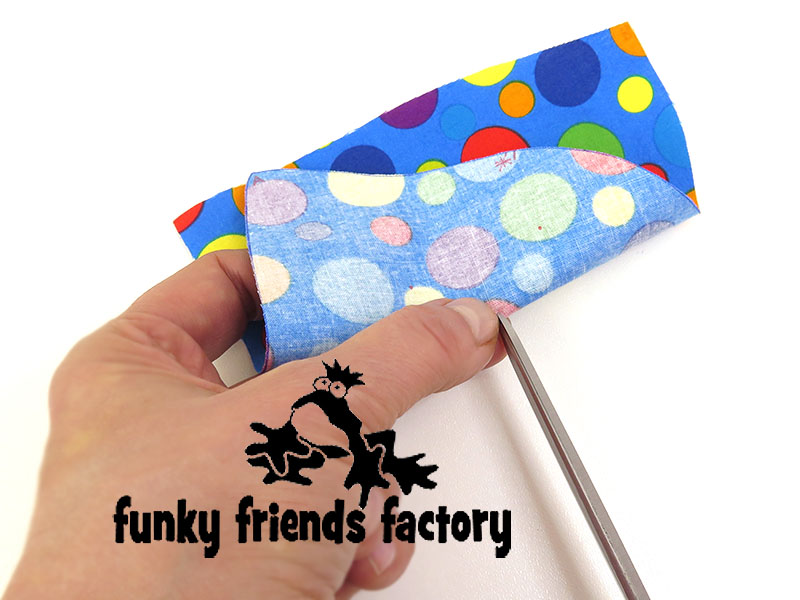
Sew the LIP PIECES together in pairs, along the middle seam, from F – D.
TIP: Pleeeeeeez transfer the letters to your fabric pieces. The way the open mouth is constructed can be confusing – and it’s very easy to get the pieces muddled if you don’t do this!
STEP 10b
Clip this seam really well, to help it turn nicely, as it is very curved.
STEP 11a
Open up the pairs of LIP PIECES and pin them together (with the right sides of the fabric together). Sew the LIP PIECES together, around the side seam, from K – D – K.
*** The LIPS are NOT stuffed. ***
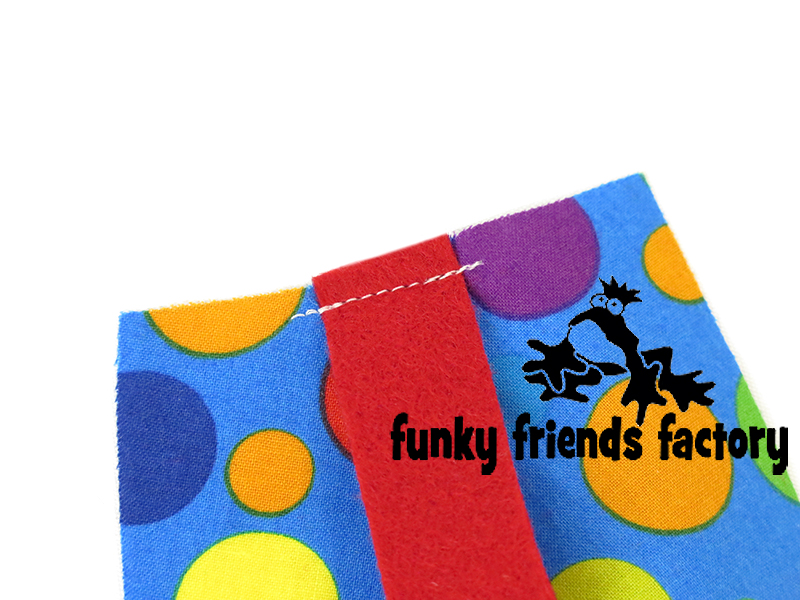
STEP 12
Clip the side seams well (especially where they are very curved at K) and turn the LIP PIECES right sides out and pin them closed along the neck and side seams.
TIP: I like to use a wooden chopstick to help turn the seams nicely. Run the end of the stick back and forth along the stitching inside until the seam is nice and smooth.
STEP 13a
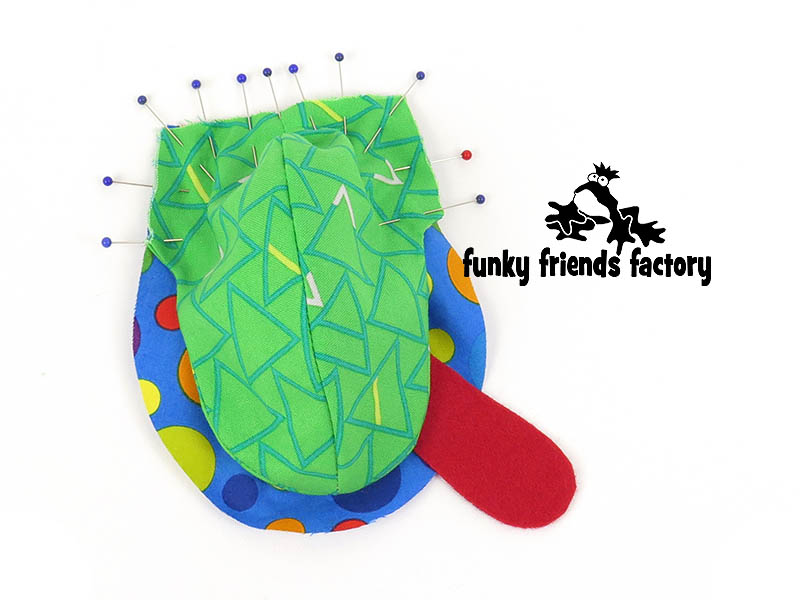
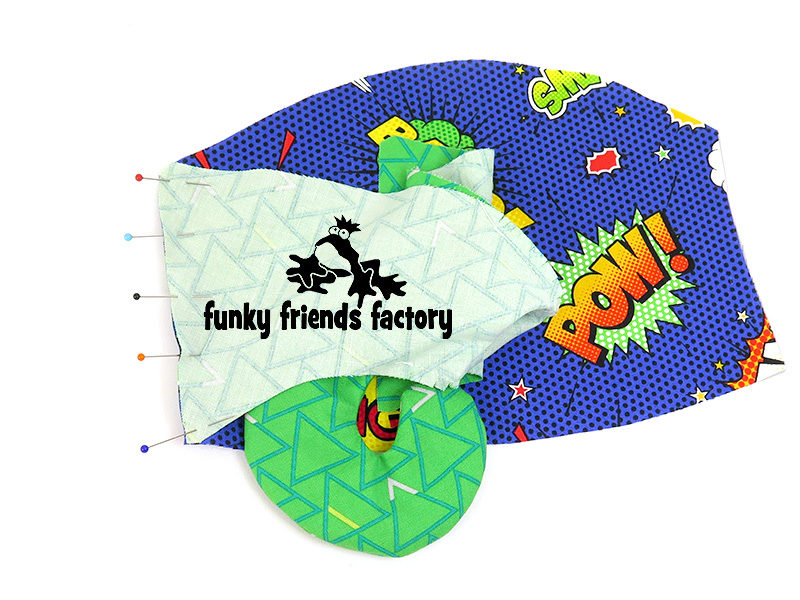
Pin the LIP PIECES to the PALATE(CHIN) PIECE (fabric right sides together)…
…with the TONGUE in between.
STEP 13c
Sew the LIP PIECES to the PALATE(CHIN) PIECE with a 3mm (⅛ inch) seam allowance to hold them together. Sew from K – C – F – C – K.
TIP: If you are using thick fabrics you can zig-zag this seam allowance to help compact the thickness of all 3 layers.
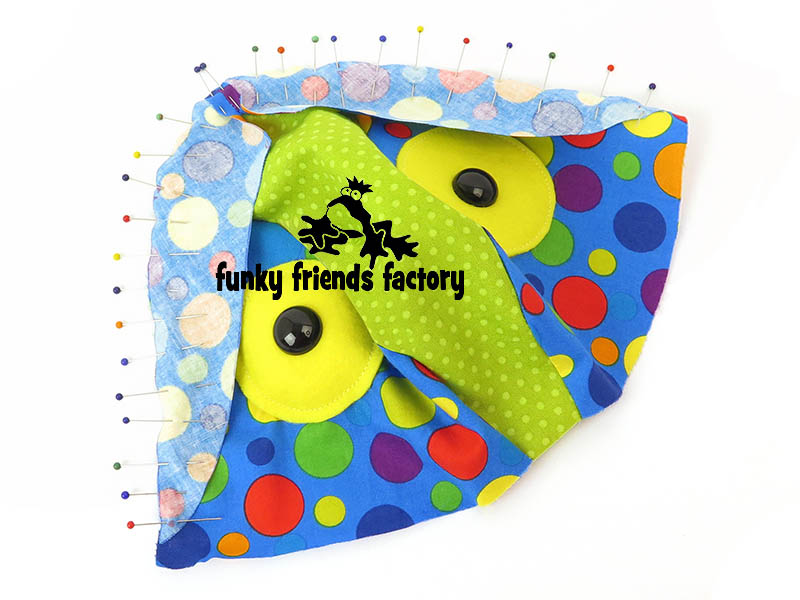
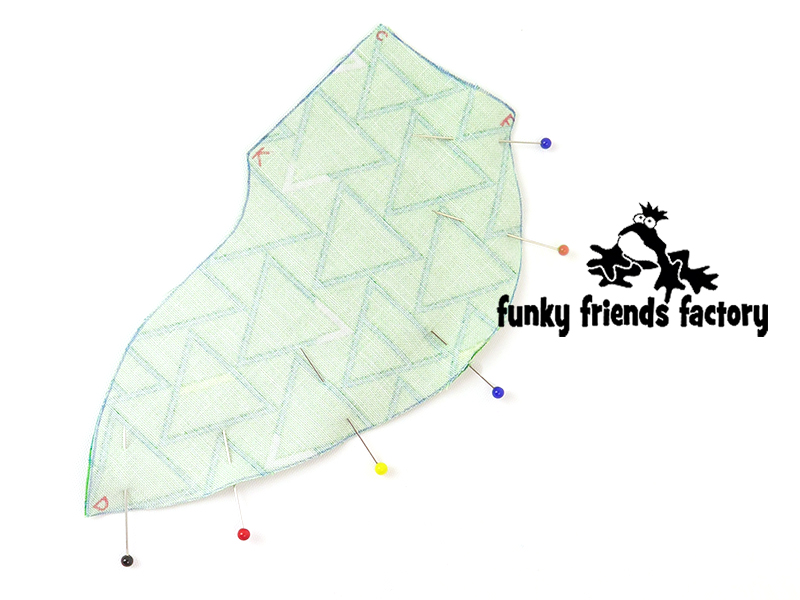
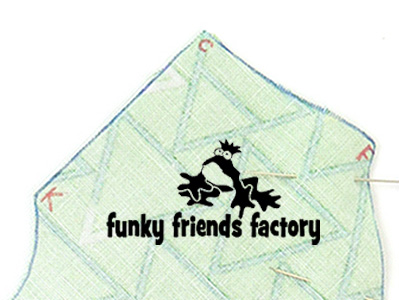
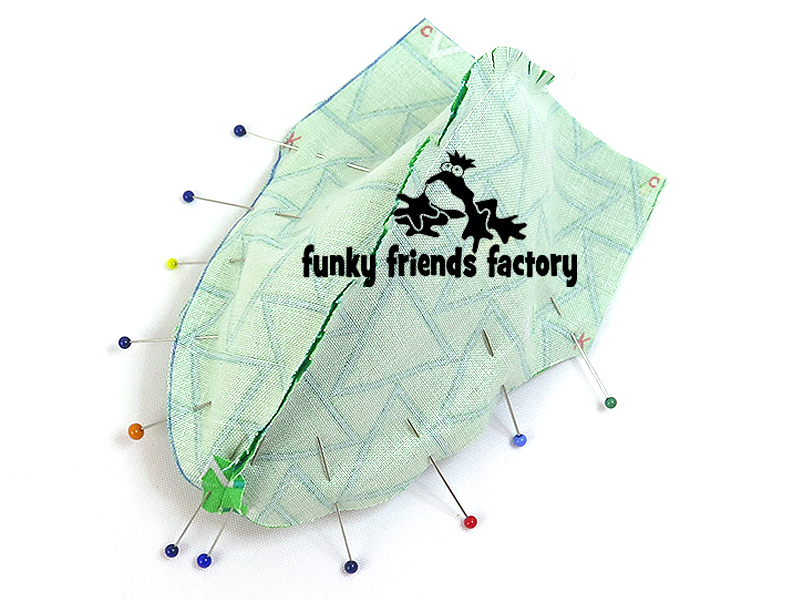
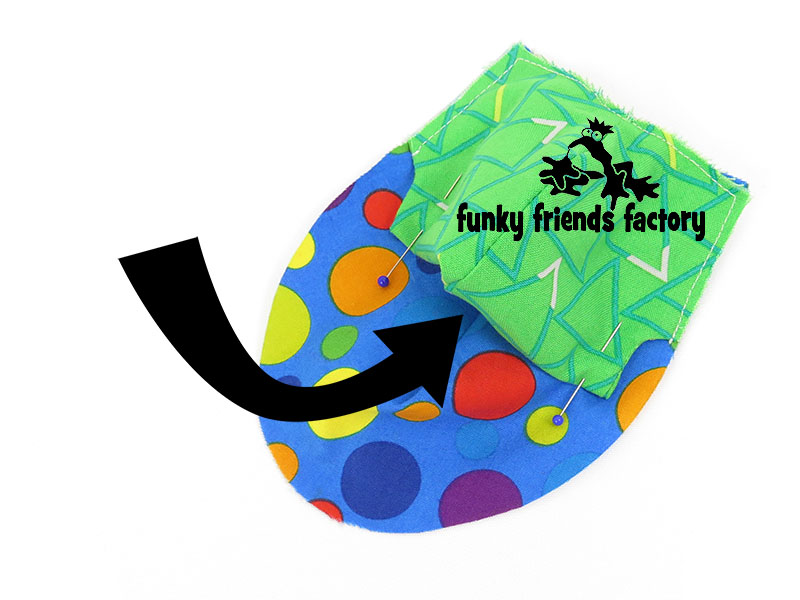
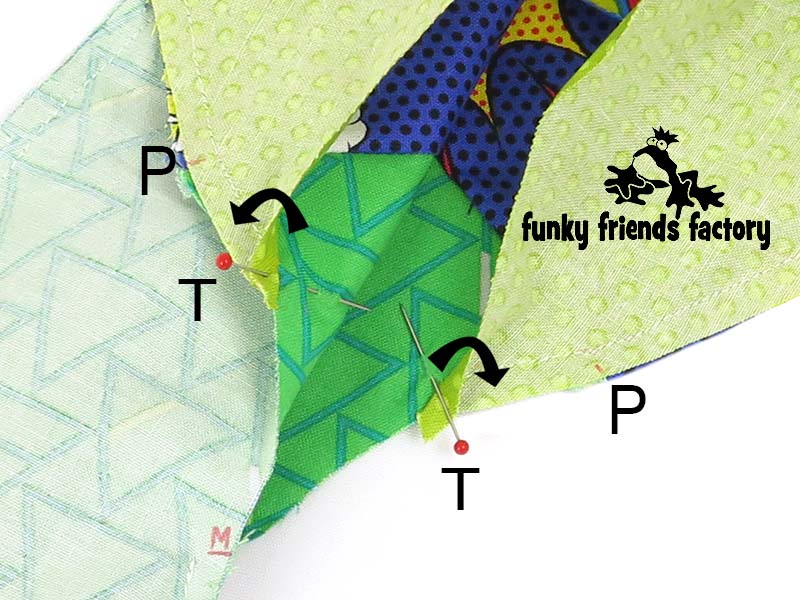
STEP 14a
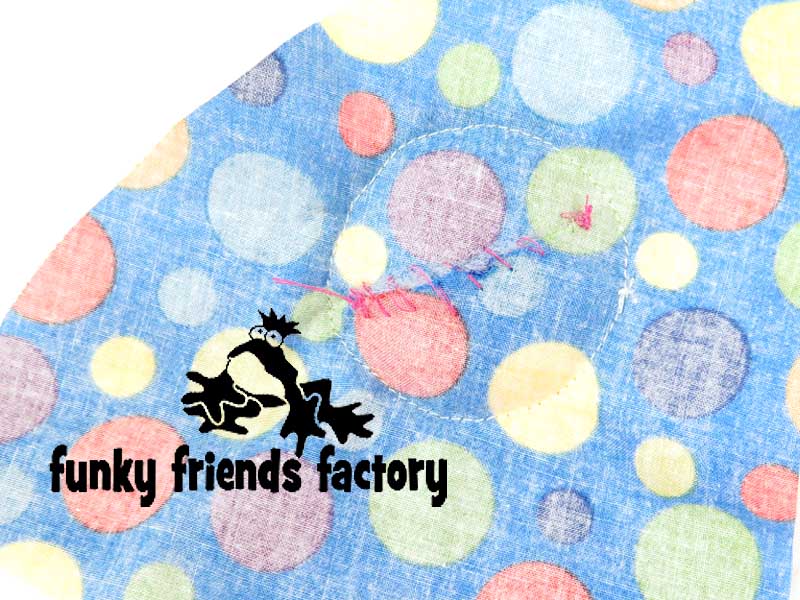
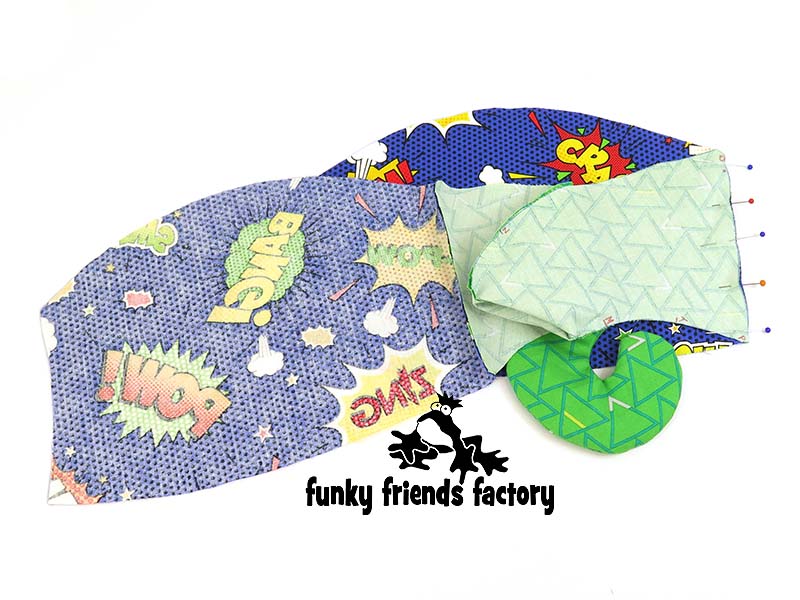
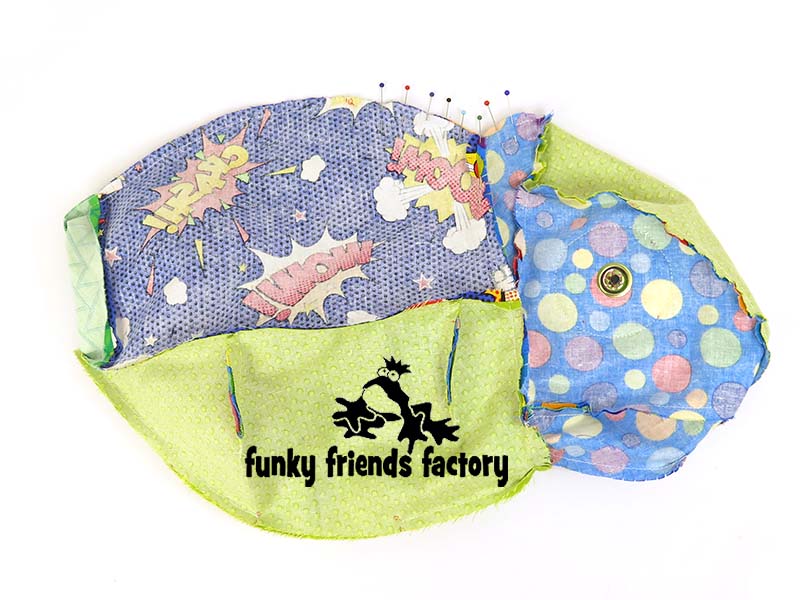
Pin the PALATE(CHIN) & LIP PIECES to the FACE & FOREHEAD PIECE.
TIP: I like to roll up the TONGUE and fold the LIP PIECES and pin them so they won’t get caught in this seam.
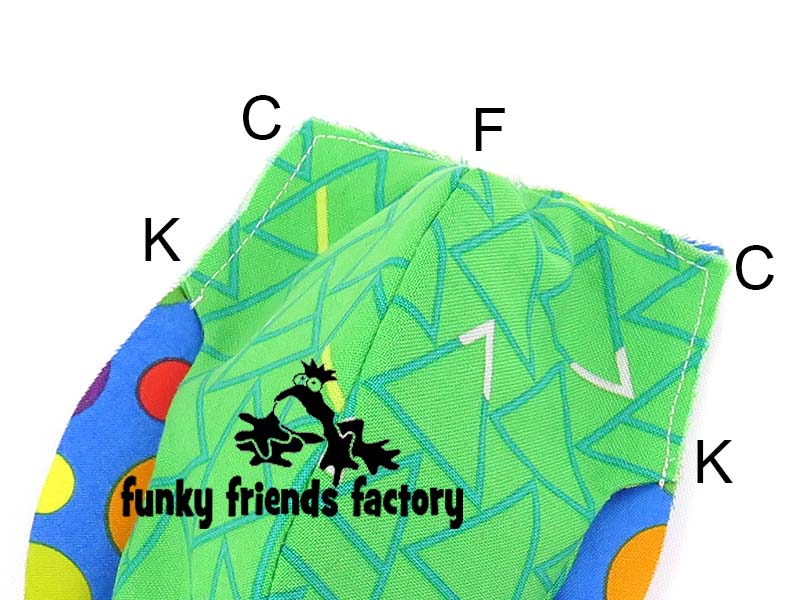
Here’s a pic of this seam once it’s been pinned.
STEP 14b
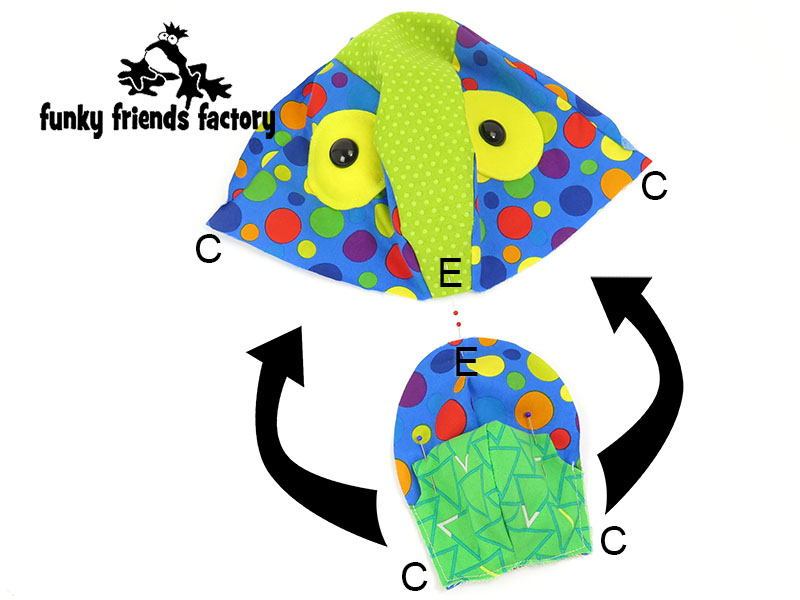
Sew the PALATE(CHIN) & LIP PIECES to the FACE & FOREHEAD PIECE from C – E – C. (Check that the LIP PIECES are in between the PALATE(CHIN) PIECE and the FACE PIECES before you sew them together!)
STEP 14c
Turn the head right sides out AND remove the pins holding the LIPS flat!!!!
TAIL and BACK:
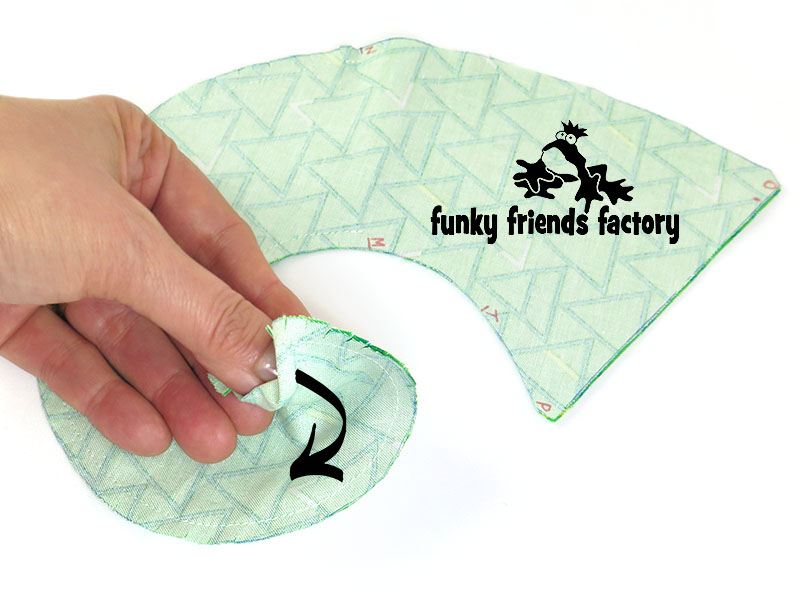
STEP 15a
Sew the TAIL PIECES from M – N (around the ‘tip’ of the TAIL). Clip the curved seams VERY WELL.
STEP 15b
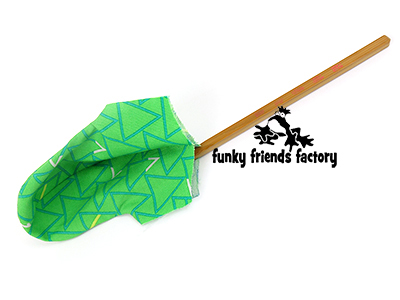
Turn the’tip’ of the TAIL right sides out NOW and stuff a little bit of stuffing in the ‘tip’. (Why? It is so much easier to turn now than after you have sewn the body closed!)
TIP: I pull the 2 pieces apart and push the ‘tip’ of the TAIL PIECES back into the tail pieces with my thumb

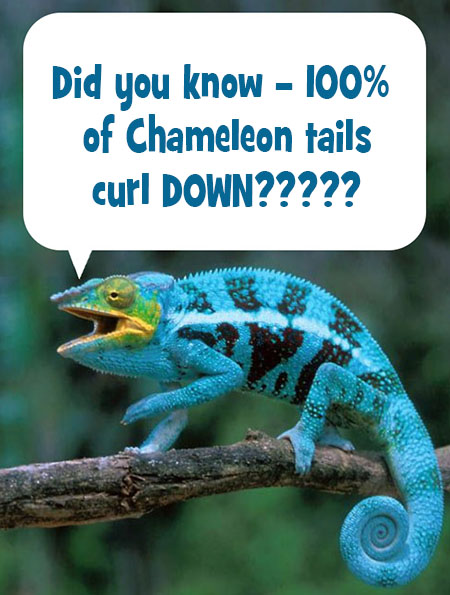
STEP 16
Sew the TAIL PIECES to the BACK PIECES from O – P, matching the dot pattern marking.
TIP: Pleeeeeeez transfer the letters to your fabric pieces. You don’t want to get the TAIL the wrong way up – ALL CHAMELEONS TAIL CURL DOWN, not UP!!!
Pin and sew one side first…
Then pin and sew the other TAIL PIECE to the other BACK PIECE.
STEP 17
Sew the TAIL & BACK PIECES closed along the top. Sew from N – O on the TAIL PIECES and continue sewing from O – Q on the BACK PIECES.

LEGS
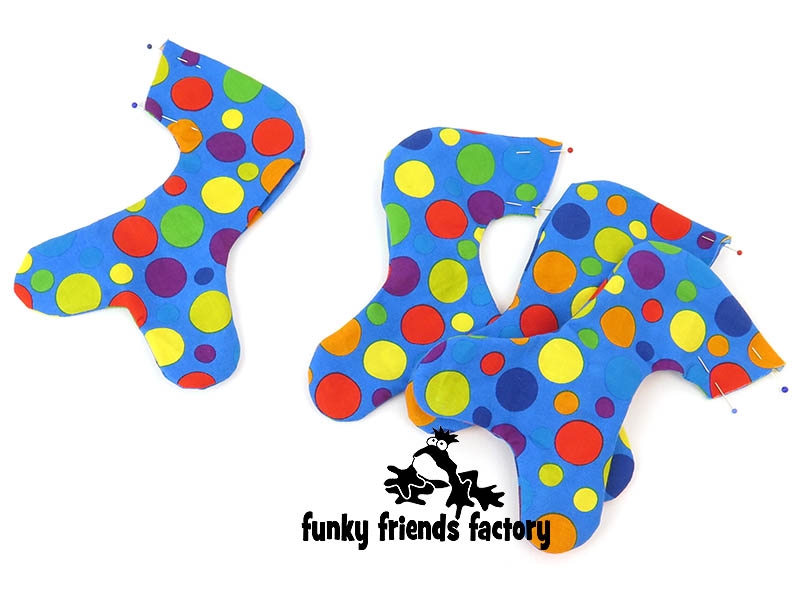
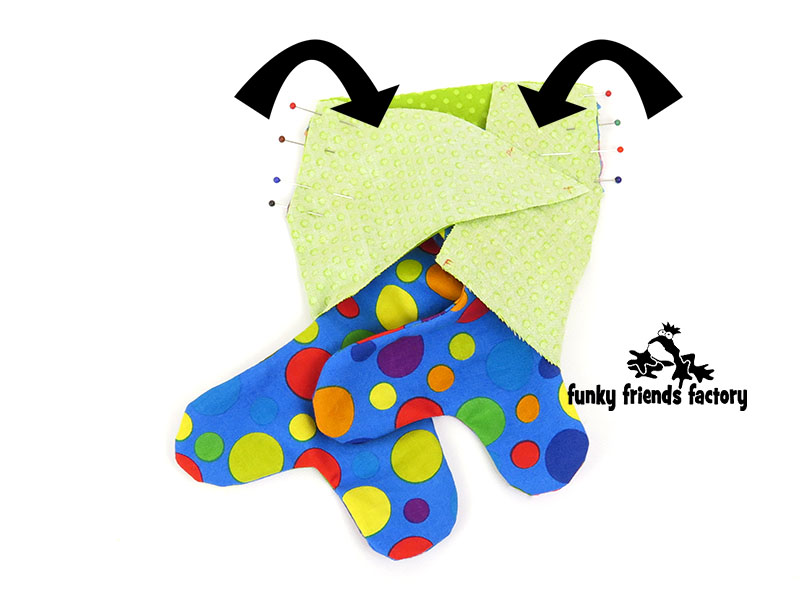
STEP 18a
Sew the LEG PIECES together in pairs remembering to leave a gap for stuffing, and leaving the straight edge open at the top.
STEP 18b
Clip the seams of the LEG PIECES really well…
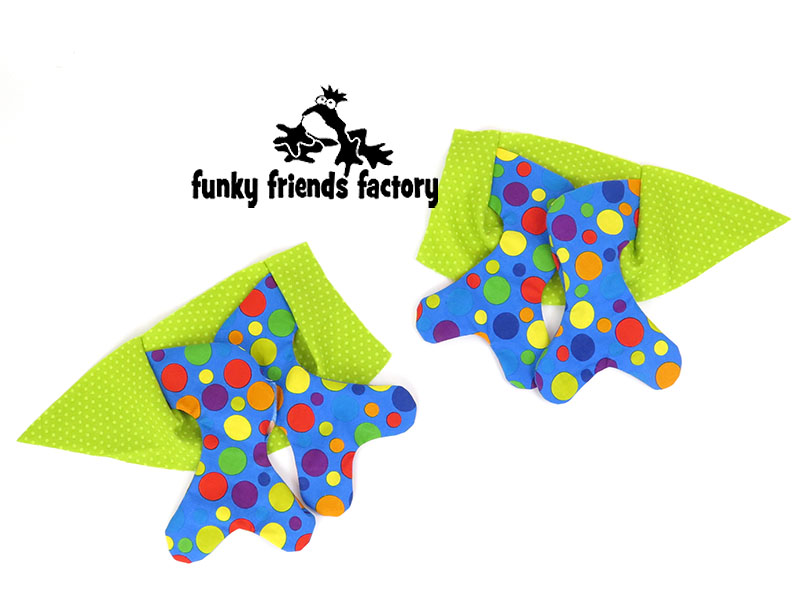
STEP 18c
Turn the legs right sides out.
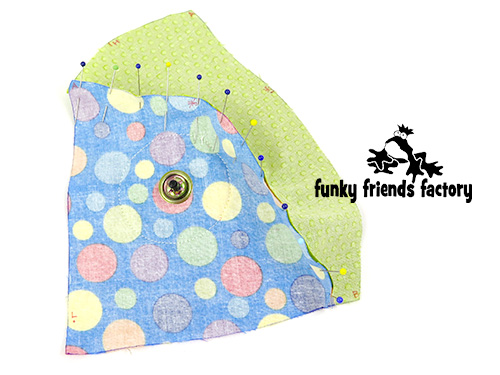
TUMMY:
STEP 19
Pin the LEGS to the TUMMY PIECES using the pattern markings and the LEG DIAGRAM to guide you.
LOOK – the knees are together – Chameleons are knock-kneed!!!
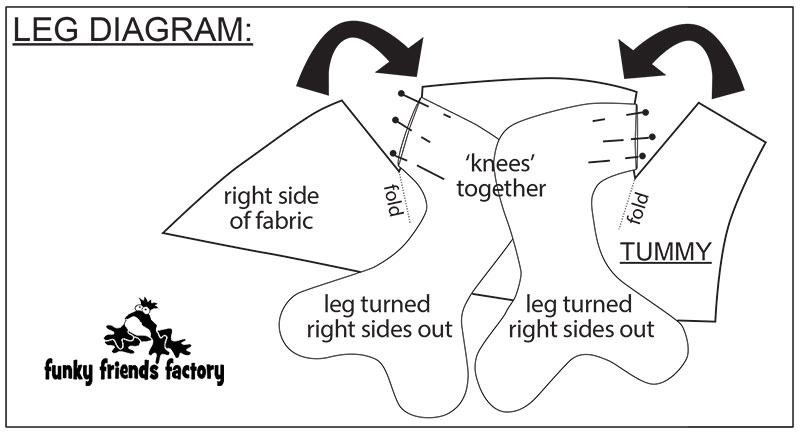
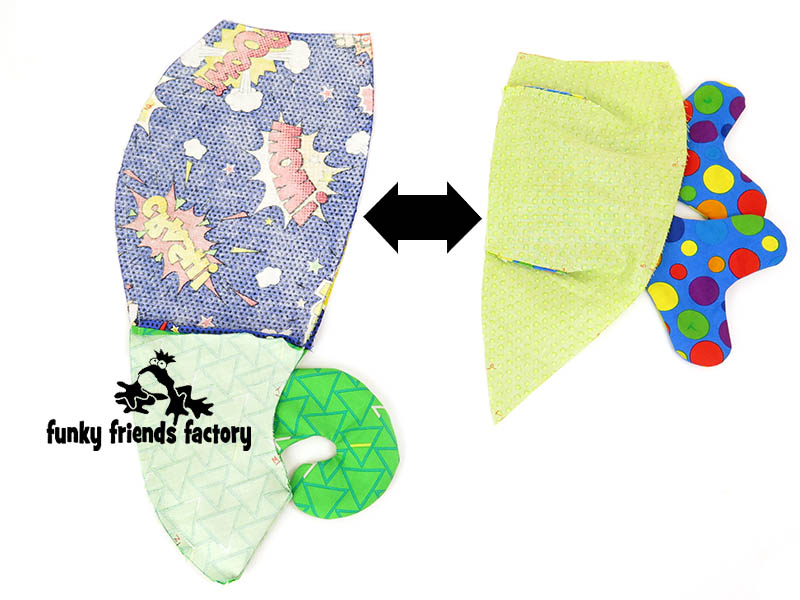
STEP 20a
Fold the TUMMY PIECES, with the fabric right sides together and pin the leg darts closed with the LEGS in between.
STEP 20b
Sew the leg darts closed with the LEGS in between.
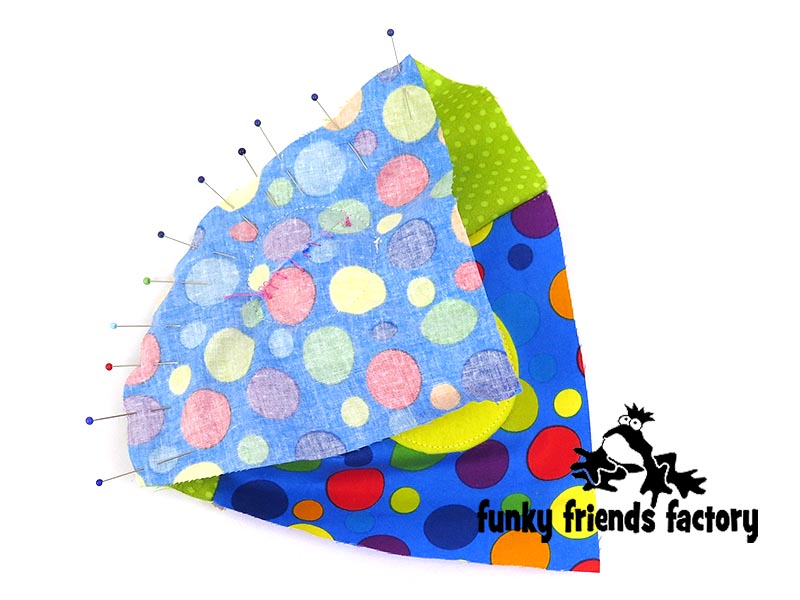
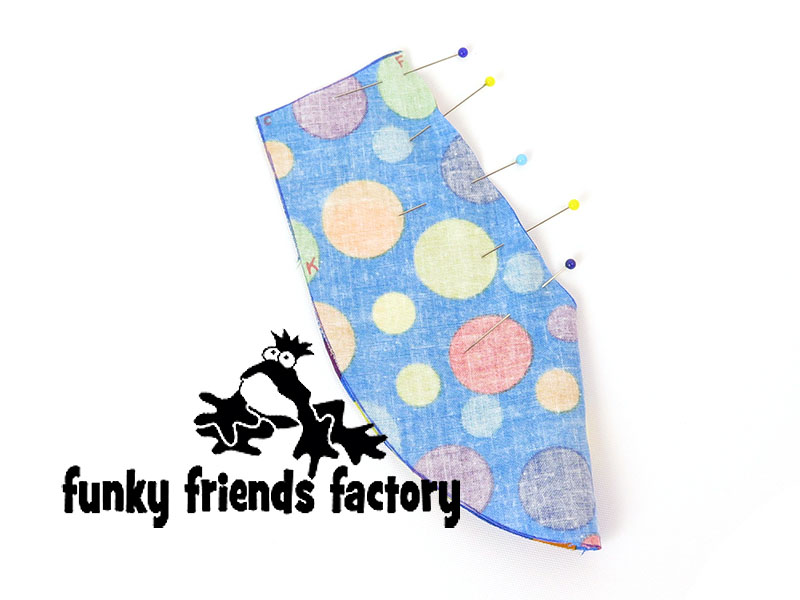
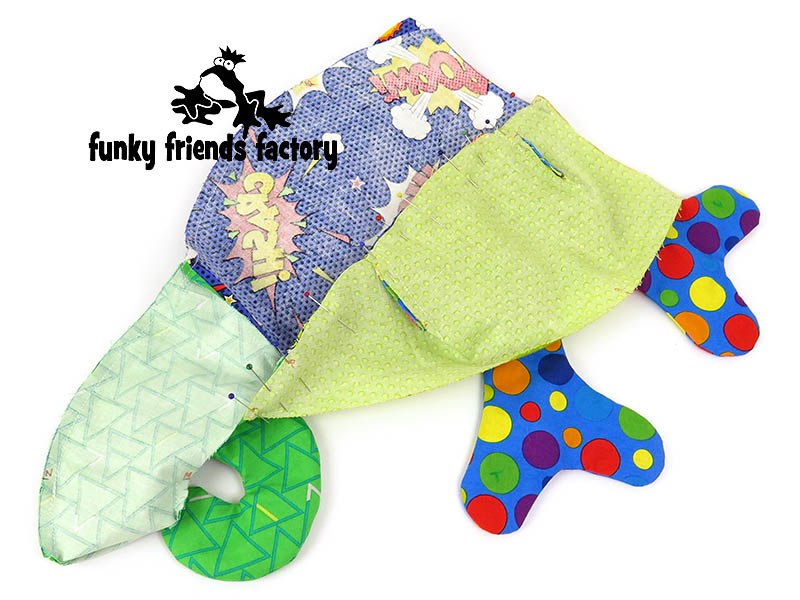
STEP 21a (I have taken LOTS of photos of this step!)
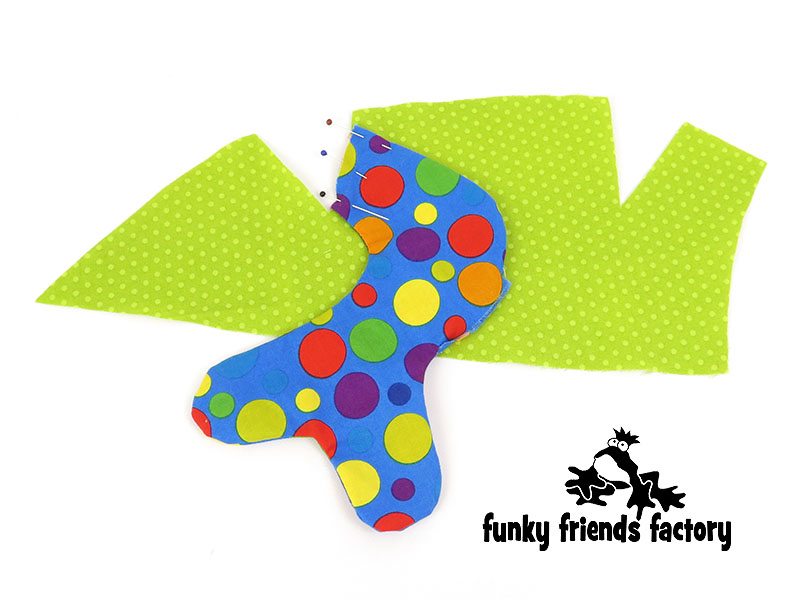
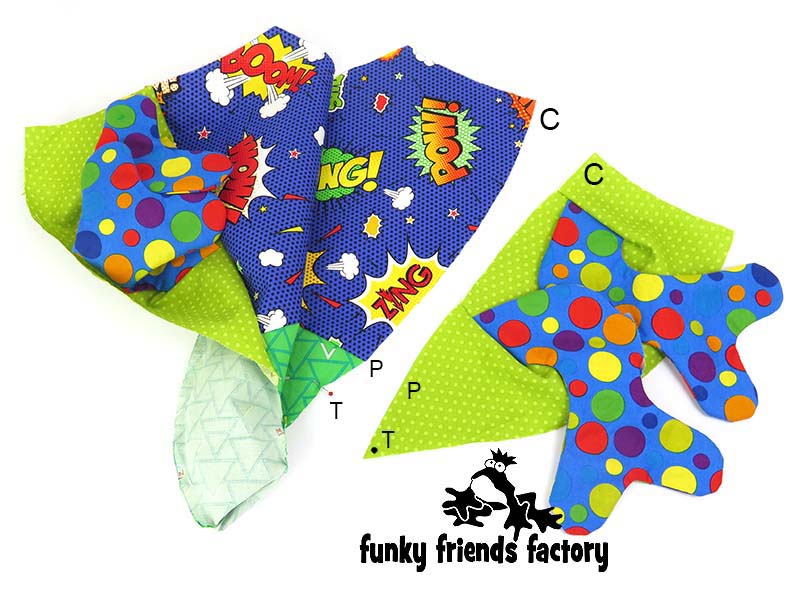
Sew the TUMMY & LEG PIECES to the BACK & TAIL PIECES from C – P – T.
Here you can see me doing 1 side first…
Here you can see the pieces pinned…
TIP: Make sure to stop at the dot pattern marking at T (not the edge of the fabric).
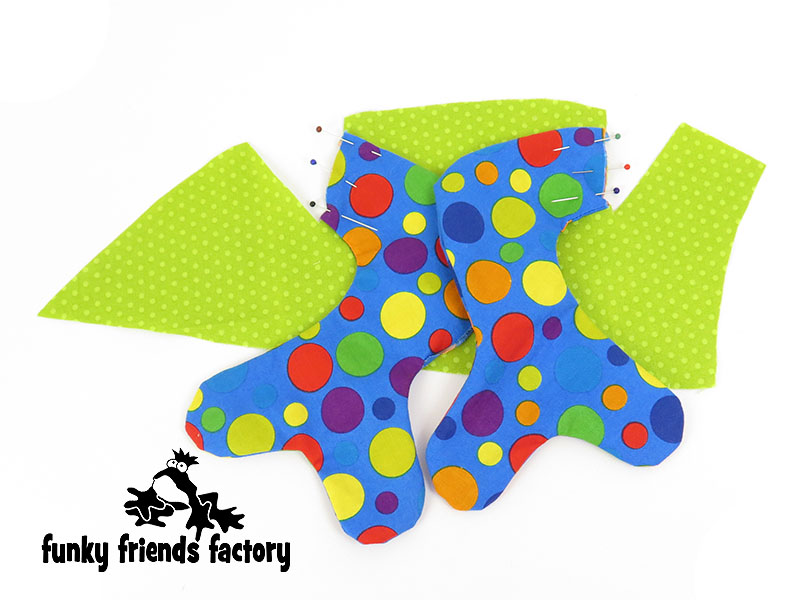
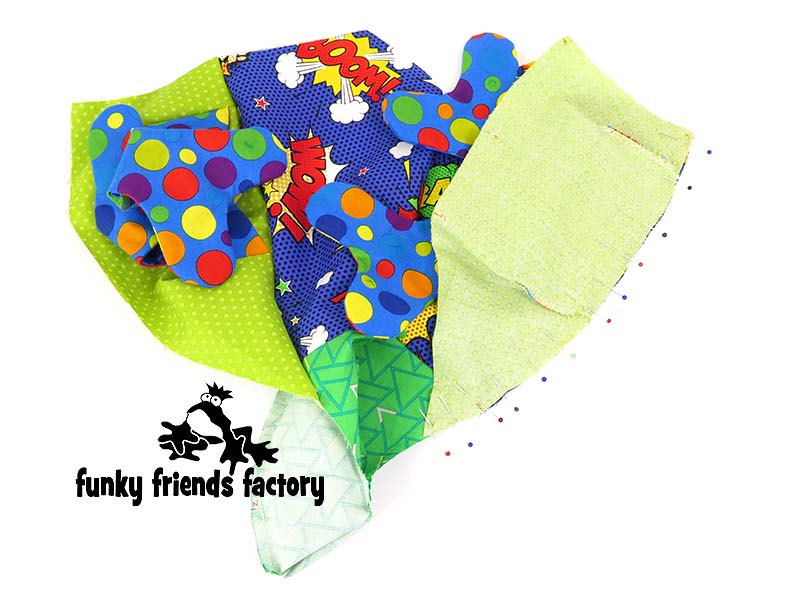
STEP 21b
Here you can see me doing the other side…
Pin and sew the other TUMMY & LEG PIECES to the other side (to the BACK & TAIL PIECES) from C – P – T.
Here you can see the pieces pinned…
Here you can see the pieces sewn together.
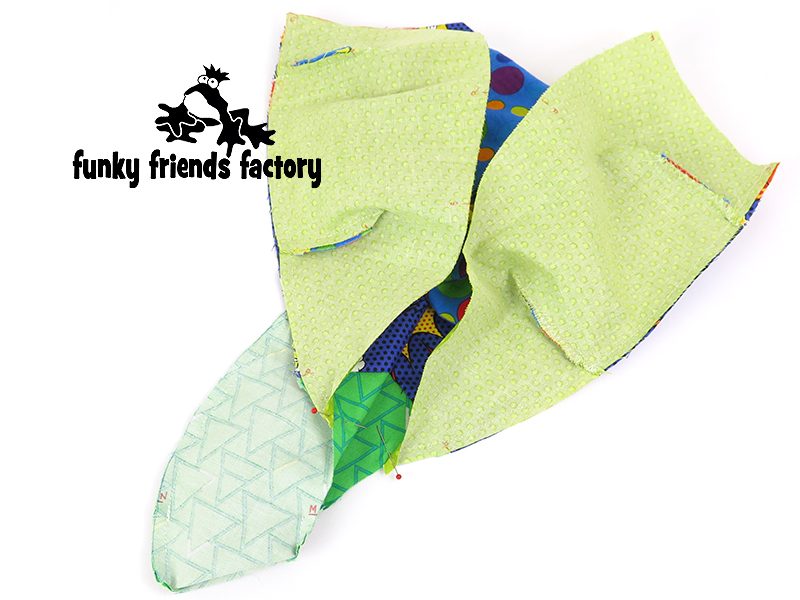
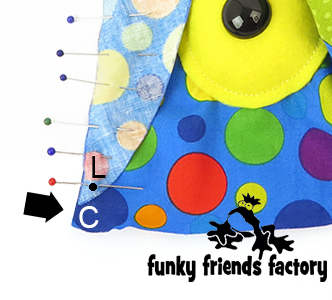
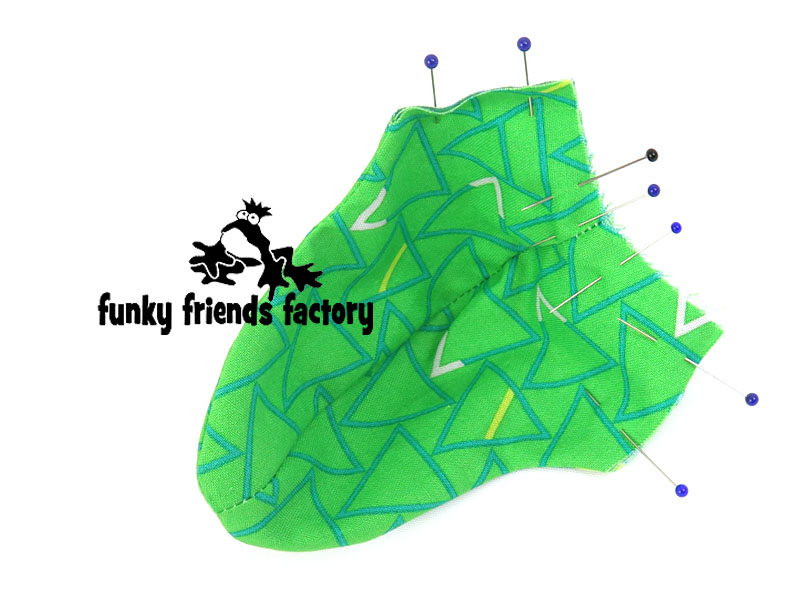
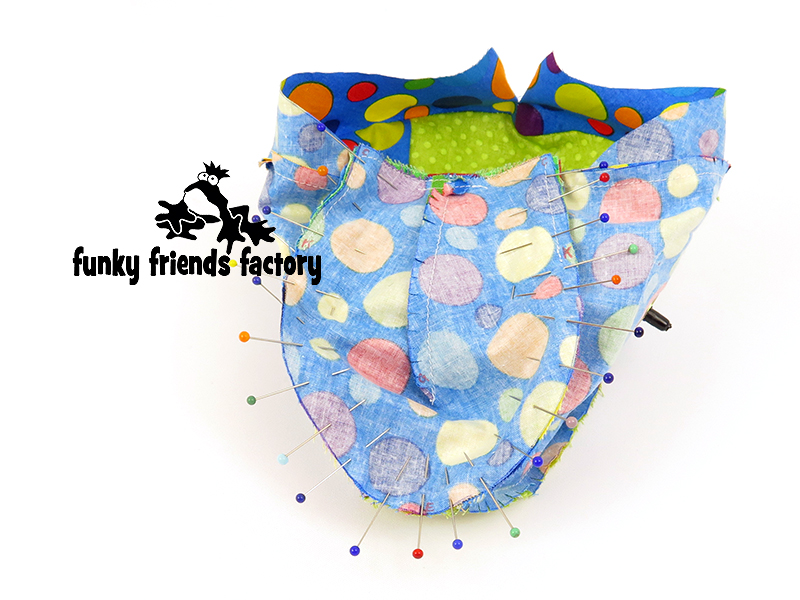
STEP 22
Fold the TUMMY PIECES out at T as shown on the pattern markings and pin them flat (wrong sides together).
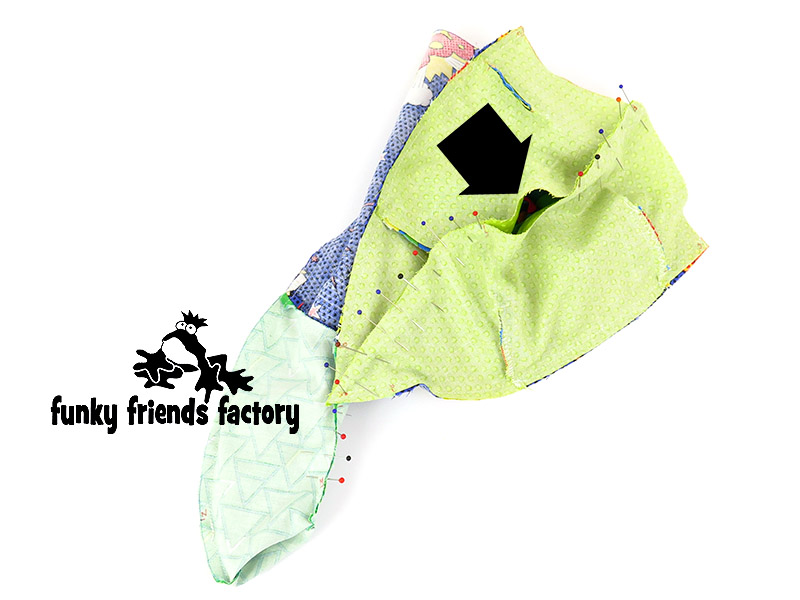
STEP 23
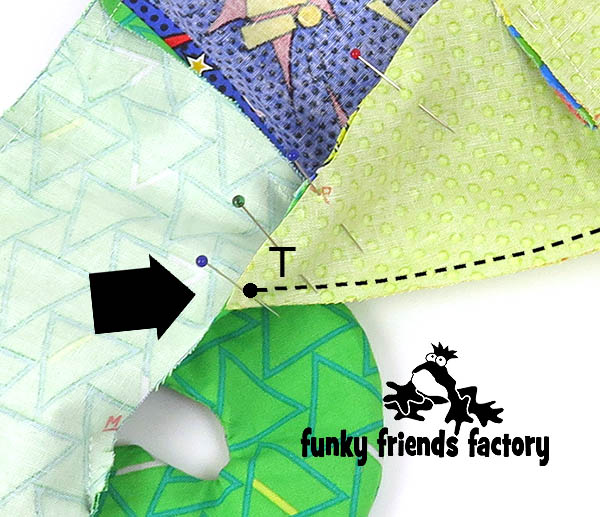
Sew the TAIL and TUMMY PIECES closed. Sew from M – T (on the TAIL) and from T – F on the TUMMY, leaving the gap open for stuffing between R and S (see the black arrow in the photo below) – don’t forget this or you won’t be able to stuff your chameleon!
NECK SEAM:
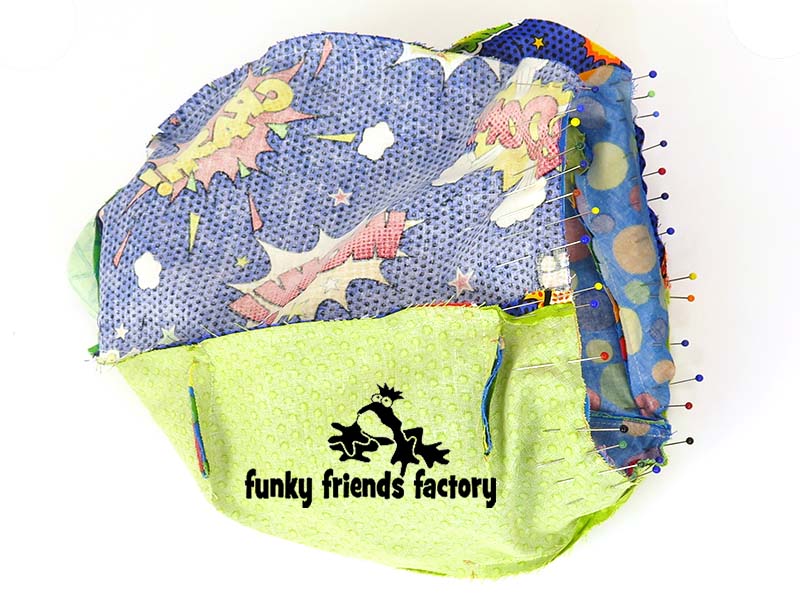
STEP 24
Pin the (PALATE (CHIN), LIP & BACK HEAD PIECES to the BACK & TUMMY PIECES at the neck seam. Sew the neck seam from U – C – F – C – U.
TIP: The easiest way to do this is to turn the head right sides out and position it inside the BACK & TUMMY PIECES so you can pin the pieces with the fabric right sides together.
STEP 25
Pull the head back out of the body. Pin and sew the Chameleon closed at the back from J – U on the BACK HEAD PIECES and from U – Q, on the BACK PIECES.
ASSEMBLY:
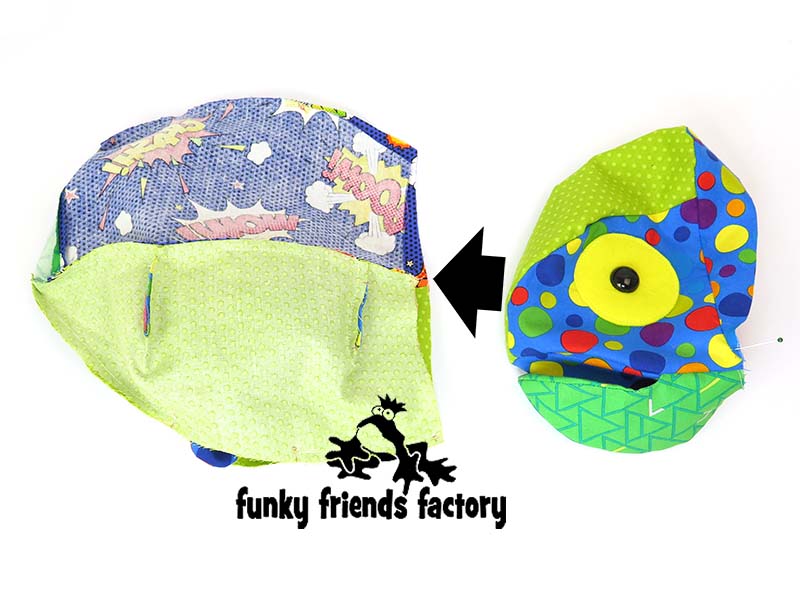
STEP 26
Turn the Chameleon right sides out through the stuffing gap.
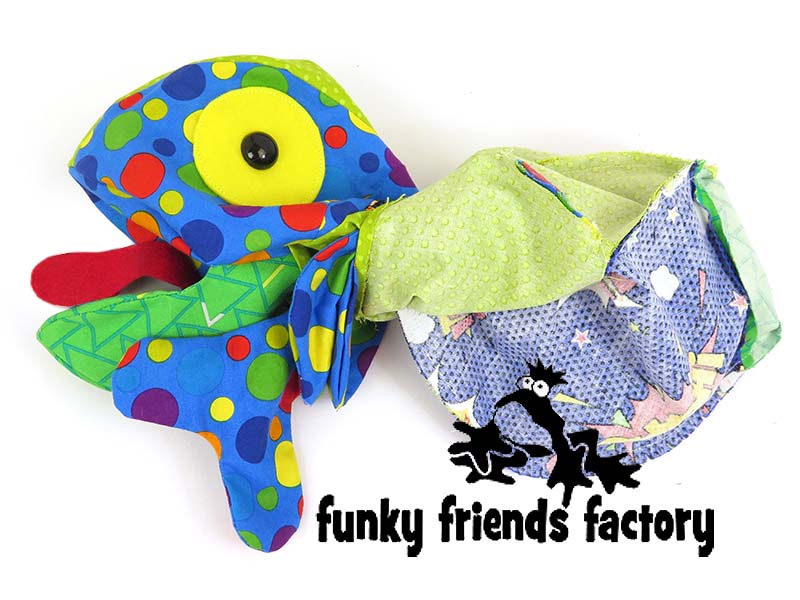
STEP 27a
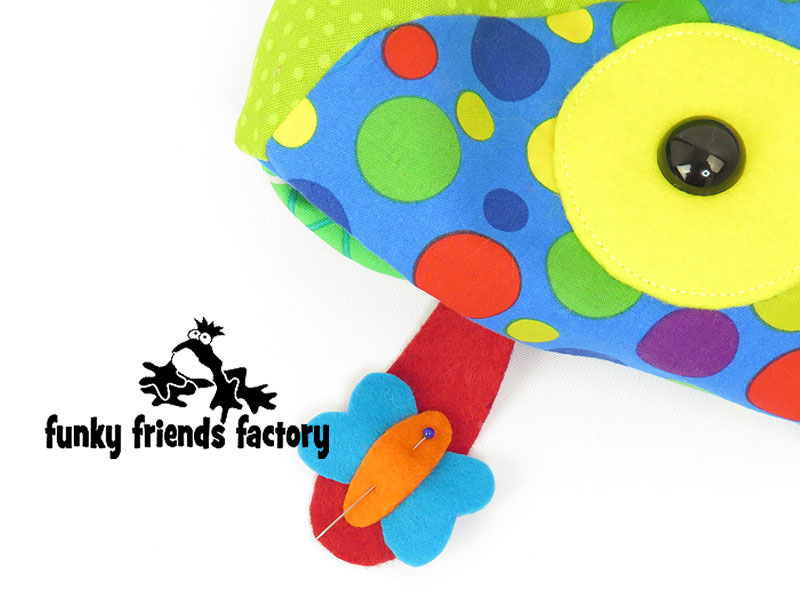
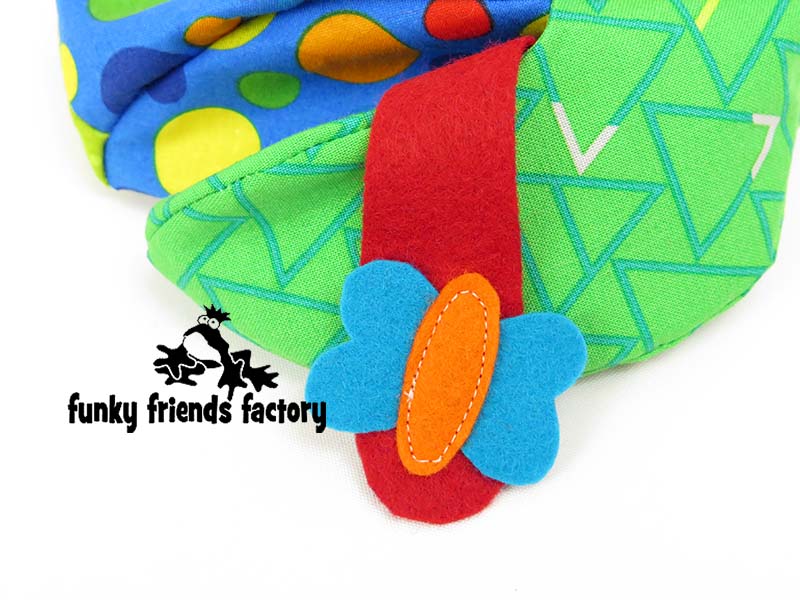
Cut the FOOD PIECES from felt. (The SPOT goes on top of the FLOWER and the BUG goes on top of the WINGS and EXACTLY where you place them on the TONGUE depends on your Chameleon’s aim!)
STEP 27b
Sew the FOOD PIECES onto the ‘top’ side of the TONGUE.
TIP: I used white thread so you could see the stitches. I recommend using a thread that matches the BUG and TONGUE piece more closely!
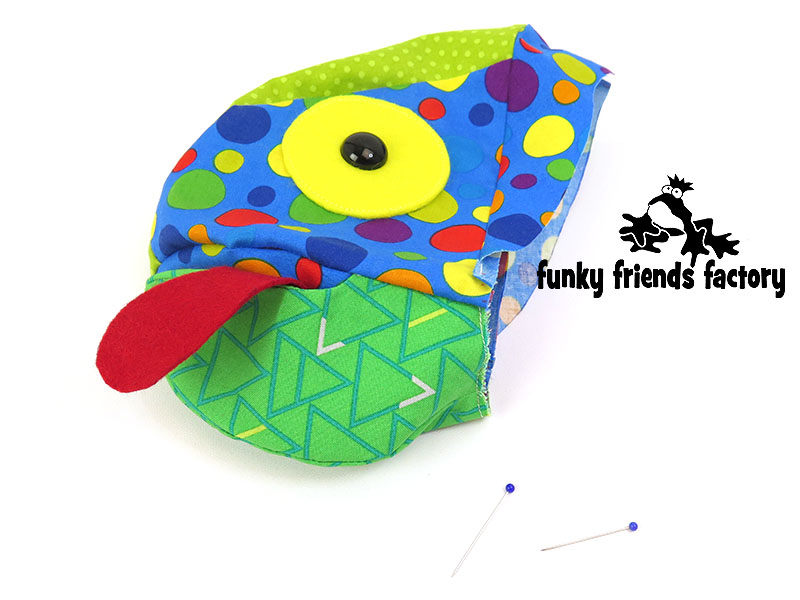
STEP 28
Stuff the rest of the tail and the head very firmly (especially the top of the head). I find a child’s paintbrush is a great stuffing tool to reach right to the ‘tip’ of the tail!. Stuff the legs. Sew the stuffing gaps closed with a ladder stitch.

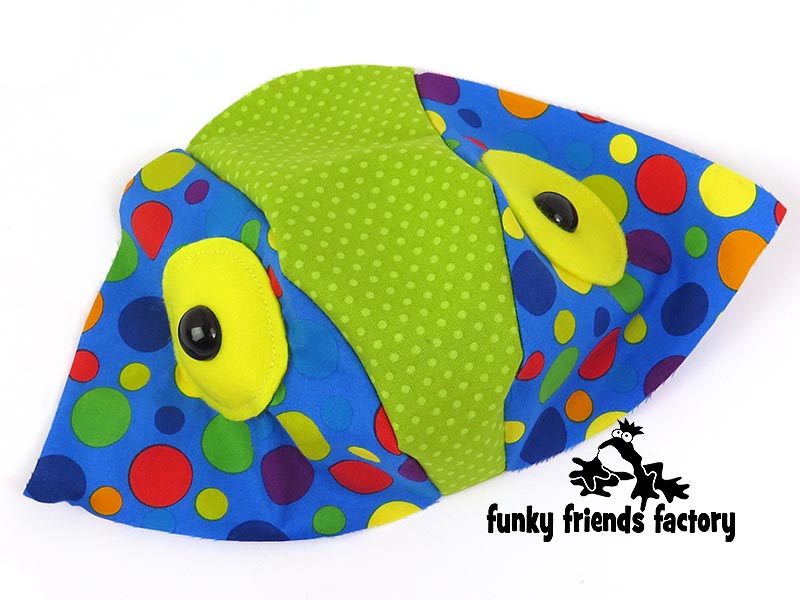
Your Chameleon is ready to LOVE!
Come join the fun on Facebook!
![]()
When you’ve made your own toy chameleon – come and post some photos of your NEW Funky Friend for me to see on my Funky Friends Factory Facebook page.
You could WIN a FREE PATTERN in the MAKER OF THE MONTH Pattern Giveaway!
I can’t wait to see the Funky Friends you sew!

bye for now,
Pauline
![]()
