
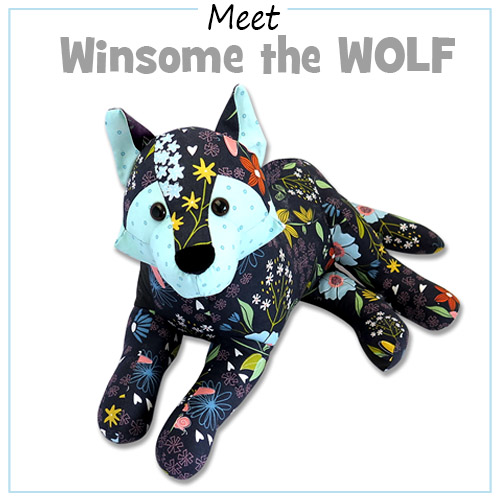
I made this photo tutorial so you can see how to sew my Winsome Wolf sewing pattern.
Scroll down for
step-by-step photos ~>
*** PLEASE NOTE – this is ONLY a PHOTO TUTORIAL ***
The FULL PATTERN IS NOT included here.
It is NOT A FREE PATTERN.I have made this photo tutorial so people who have purchased the pattern can SEE how to sew a wolf toy (I wanted to explain this so you are not disappointed if you have found this page via a search engine and not from the link in my Winsome Wolf sewing pattern!)
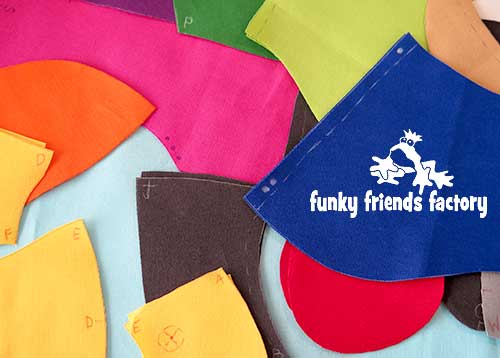
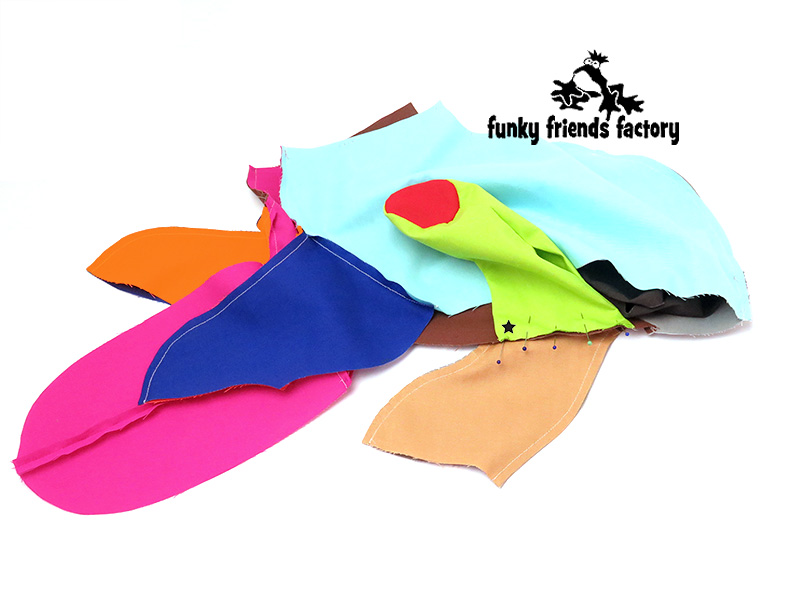
First choose some fabric
You can sew Winsome Wolf from most fabrics AND you can use any colour!
Before you get started…
SPECIAL NOTICE for
***the WOLF PATTERN***The Wolf pattern has lots of similar BUT slightly different pieces (because of the way it is lying with the back legs out to the side and it’s head tilted) which means there are LOTS of opportunities for muddling/mismatching the pieces so ~>
I did SOMETHING EXTRA for you!
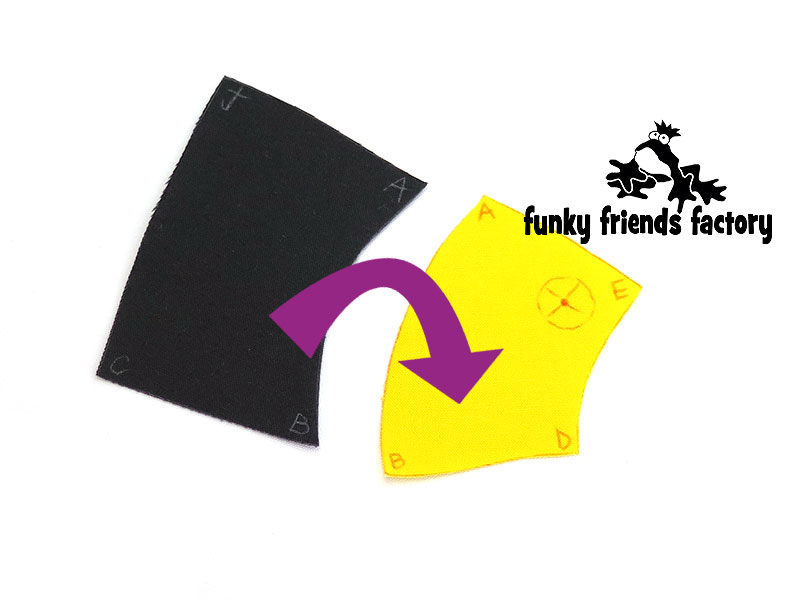
I have used LOTS of different coloured fabrics for this tutorial. This is to help you see how the pieces go together and to make sure you won’t get the pieces muddled up!
NOT just because I love rainbows! 🌈 😃
AND… I have a favour to ask you!
Pretty please!!!!!!
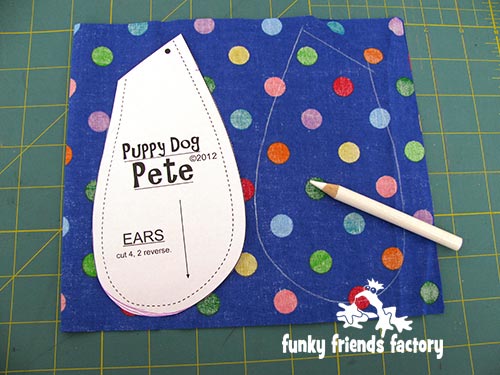
PLEASE transfer all of the letters and pattern markings onto your FABRIC pieces!
I know I always say to do this BUT this time, with this pattern – I think it’s REALLY IMPORTANT that you do it!!!!! It’s the EASIEST way to guarantee you’ll get it right first time, and won’t end up UNPICKING pieces…. (like I did a few times when designing her!)
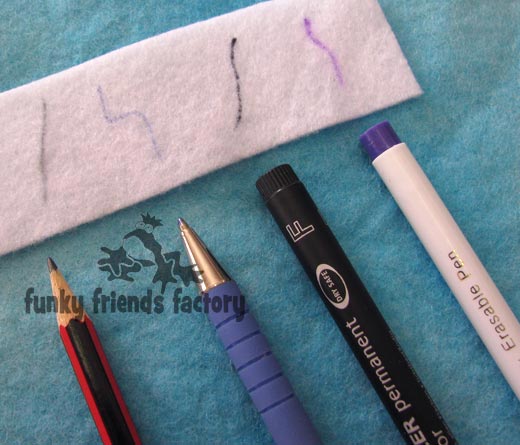
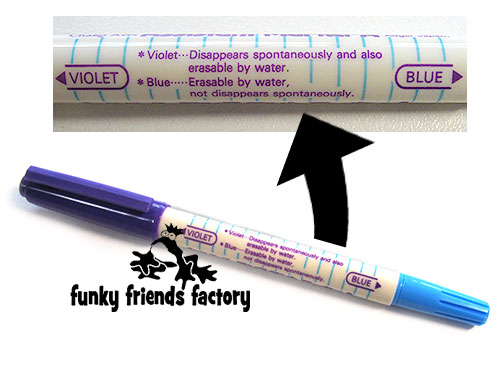
There are LOTS of options for writing the pattern markings on the fabric pieces – I use pencil, ball point pen, permanent markers and erasable fabric pens.
There are 2 types of erasable fabric pens – AIR ERASABLE (disappears after a little while) and WATER ERASABLE (you need to apply water to make this disappear). AIR ERASABLE fabric markers are used when you don’t want your markings to be visible forever. This is great for drawing on the facial features before you embroider them BUT not when you want to see the markings LATER while you’re sewing the toy – so use a WATER ERASABLE fabric pen for these pattern markings! (You don’t need to remove them as you won’t see them from the right side of the fabric!)
For dark fabrics I have used a white pencil crayon, a light coloured fabric chalk pen, and even a paint marker (which I took from my husband’s tool box!!!!).
Right, let’s get sewing!
FACE & EARS:
STEP 1
Sew the SIDE HEAD PIECES to the EYE PATCH PIECES from A – B.
STEP 2a
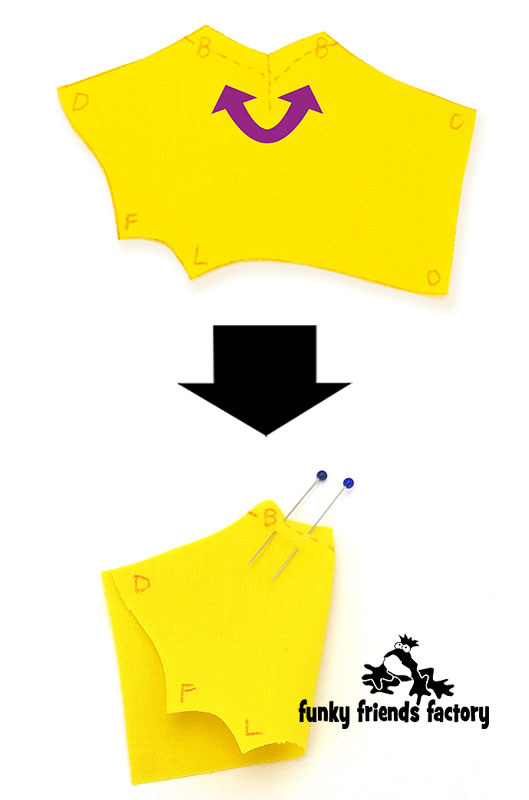
Fold the CHEEK PIECES with the fabric right side together and sew the darts closed. (1 dart in each piece, 2 all up)
STEP 2b
Sew the CHEEK PIECES to the SIDE HEAD & EYE PATCH PIECES from C – D.
Here you can see the pieces PINNED.
AND
Here you can see them SEWN.
STEP 2c
Clip the seams well, especially at the darts.
TIP: I like to use my wooden chopstick to turn the darts well – they should be nice and pointy! Make sure you don’t push too hard and burst the seam.
STEP 3a
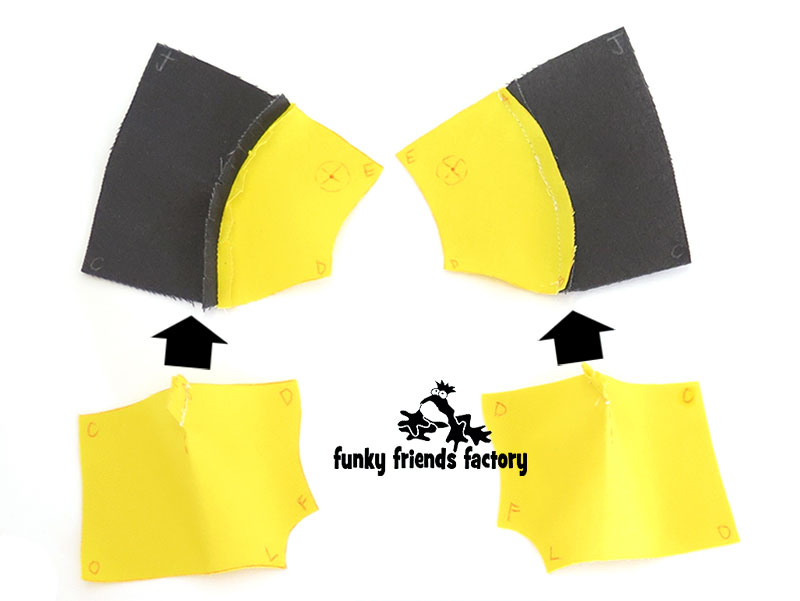
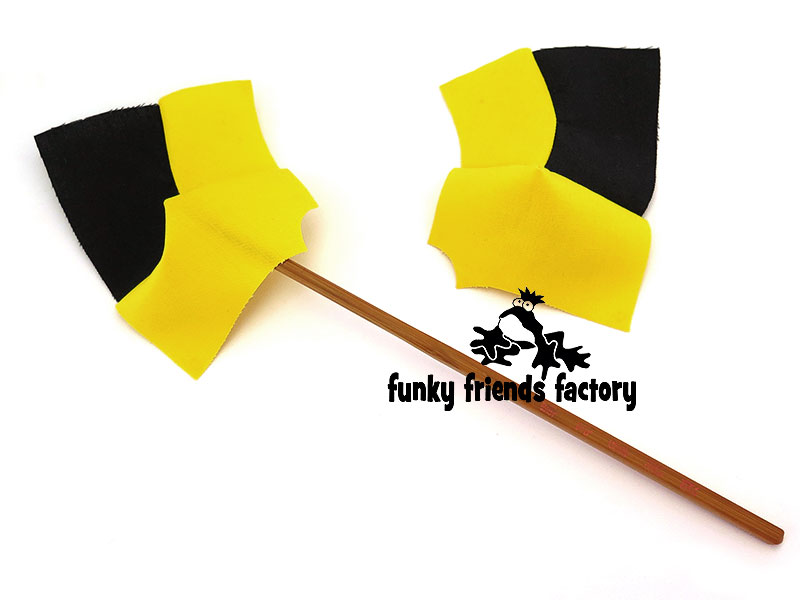
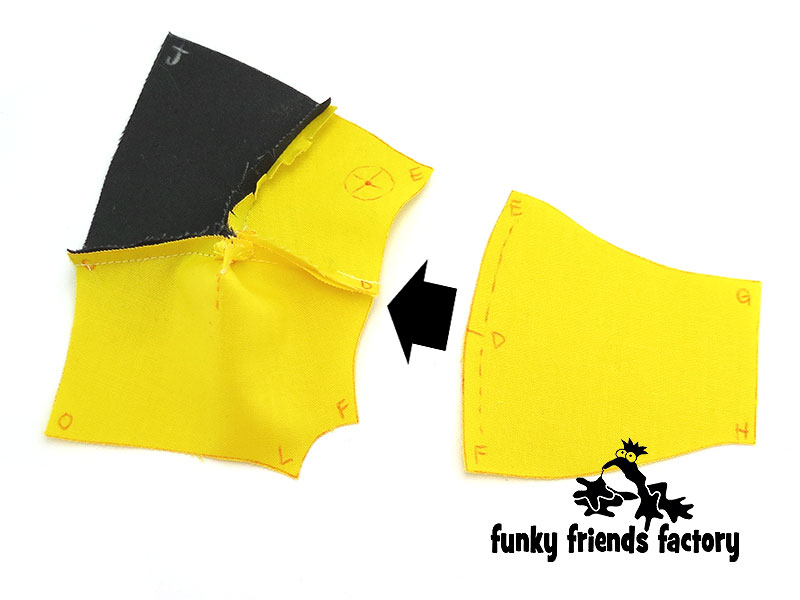
Sew the SNOUT PIECES to the CHEEK & EYE PATCH PIECES from E – D – F.
Here you can see them SEWN.
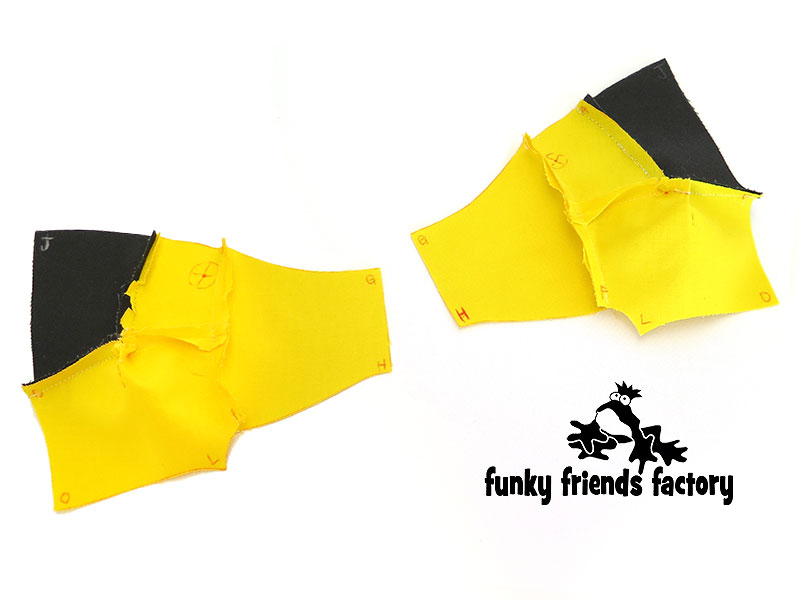
STEP 3b
Sew the SNOUT PIECES together at the front from G – H.
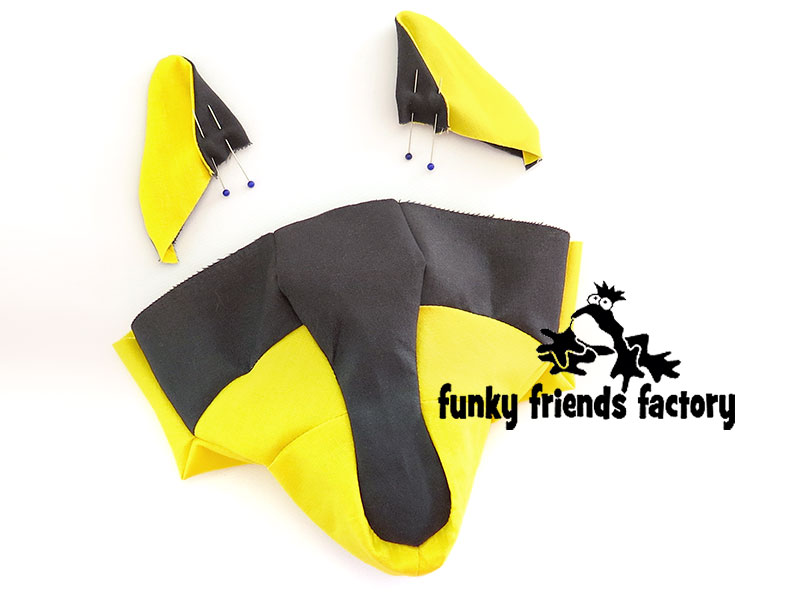
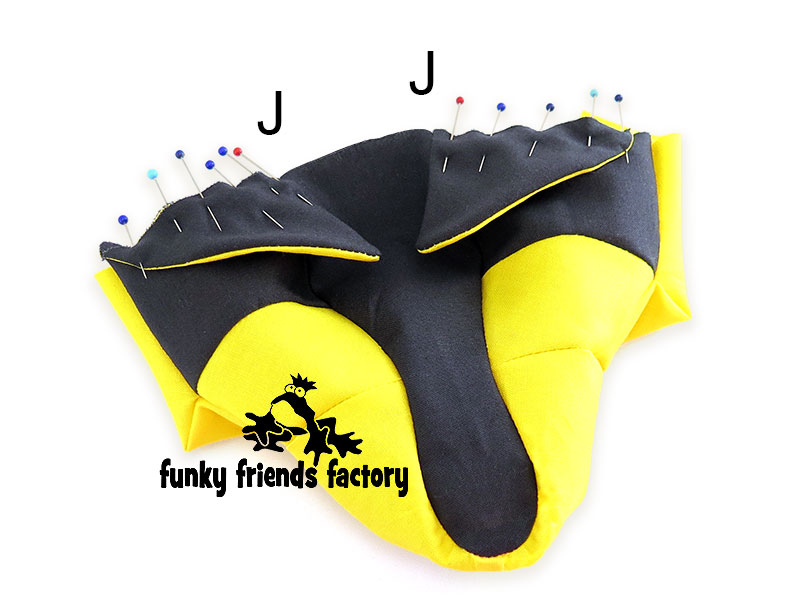
STEP 4
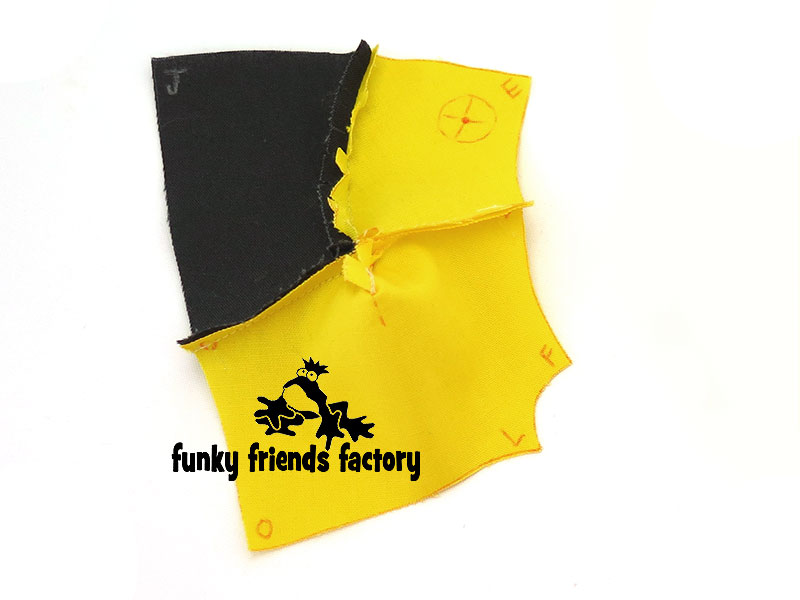
Sew the FOREHEAD PIECE to the SIDE HEAD, EYE PATCH, & SNOUT PIECES from J – A – E – G – E – A – J.
TIP: This seam is a the centre of the face so take your time and use lots of pins to make it as neat as you can.

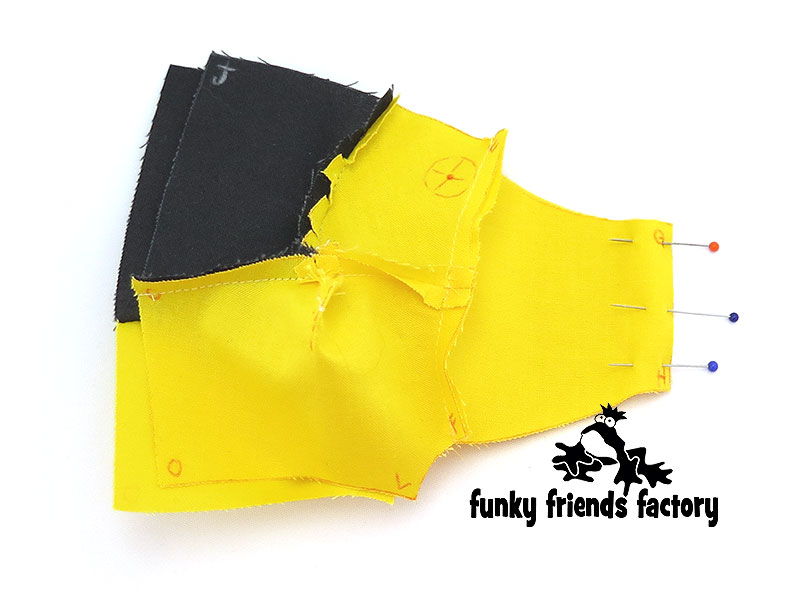
STEP 5
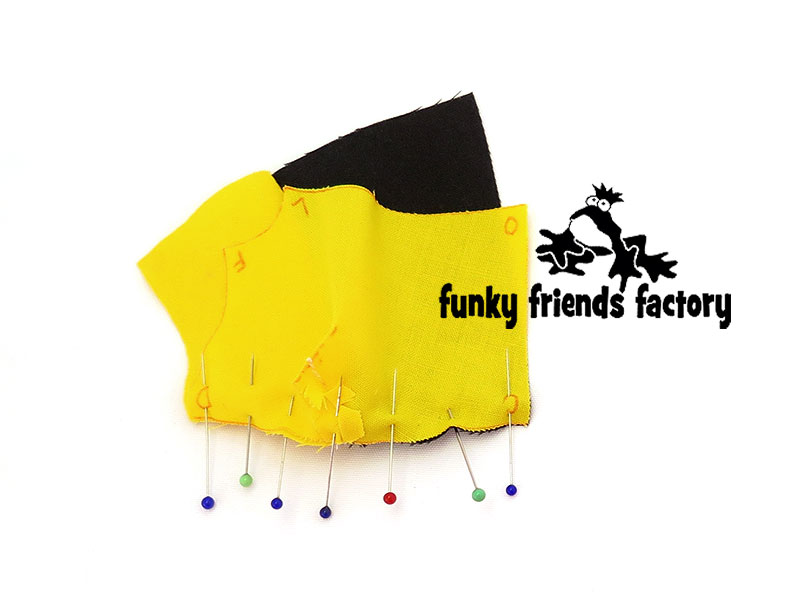
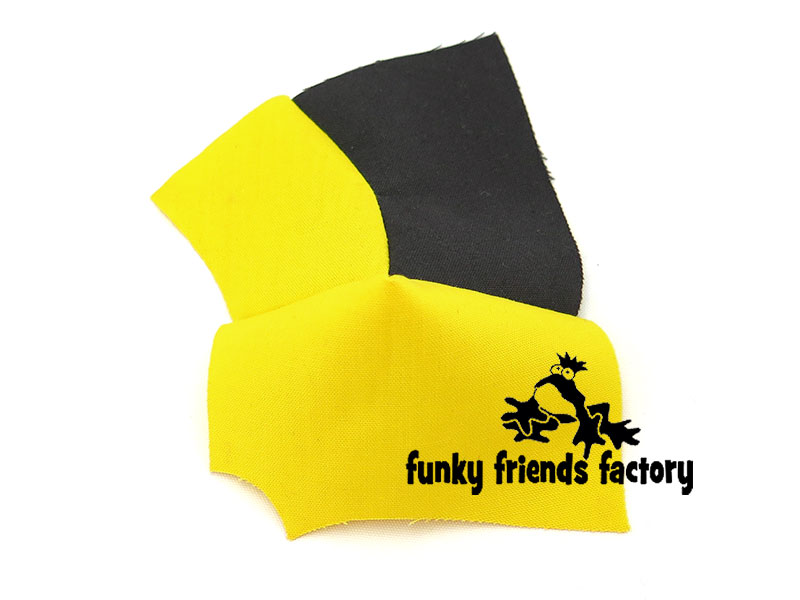
Sew the CHIN PIECE to the CHEEK & SNOUT PIECES from L – F – H – F – L.
Here you can see the pieces PINNED.
TIP: Make sure to clip all of the very curved seams on the head of your wolf – this is very important if you are using a non-stretch (woven) fabric!
STEP 6a
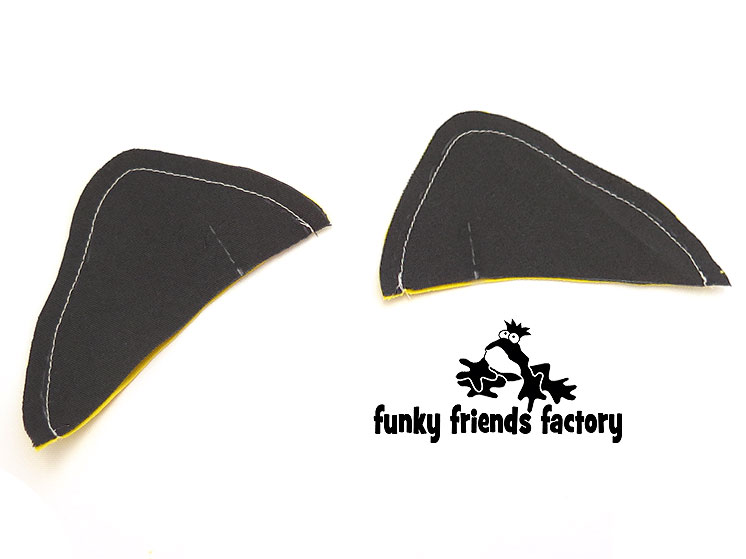
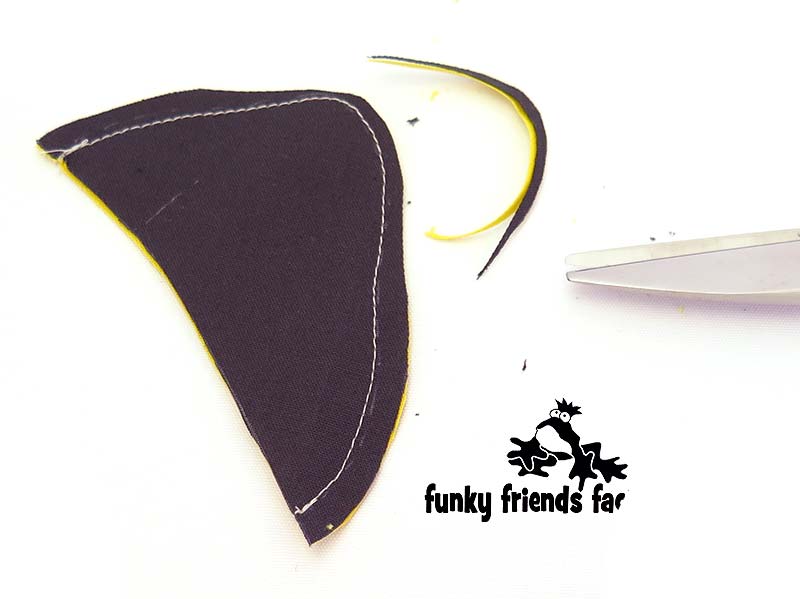
Sew the EAR PIECES together in pairs (1 White and 1 Main fabric piece together) leaving the bottom edge open for turning.
TIP: I find the ‘tips’ of the EARS turn much more smoothly if you trim the seam allowance back to 3mm (1/8th inch) if you are using a non-stretch (woven) fabric!
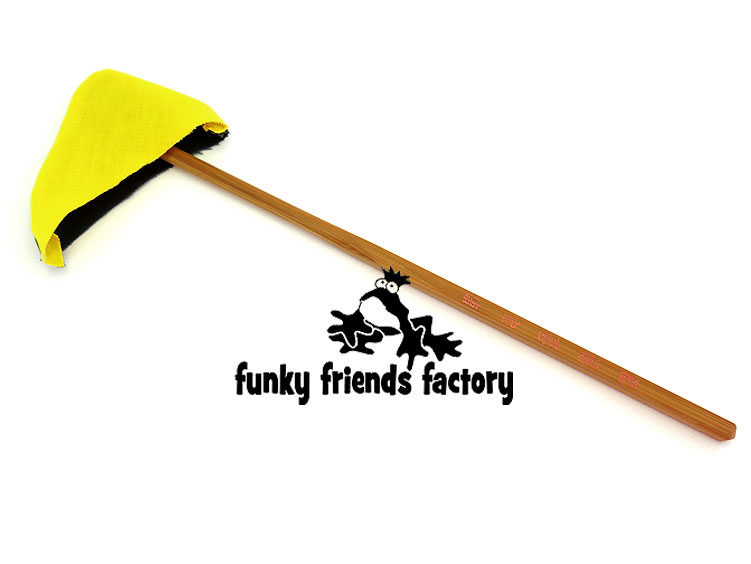
STEP 6b
Turn the EAR PIECES right sides out and use the wooden chopstick to turn the seams nicely.
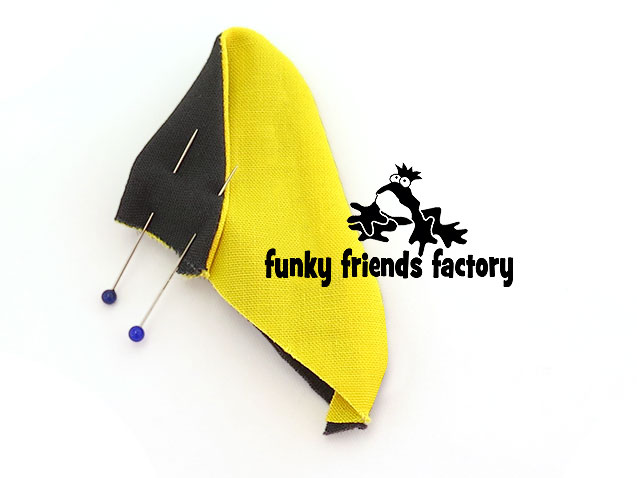
STEP 6c
Fold the EAR PIECES as shown on the pattern markings and pin them like this.
TIP: Check that you have a left and right EAR!
STEP 7
Pin the EARS to the SIDE HEAD PIECES with the fold of the EARS lined up with the seam at J.
BACK HEAD:
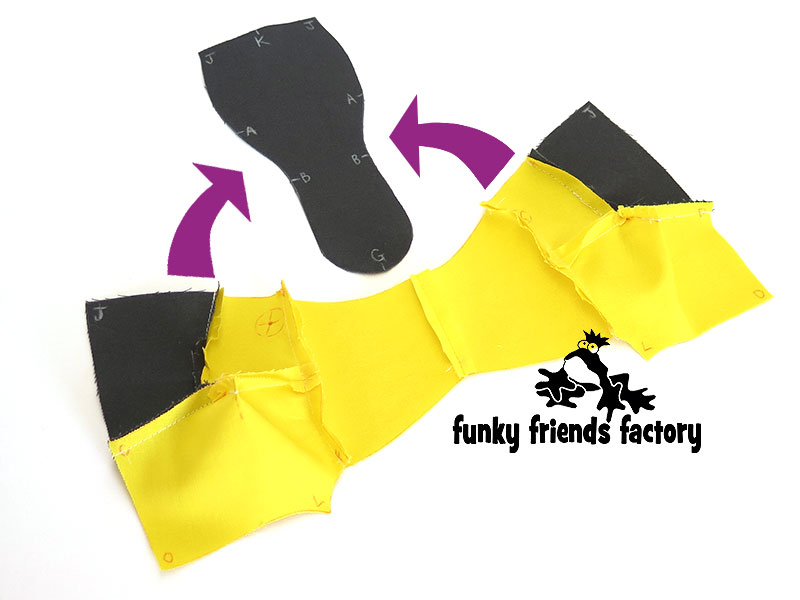
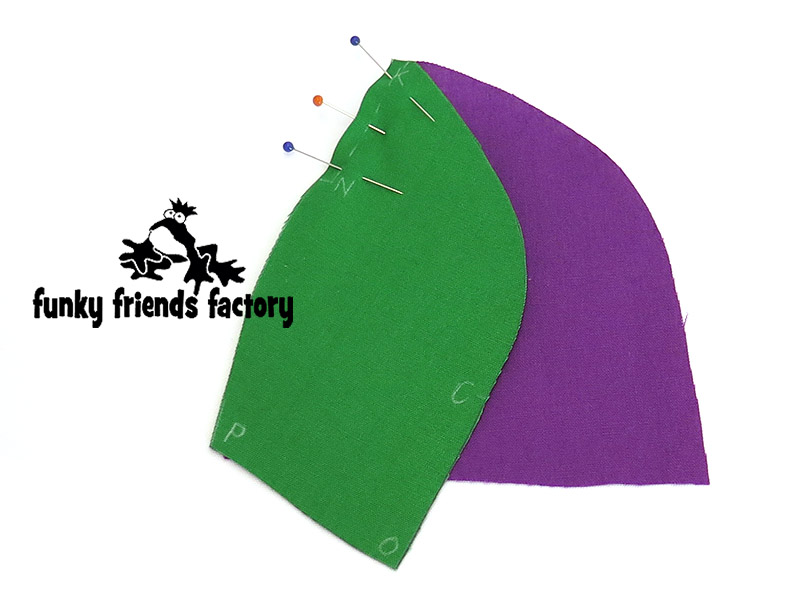
STEP 8a
Sew the BACK HEAD 1 PIECE to the BACK HEAD 2 PIECE from K – N.
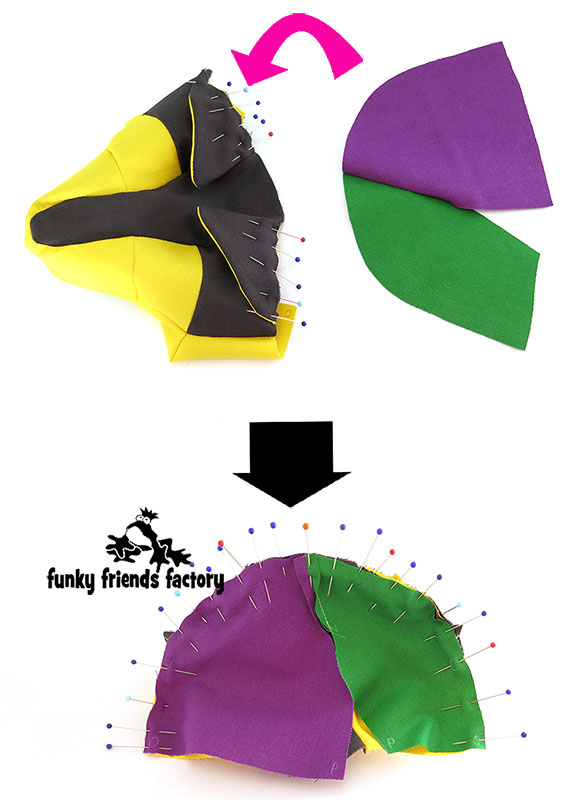
STEP 8b
Sew the BACK HEAD PIECES to the FOREHEAD, SIDE HEAD & CHEEKPIECES with the EAR PIECES in between. (Sew from O – C – K – C – O.)
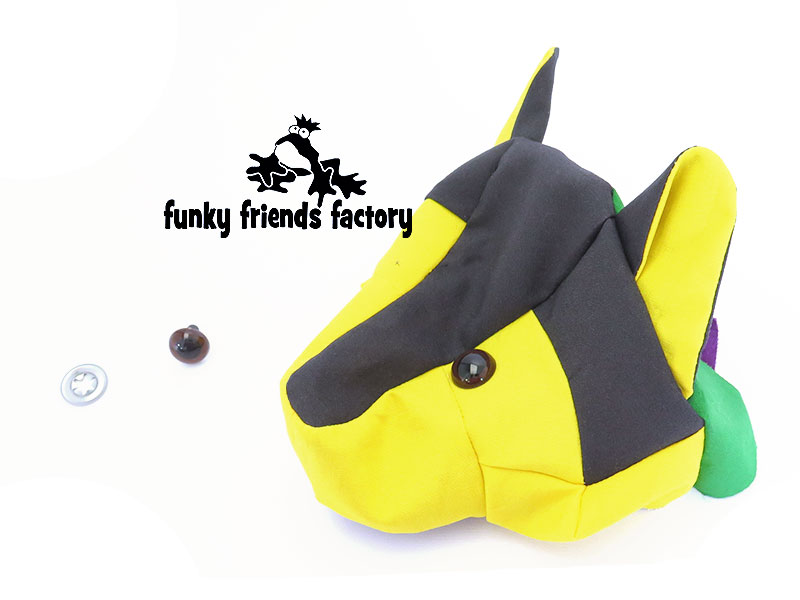
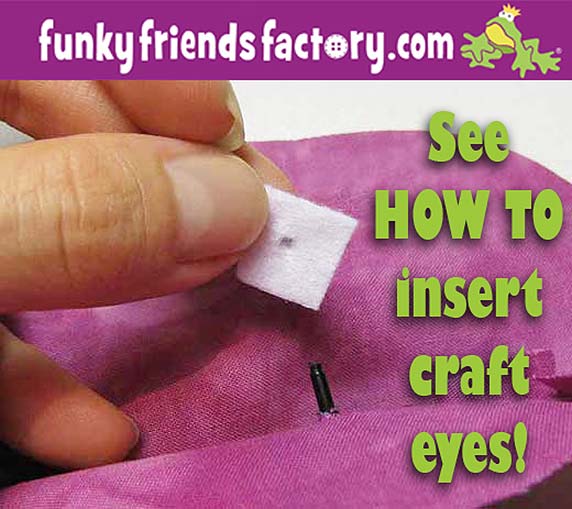
EYES:
STEP 9
If you are using CRAFT EYES insert these now.
TIP: I have a tutorial to show you how to insert craft eyes on my blog.
TUMMY & CHEST:
STEP 10
Sew the TUMMY PIECES together from S – W.
STEP 11
Sew the CHEST PIECE to the TUMMY PIECES from T – S – T.
TOP LEG:
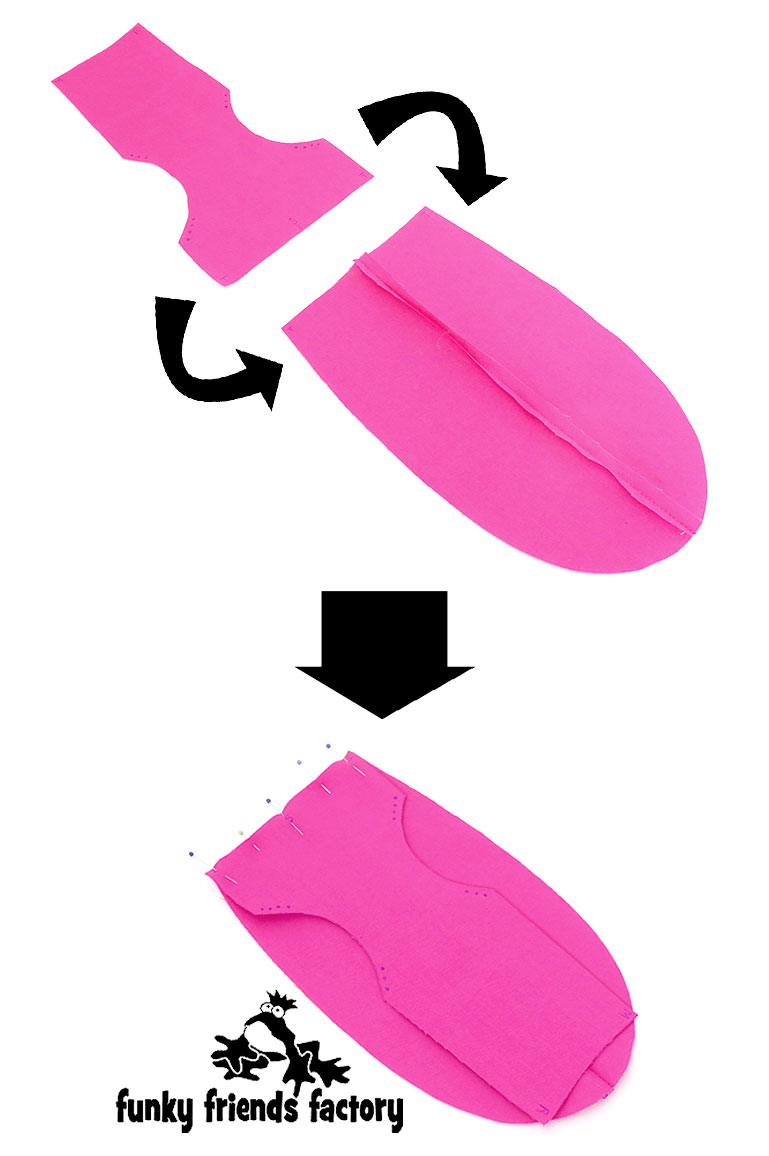
STEP 12a
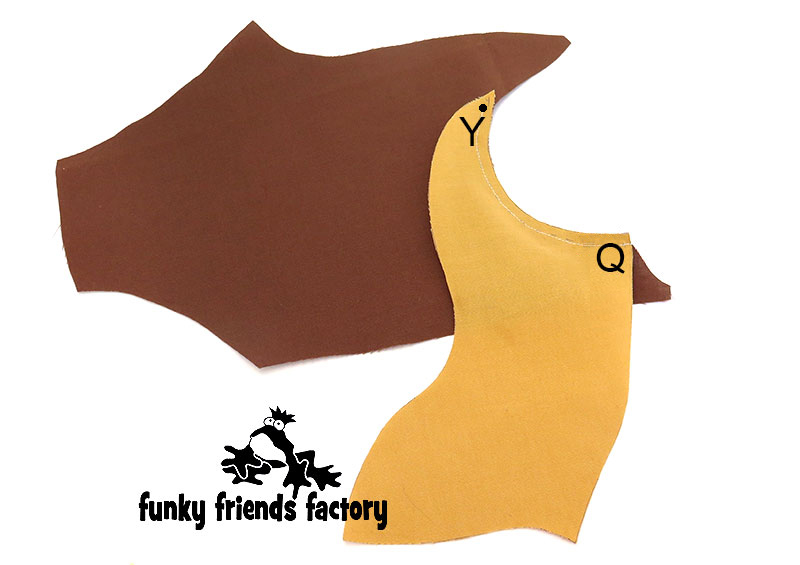
Pin the INNER LEG PIECE to the FRONT PIECE matching Y and Q.
STEP 12b
Sew the INNER LEG PIECE in place, sewing from the dot pattern marking at Y to Q. Do not sew from the edge of the fabric at Y…
…you’ll see why next!
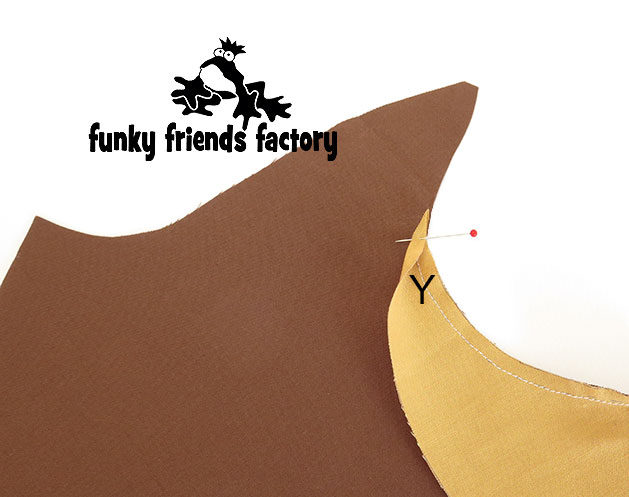
STEP 12c
Fold the seam allowance of the INNER LEG PIECE at Y, with the fabric wrong sides together, as shown on the pattern markings and pin the fabric back like this.

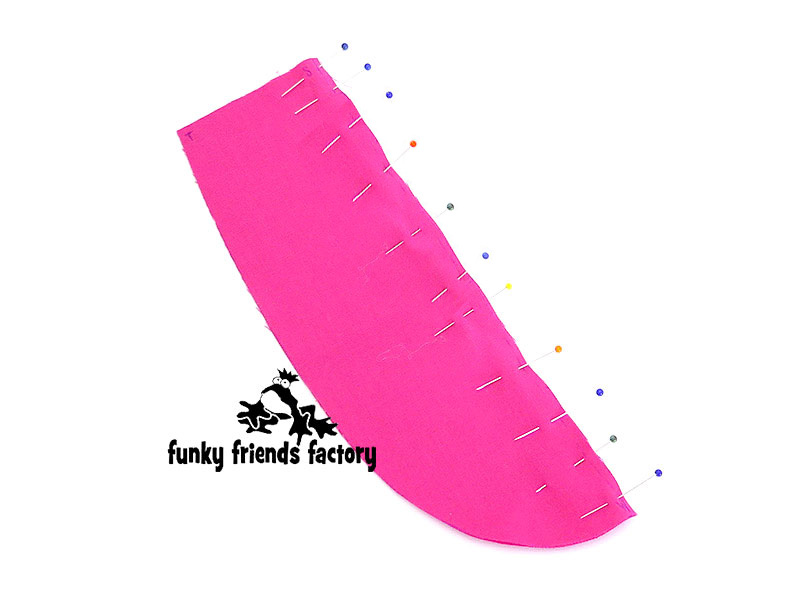
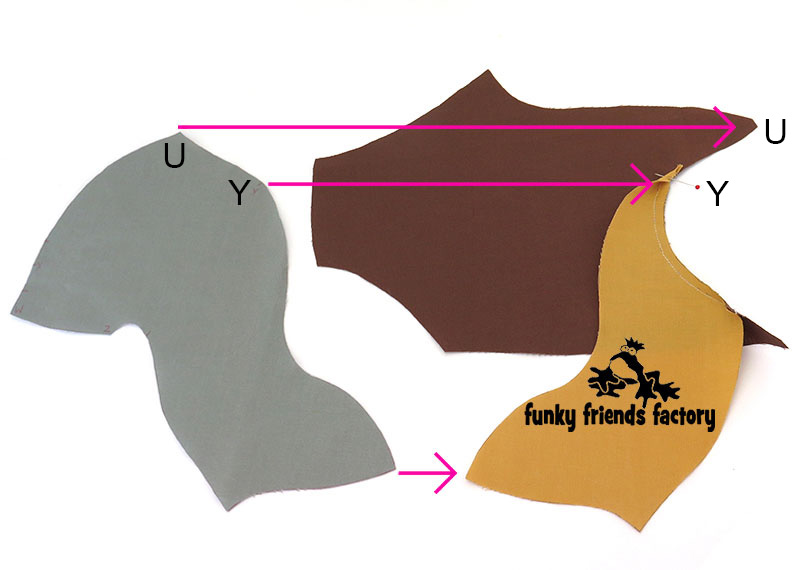
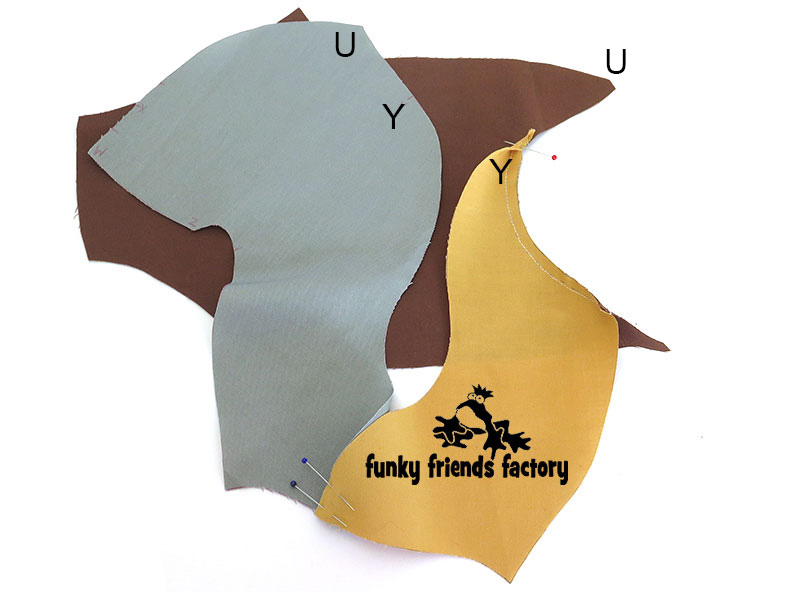
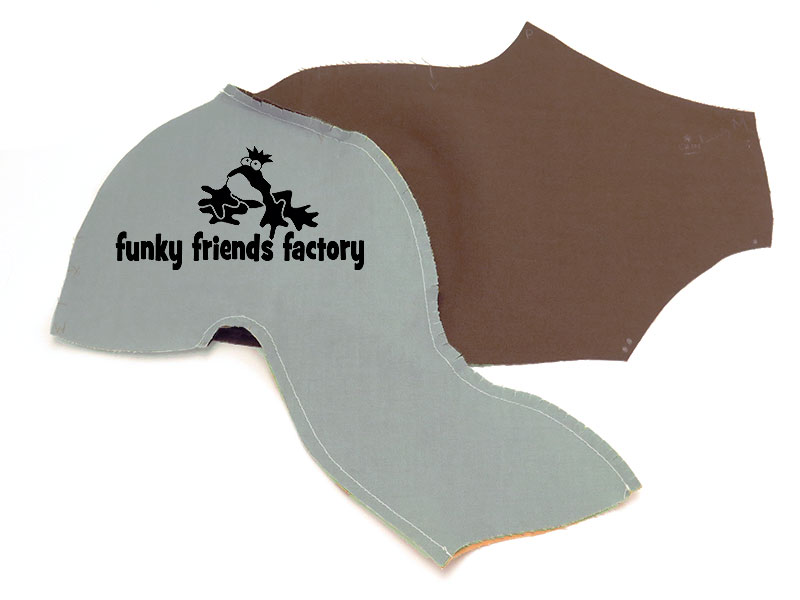
STEP 13a
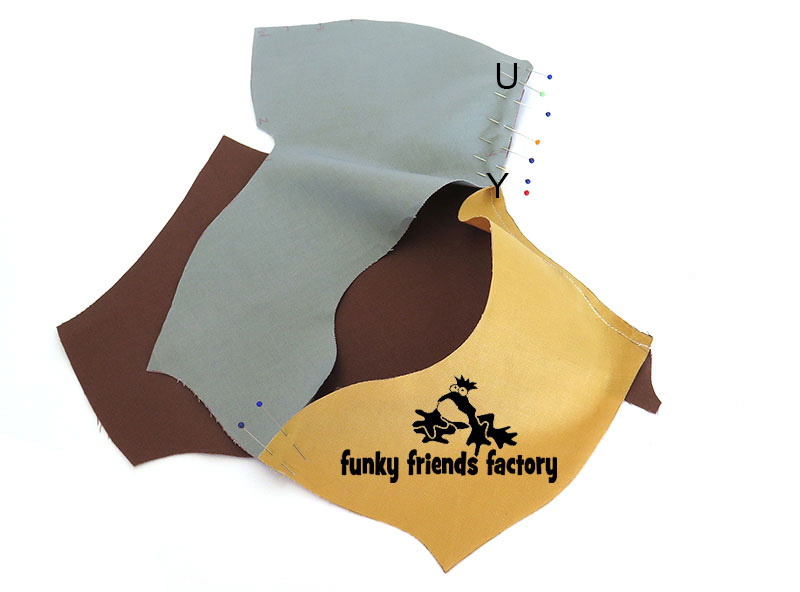
Pin the TOP LEG PIECE to the INNER LEG & FRONT PIECE, along the FRONT of the leg.
Start pinning at the bottom of the leg…
Then pin the pieces together from U – Y…
Then finish pinning the rest of the seam.
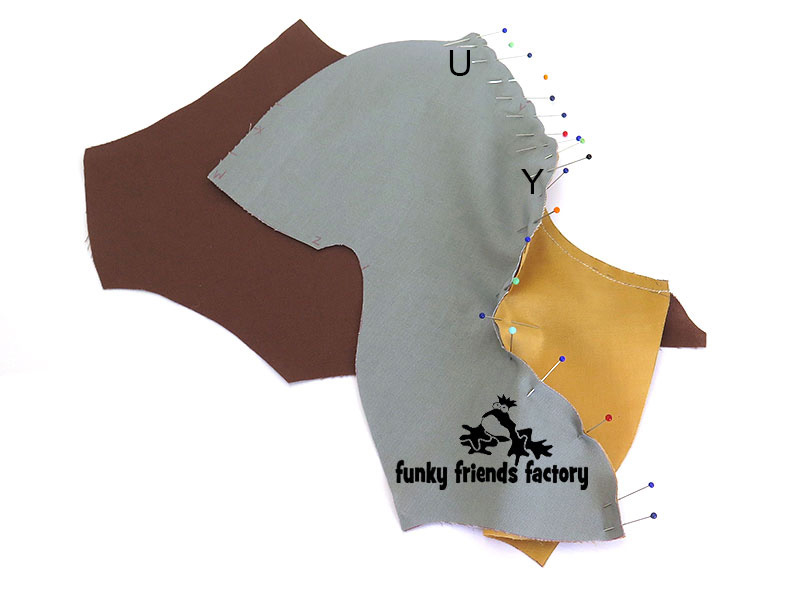
STEP 13b
Sew the TOP LEG PIECE to the INNER LEG & FRONT PIECE from U – Y to the bottom of the leg.
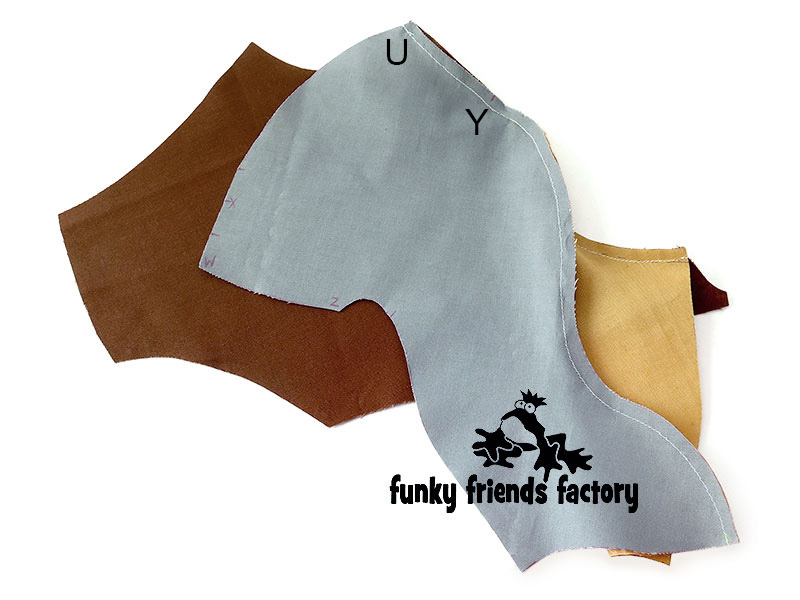
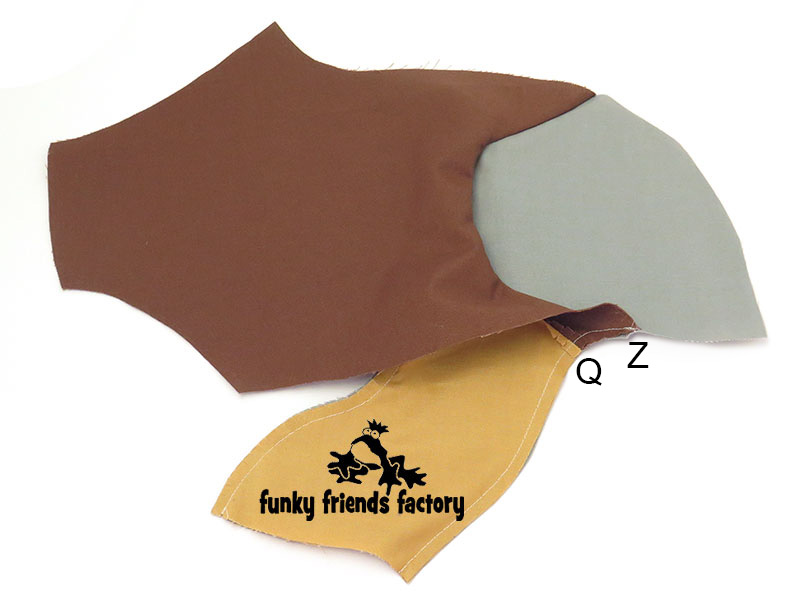
STEP 14a
Pin the TOP LEG PIECE to the INNER LEG & FRONT PIECE, along the BACK of the top leg.
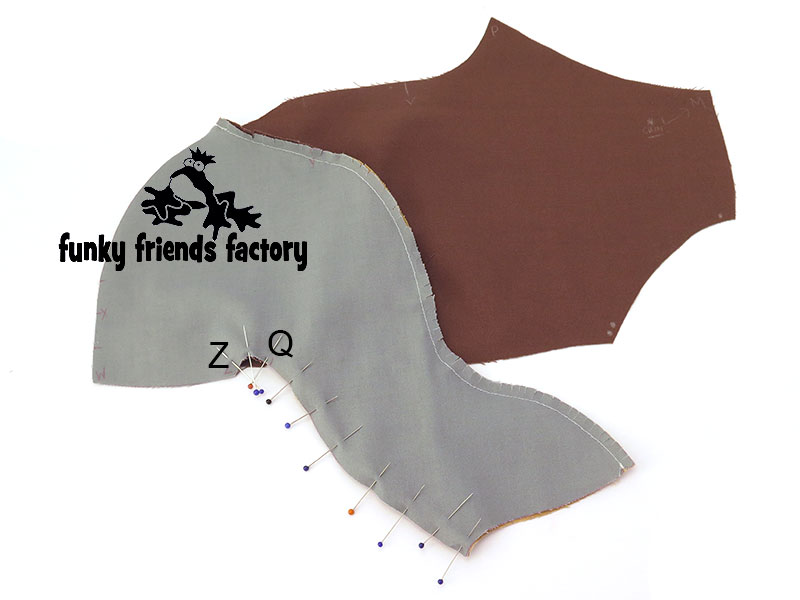
STEP 14b
Sew the TOP LEG PIECE to the INNER LEG & FRONT PIECE, from Z – Q to the bottom of the top leg.
This is what the pieces should look like from the other side!
TIP: Clip the seams well, especially where they meet at point Y so that the pieces lay nice and smoothly. If you have any puckers or wrinkles, unpick the seam at that spot and resew it NOW!
TAIL & BACK SEAM:
STEP 15a
Sew the TAIL PIECES together, leaving the gap open for stuffing.
STEP 15b
Clip the seams and turn the TAIL right sides out. Fold the TAIL PIECES as shown in the pattern markings and pin the top of the TAIL closed with X in the middle.
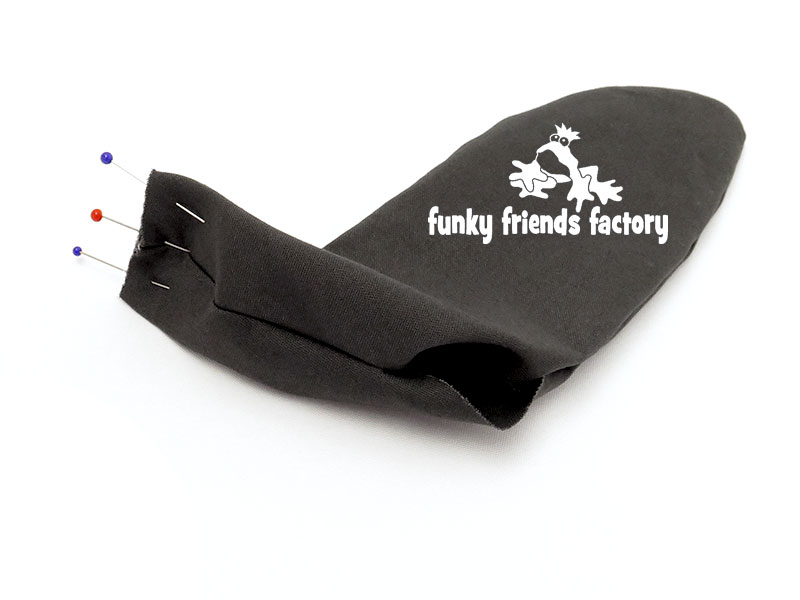
STEP 16
Pin the TAIL in place with X ‘touching’(facing) the TOP LEG PIECE.
TIP: PLEASE double-check that point X is ‘touching’(facing) the TOP LEG PIECE or your tail will be the wrong way round and will flop to the back NOT the front!
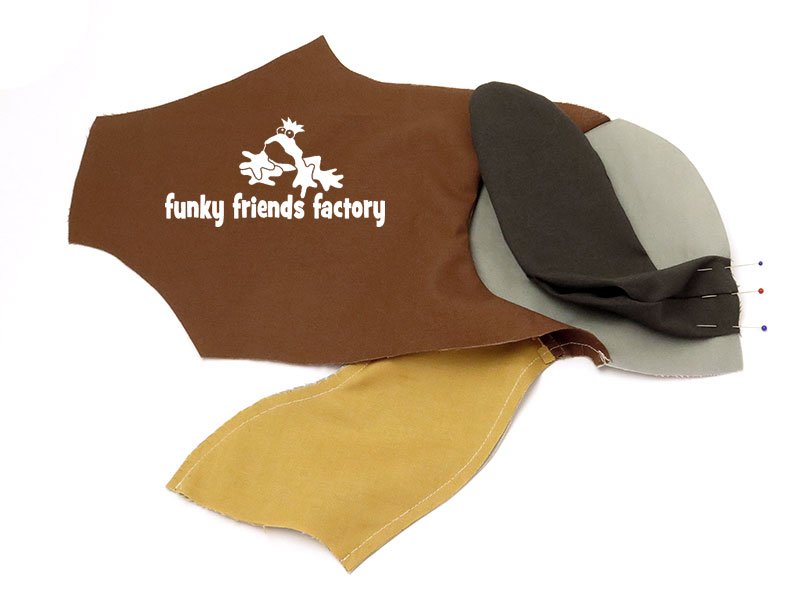

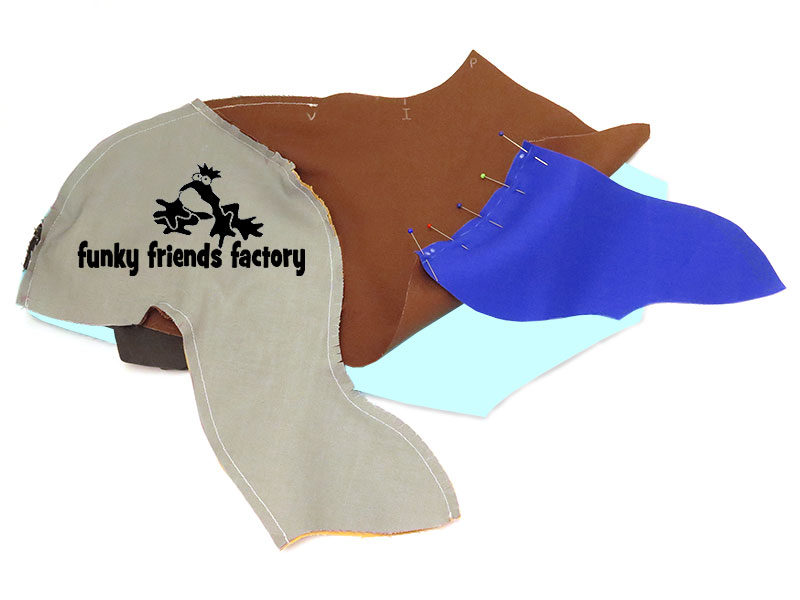
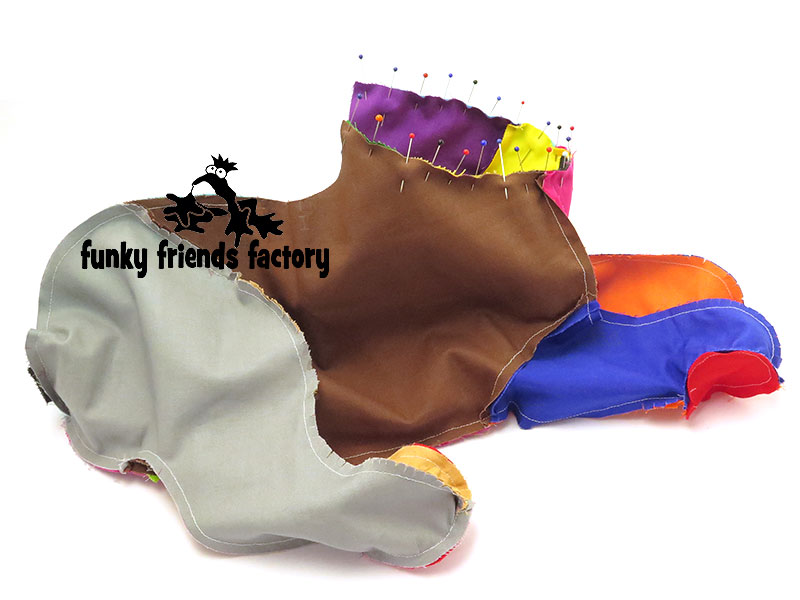
STEP 17
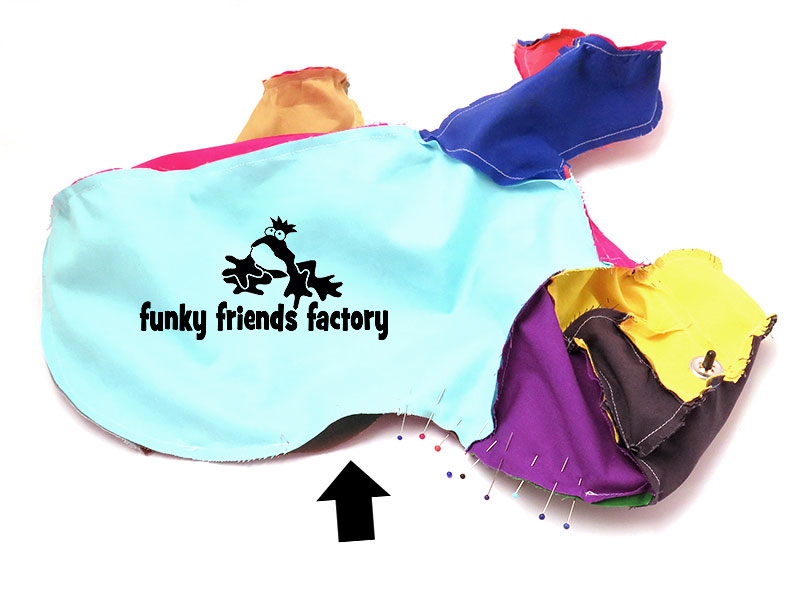
Sew the BACK PIECE to the TOP LEG & FRONT PIECE from V – W, along the back seam, with the TAIL in between.
(I have added the black arrow, in the photo below, to show you where the stuffing gap will be – between I and V.)

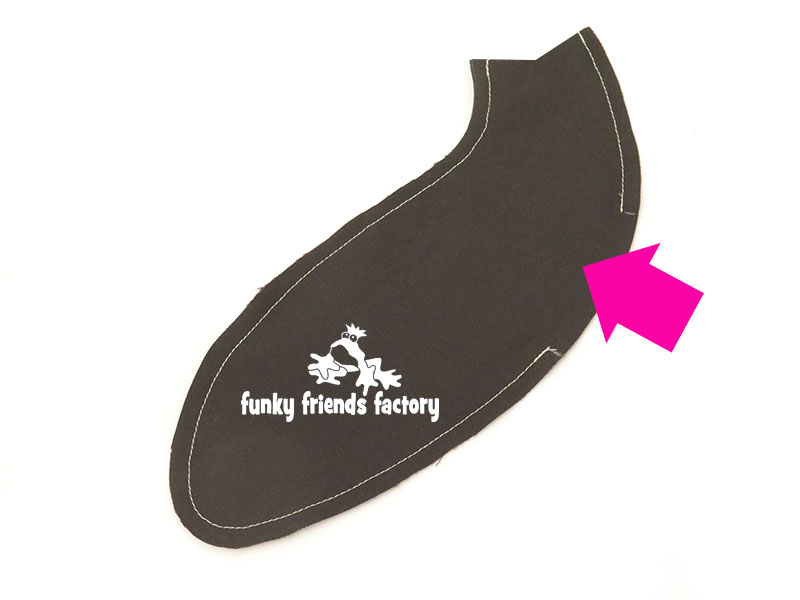
REAR LEG:
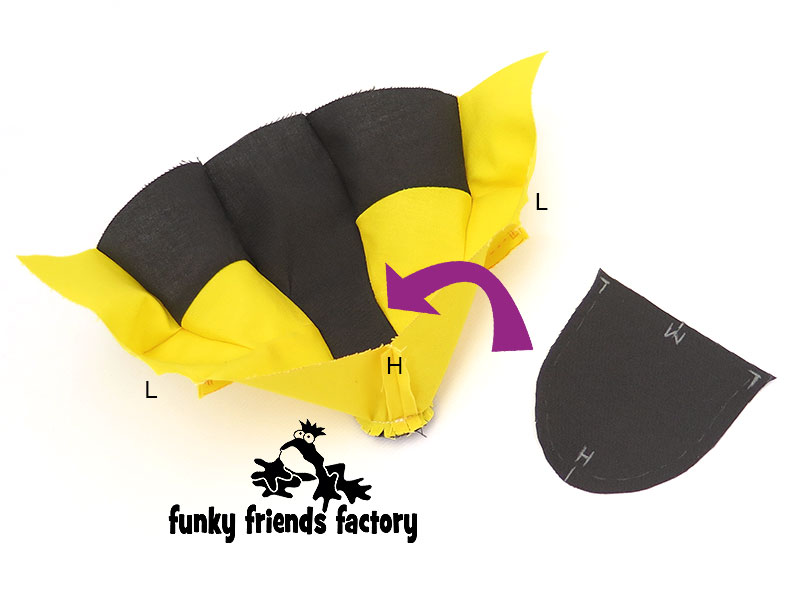
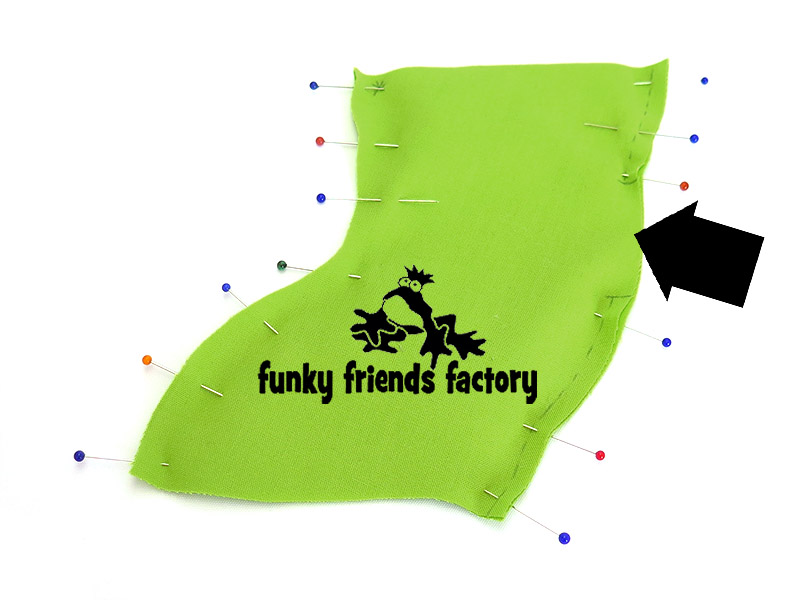
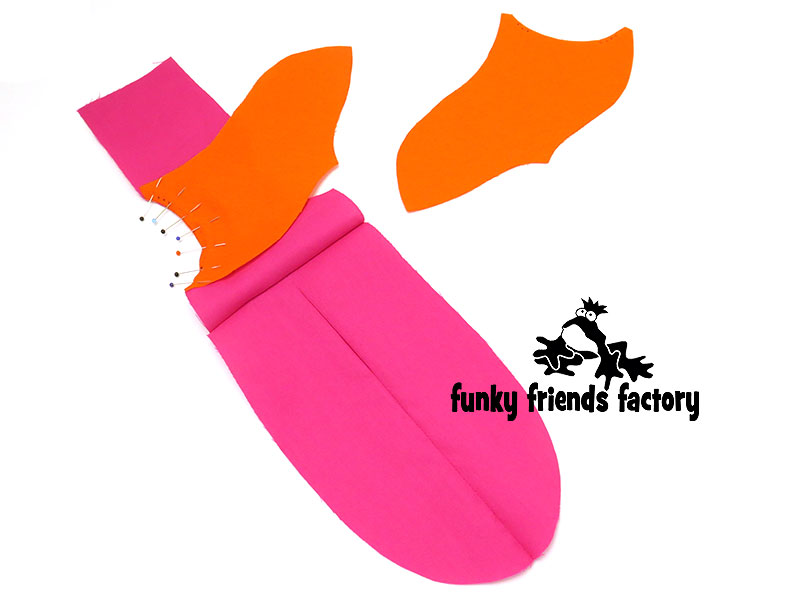
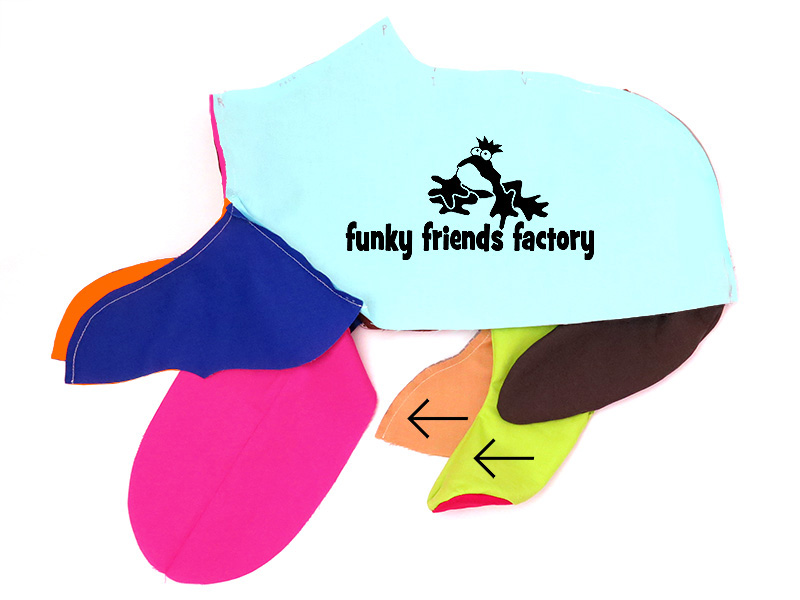
STEP 18a
Sew the front and back seams of the REAR LEG PIECES together, leaving the gap open for stuffing (See the black arrow in the photo below).
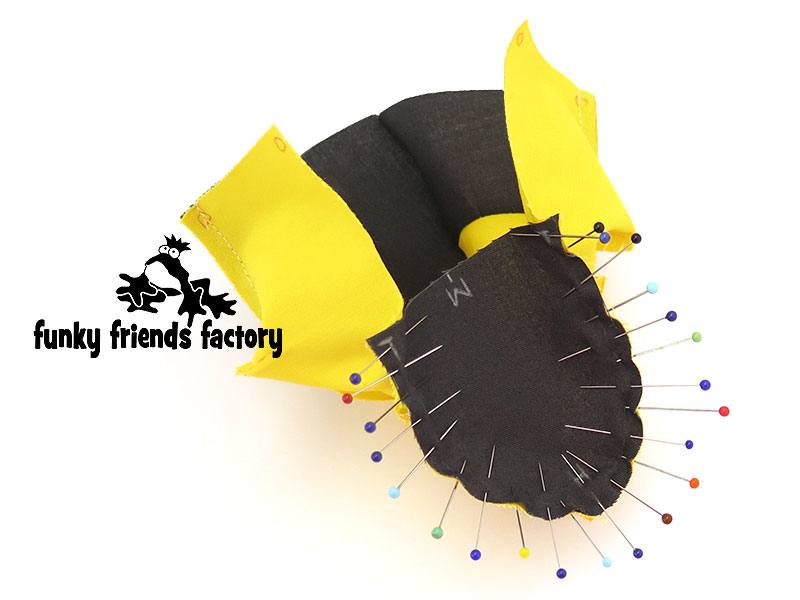
STEP 18b
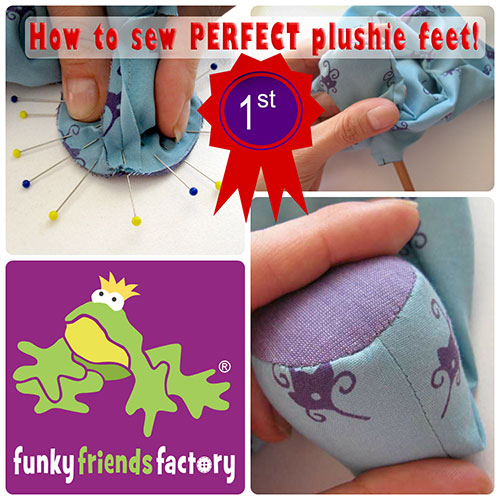
Pin one of the FOOT PAD PIECES to the REAR LEG PIECES and sew it in place.
TIP: I have a tutorial to show you how to sew the FOOT PADS in place. Click HERE to check it out!
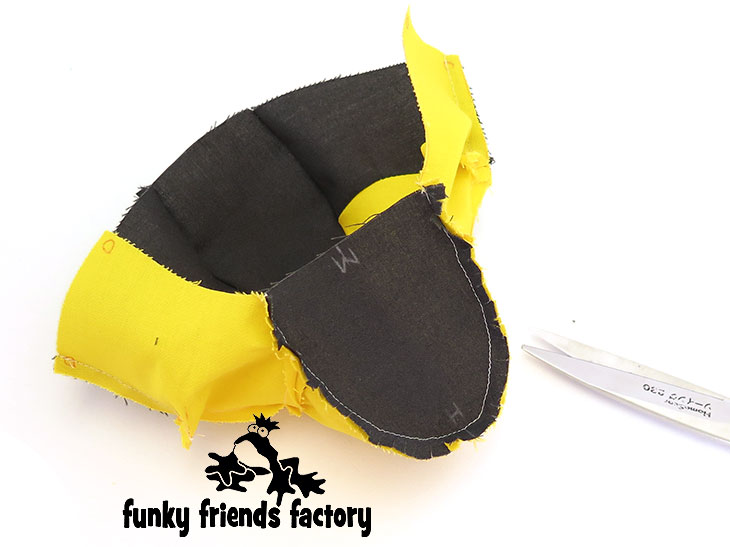
STEP 18c
Clip the seams and turn the REAR LEG PIECES right sides out and pin it closed at the top.

ARMS:
STEP 19
Sew the INNER ARMS to the CHEST PIECE matching the pattern marking dots.
TIP: I think it’s easiest to do one side at a time.

STEP 20a
Sew one of the OUTER ARM PIECES to the FRONT PIECE and…
STEP 20b
…sew the other OUTER ARM PIECE to the BACK PIECE, matching the dot pattern markings.
BODY:
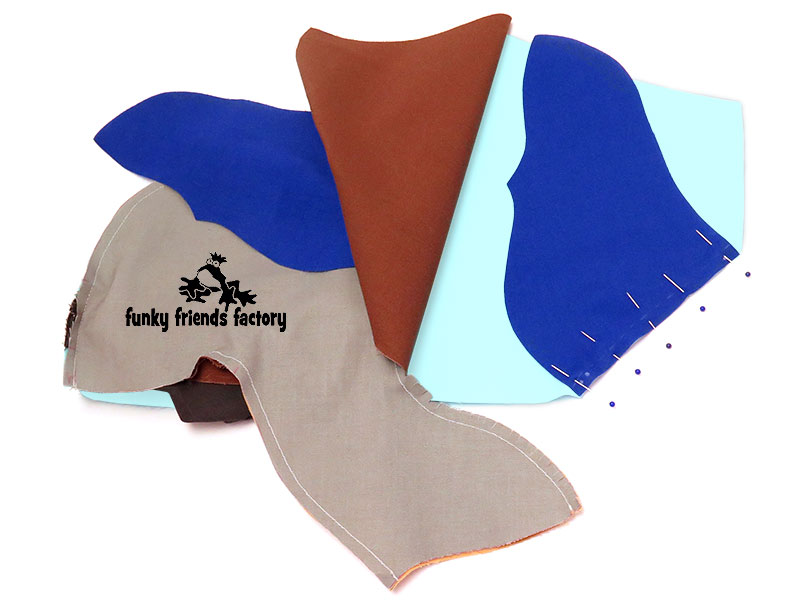
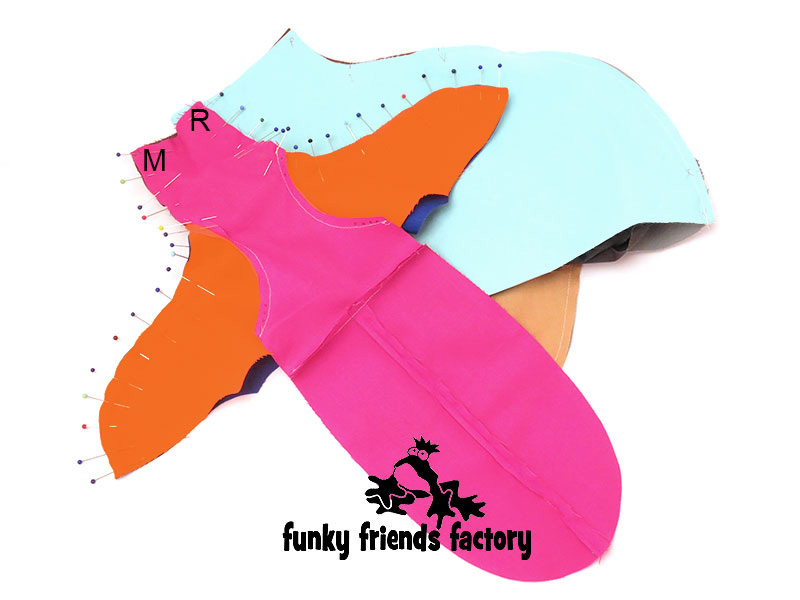
STEP 21
Sew the CHEST & INNER ARM PIECES to the OUTER ARMS, FRONT & BACK PIECE, sewing along the top of the arms up to M and R at the neck seam.
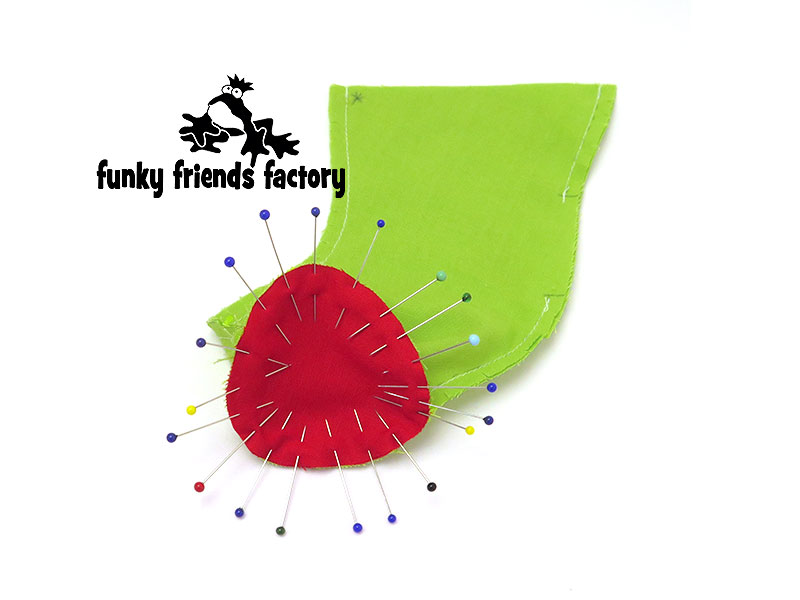
STEP 22a
Pin the REAR LEG to the FRONT PIECE matching the star pattern marking. Double-check that the REAR LEG is pinned to the FRONT PIECE (NOT the BACK PIECE!!!) before you sew it in place with a 3mm (⅛inch) seam allowance.
TIP: Once the REAR LEG is sewn to the FRONT PIECE you can let it hang down and check the the legs are sewn correctly – BOTH facing the front!
STEP 22b
Sew the CHEST, INNER ARM & TUMMY PIECE to the OUTER ARMS, FRONT BACK PIECE, sewing along the bottom of the arms and along the sides of the CHEST & TUMMY PIECES to W at the back (with the REAR LEG in between).

FOOT PADS:
STEP 23
Pin and sew the other 3 FOOT PADS in place. (SORRY – 2 of these are for the ARMS so technically – they are PAW PADS not FOOT PADS!)

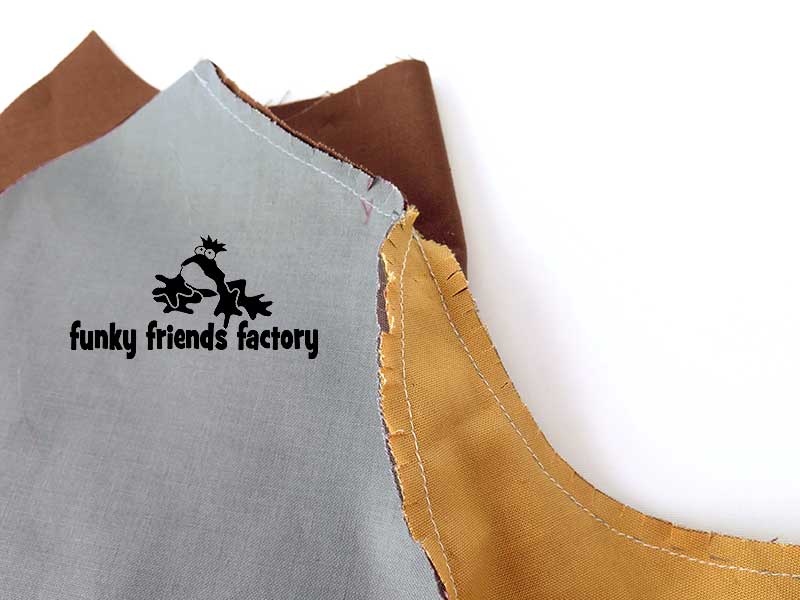
NECK SEAM:
STEP 24
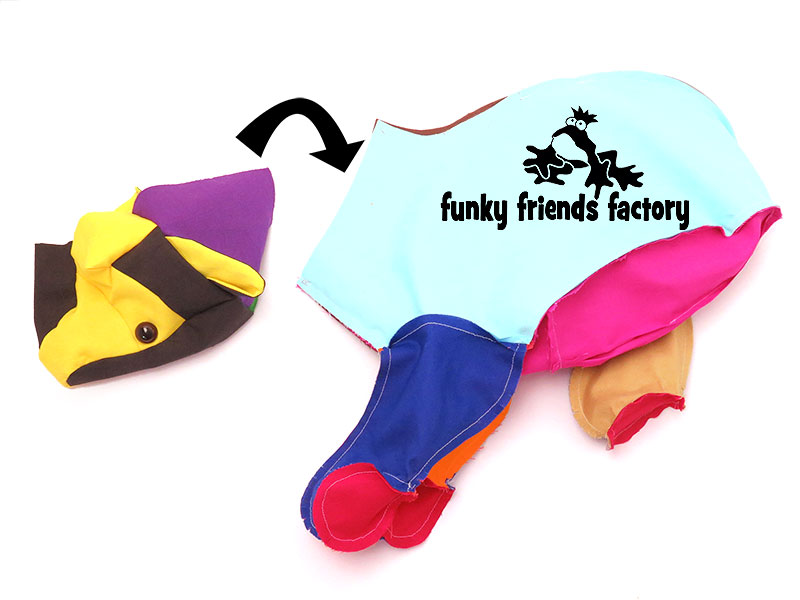
Pin the NECK PIECES to the BODY PIECES, at the neck seam, making sure to match up points M and R so the Wolf’s head will sit to one side. Sew the HEAD to the BODY at the neck seam.
TIP: I find the best way to do this is to place the head inside the BODY, so it is facing back into the body then pin and sew it in position.
STEP 25
Pull the head back out of the body. Sew the BACK HEAD PIECES, FRONT PIECE and BACK PIECE closed at the back of the wolf’s neck. Sew from N – I, leaving the stuffing gap open.
ASSEMBLY:
STEP 26
Turn the wolf right sides out. Stuff the TOP LEG and ARMS first, then the head and then the rest of the body. Stuff the TAIL and REAR LEG last.

STEP 27
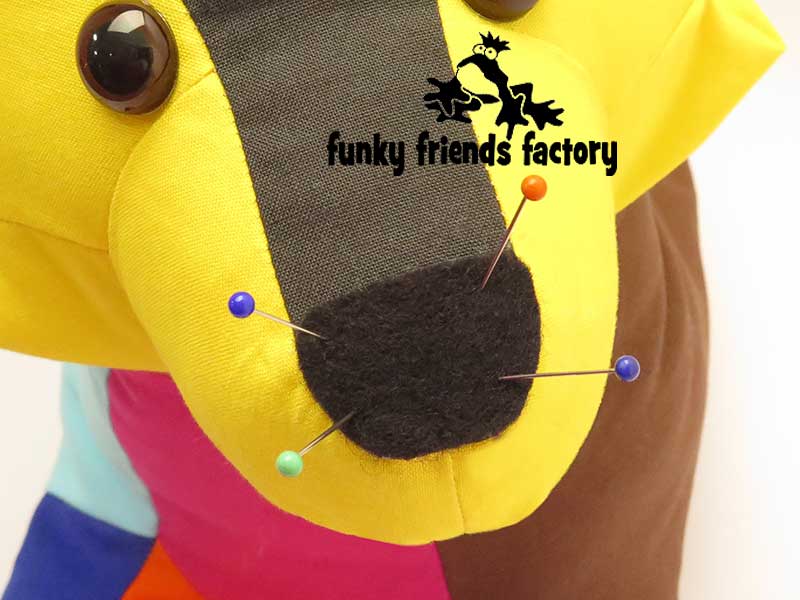
Cut the NOSE PIECE from black felt. Pin it on the FOREHEAD PIECE, so it just covers the front seam and sew it in place with a blanket stitch. If you are embroidering the eyes, do them now.
STEP 28
Sew the stuffing gap closed with a ladder stitch.
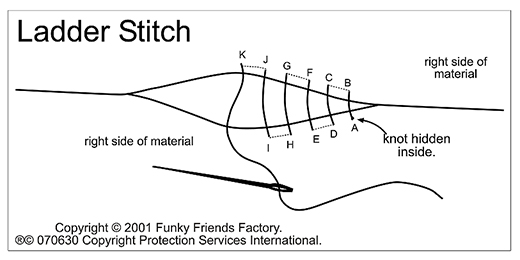
Your Wolf is ready to LOVE!
Want to win a
FREE toy pattern?
It’s so EASY to enter our Pattern GIVEAWAY!
![]()
ALL you need to do is post a photo of a FUNKY FRIENDS FACTORY toy that you have made on the Funky Friends Factory Facebook Page .
At the end of each month I draw a winner and post the winner’s name on the Blog the following MONTH. I have an Album on Facebook for all the MAKEROFTHEMONTH winners. You can check it out HERE!
NOT on Facebook? ENTER by email! 😀
*** You can send me your photos by email too!
So come on! Share your photos ~>
The next winner could be YOU!!!
 .
.
Till next time,
Happy Sewing,
Pauline
xxx
![]()
