
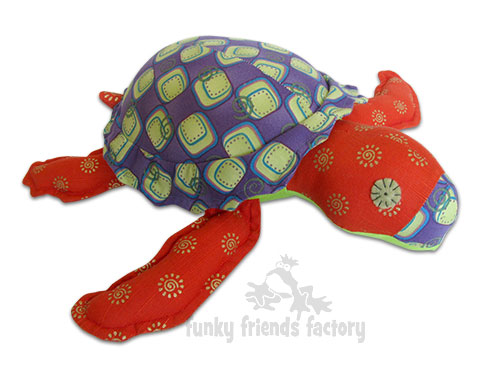
I made this photo tutorial so you can see how to sew my Stu Seahorse Sewing Pattern ~> scroll down for step-by-step photos!
.
*** PLEASE NOTE – this is ONLY a PHOTO TUTORIAL ***
The FULL PATTERN IS NOT included here.It is NOT A FREE PATTERN!
I have made this photo tutorial so people who have purchased my Stu Sea Turtle Sewing Pattern can SEE how to sew a sea turtle toy! (I wanted to explain this so you are not disappointed if you have found this page via a search engine and not from the link in my Sea Turtle Sewing Pattern)
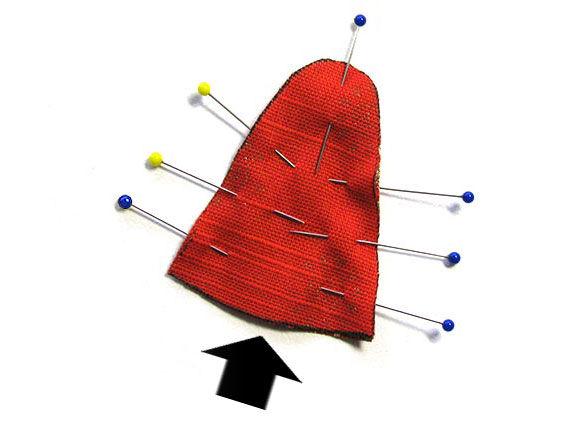
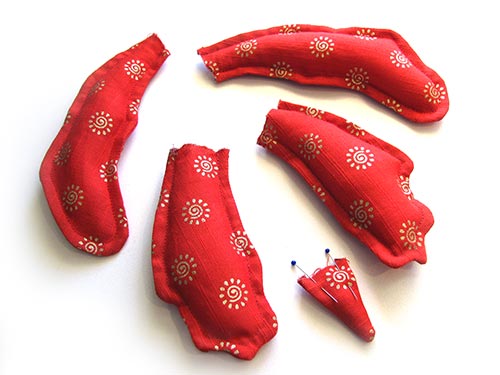
We start with the TAIL:
STEP 1
Sew the TAIL PIECES together using the pattern markings to guide you.
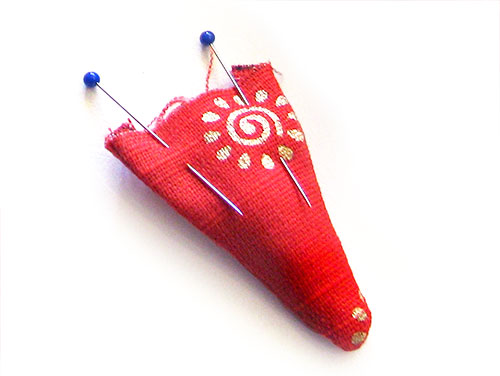
STEP 2
Turn the TAIL right sides out. Stuff the TAIL with toy stuffing and pin the open edge closed.
TIP: I use a wooden chopstick as my stuffing tool to make sure the seams are turned out nice and smooth.
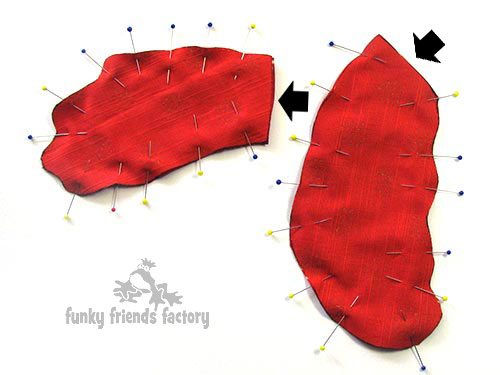
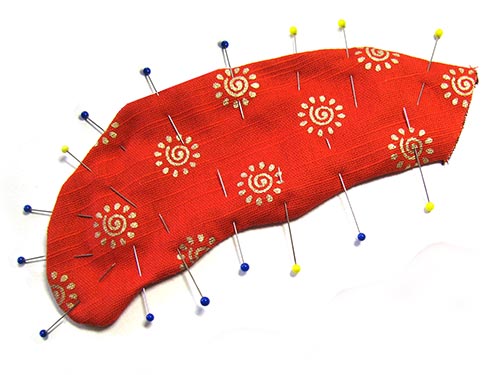
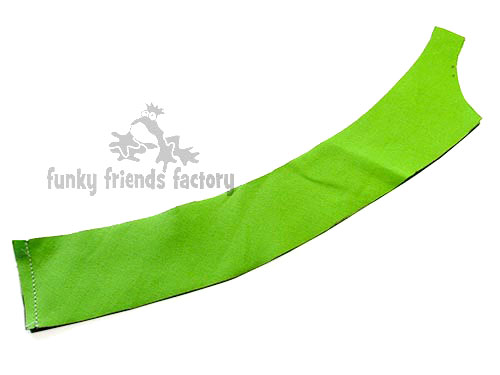
FLIPPERS:
STEP 3
Sew the FRONT FLIPPER PIECES and BACK FLIPPER PIECES together in pairs, like you did for the TAIL.
STEP 4
Turn the FLIPPERS right sides out. Use a sharp pair of scissors to snip/clip your seam allowance especially around the sharp curves.
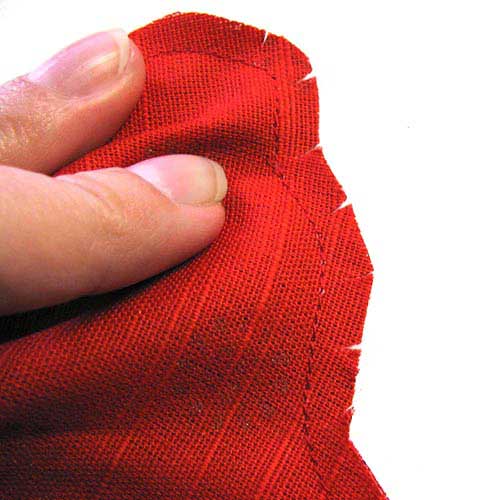
STEP 5
Pin all the FLIPPERS so that the edge seams lie flat.
STEP 6
Stitch around the edge of each b about 5mm/¼ from the outer edge to create a ‘rim’ around the outsides of the flippers. Stuff the FLIPPERS with stuffing, using just a little bit of stuffing, so they are
quite flat (thin).
TUMMY:
STEP 7
Sew the NECK PIECE to the TUMMY PIECE, from A – B along the tummy seam.
STEP 8
Pin the TAIL and FLIPPERS in position on the TUMMY PIECE, then set this aside.
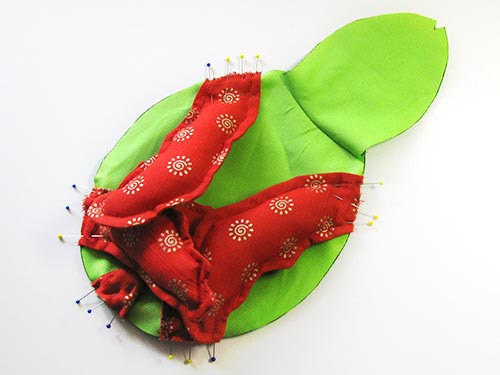
SIDE and HEAD:
STEP 9
Sew the SIDE PIECES together at the back, from C-D.
STEP 10
Sew each BEAK PIECE to a HEAD PIECE.
TIP: Take care to make sure that you are matching the single dots on the pattern markings, otherwise the turtle‘s head will look squashed and a bit funny!

STEP 11
Sew each HEAD PIECE to a SIDE BODY PIECE, from E – A/B.
TIP: Remember to match the 2 dots of the pattern markings so the HEAD is the right way up!
STEP 12
Pin and sew the NECK & TUMMY PIECES to the BEAK,HEAD & SIDE BODY PIECES with the TAIL and FLIPPERS in between. Sew from G at the front past A/B to D at the back, then back past A/B to G on the other side.
TIP: Use LOTS of pins so the none of the pieces slip as you sew.
SEW the HEAD CLOSED:
STEP 13
Sew from point K on the NECK PIECE to G then along the top of the head to E, then continue sewing from E to H (to join the SIDE BODY PIECES at the front).
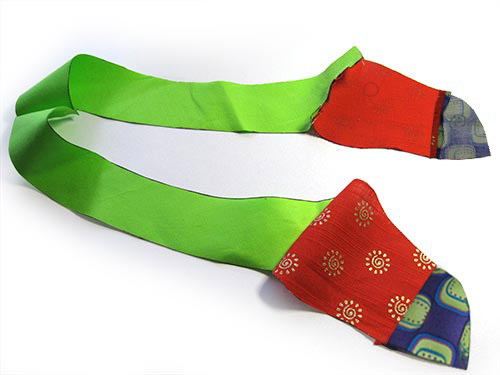
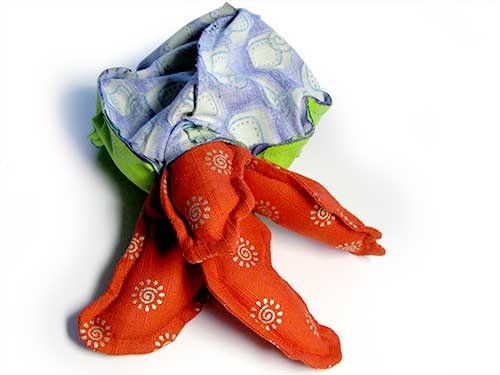
SHELL and RIM:
STEP 14
Sew the SHELL PIECES along the center seam, matching the 3 dot markings.
*** NB – The center is much flatter than the sides!***
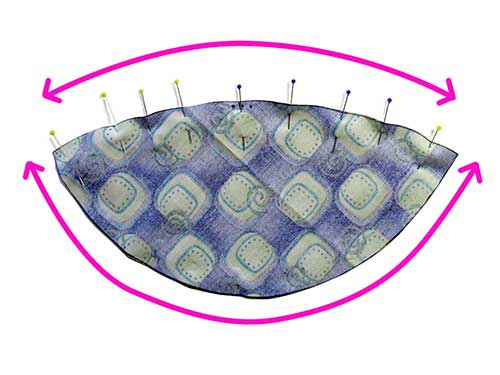
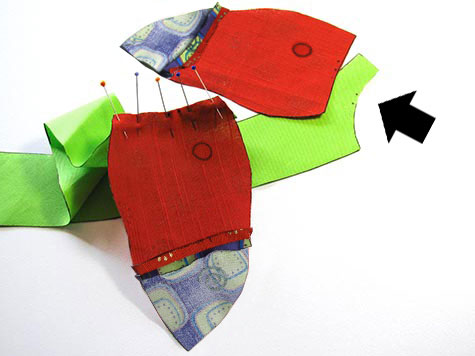
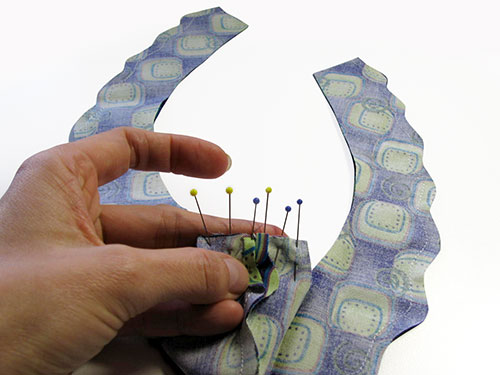
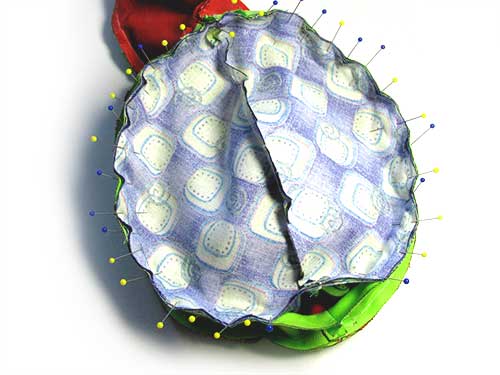
STEP 15
Sew two of the SHELL RIM PIECES together along the edge seam. Repeat for the other SHELL RIM PIECES.
STEP 16
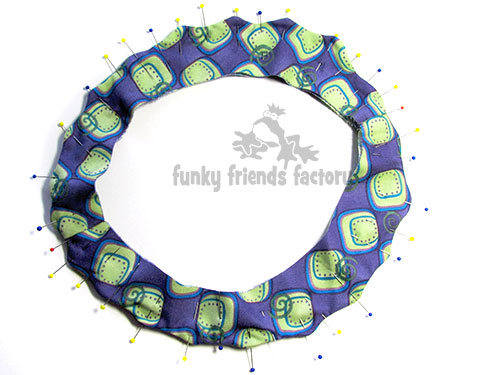
Open up the pairs of SHELL RIM PIECES and sew them to each other at the front and back seams.
TIP: It should form a frilly ring!

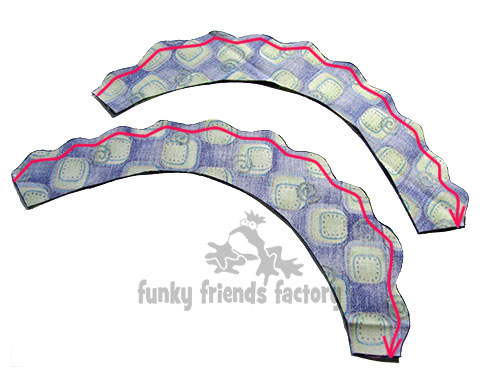
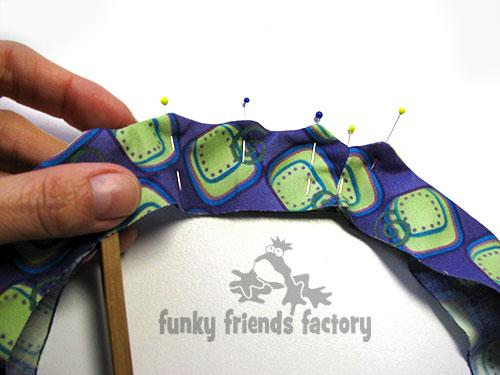
STEP 17a
Snip/clip your seam allowance very well to make sure the edge seams of the SHELL RIM PIECES will turn nicely.
STEP 17b
Pin the edge seams of the SHELL RIM PIECES so they lie nice and flat. Sew right around the edge of the edge seam of all the SHELL RIM PIECES 5mm (¼inch) in from the edge to create a ‘rim’ around the outside (just like the flippers).
STEP 18
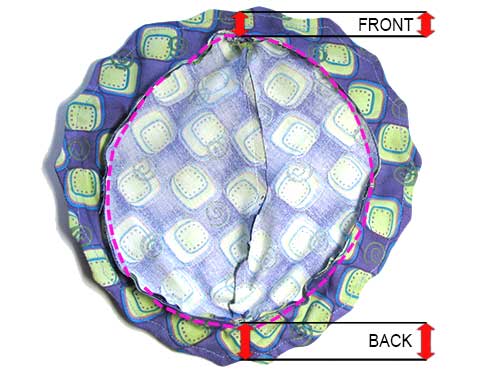
Pin and sew the finished SHELL RIM to the SHELL PIECES along the rim/shell seam.
*** NB – The FRONT is narrower than the BACK!***
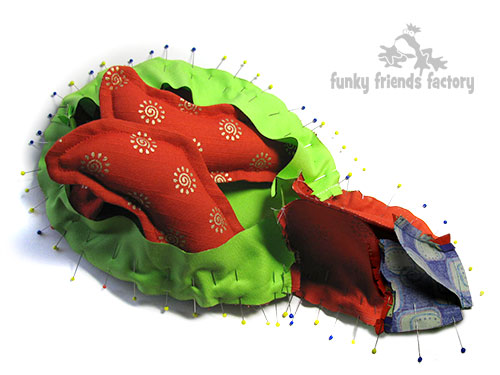
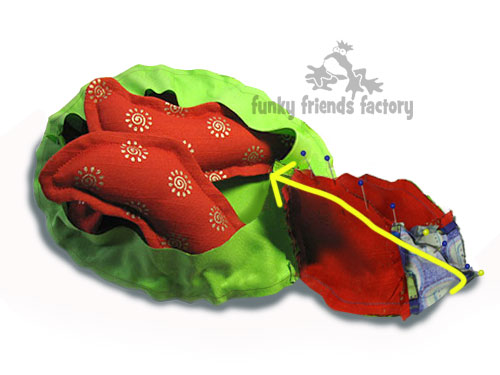
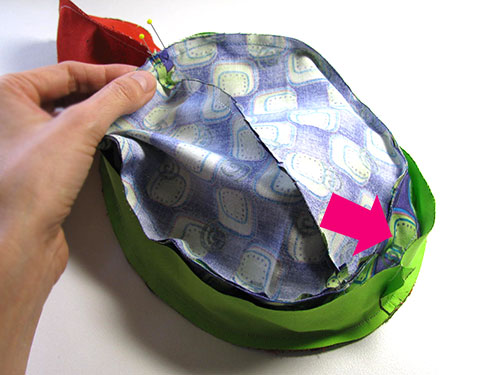
STEP 19
Pin the SHELL & RIM PIECES to the SIDE BODY PIECES, leaving a gap at the back for stuffing. (The TAIL, FLIPPERS and SHELL RIM must be tucked inside.)
TIP: PLEASE DON’T forget to leave the stuffing gap open otherwise you will have a lovely turtle with all his body bits stuck inside his shell and you won’t be able to turn him right sides out!
ASSEMBLY:
STEP 20
Turn your turtle right sides out through the stuffing hole.
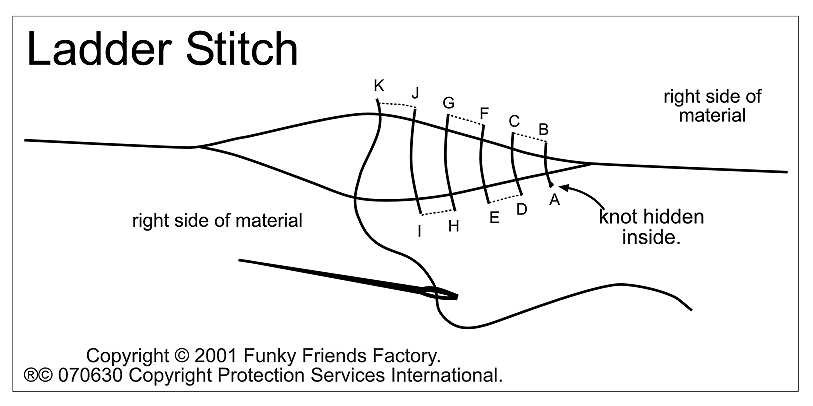
STEP 21
Fill the head and body with toy stuffing. Hand sew the stuffing gap closed using a ladder stitch.
EYES:
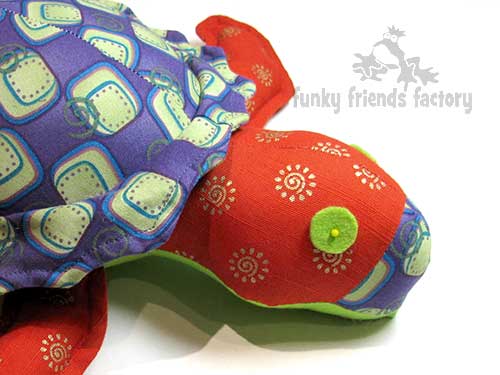
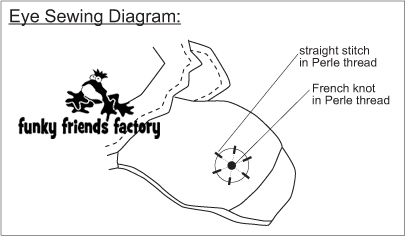
STEP 22
Cut 2 circles of felt for the eyes. Place them in position using pins.
STEP 23
Use thick embroidery thread to sew a French knot in the center of each eye then sew around the felt circle to secure it in place – see diagram. (Or use 12mm craft eyes instead)
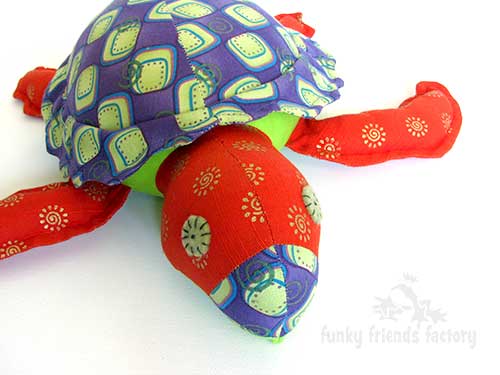
Your Sea Turtle is ready to LOVE!
Come join the fun on Facebook!
![]()
I LOVE to see how your Funky Friends toys turn out!
When you’ve made your own stuffed toy Sae Turtleyou can come show it off ~>
Post a photo on my Funky Friends Factory Facebook page for me to see and YOU could win a FREE PATTERN!

Till next time,
Happy Sewing,
Paulinel
