
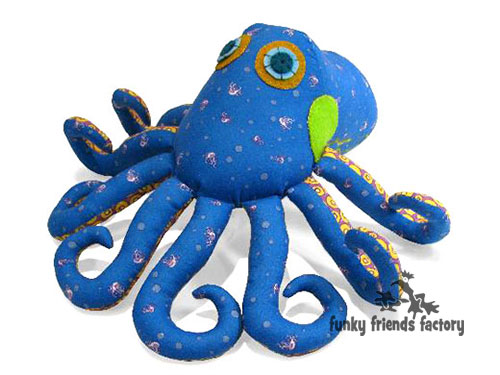
I made this photo tutorial so you can see how to sew my Octopus Sewing Pattern ~> scroll down for step-by-step photos!
Ozzie Octopus is not hard to sew – once you’ve sewn one octopus leg you can sew them all pretty quickly!
.
*** PLEASE NOTE – this is ONLY a PHOTO TUTORIAL ***
The FULL PATTERN IS NOT included here.It is NOT A FREE PATTERN!
I have made this photo tutorial so people who have purchased my Ozzie Octopus Sewing Pattern can SEE how to sew my octopus toy! (I wanted to explain this so you are not disappointed if you have found this page via a search engine and not from the link in my Ozzie OCTOPUS Sewing Pattern )
Let’s get started!
STEP 1
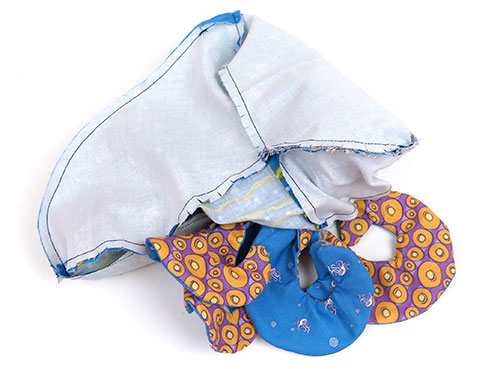
Choose some fabric… an octopus toy looks awesome in ANY fabric!
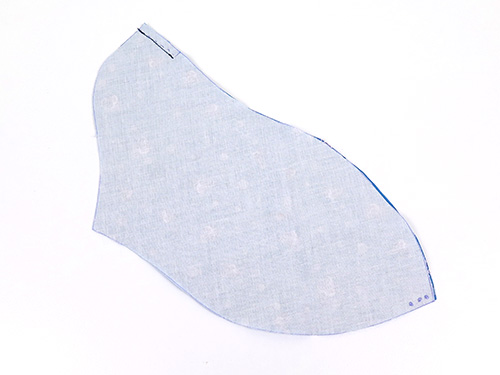
BODY:
STEP 2
Sew the BODY PIECES together from A – B.
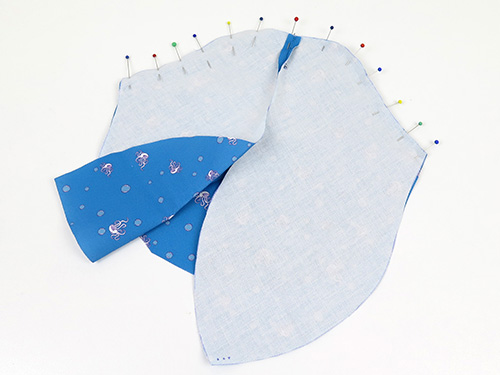
STEP 3
Sew the BODY PIECES to the FACE PIECE from C – A – C.
LEGS:
STEP 4
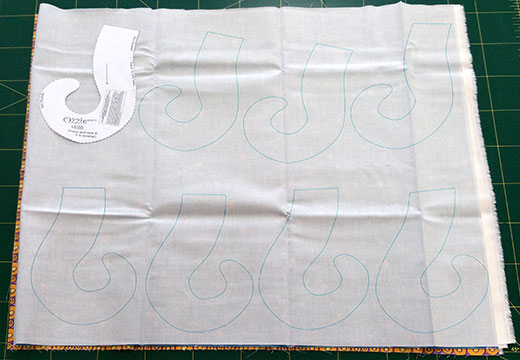
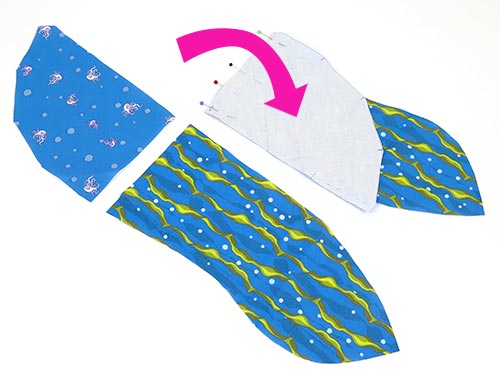
Place the MAIN fabric block and tentacled-patterned fabric block, right sides together, and trace the dotted lines of the LEG PIECES according to the layout diagram. Sew the LEG PIECES.
*** Remember to sew on the dotted line that you traced as this is the sewing line! And don’t forget to leave the gap for stuffing on each leg.
STEP 5
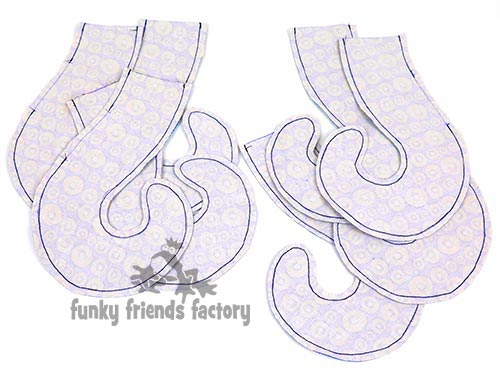
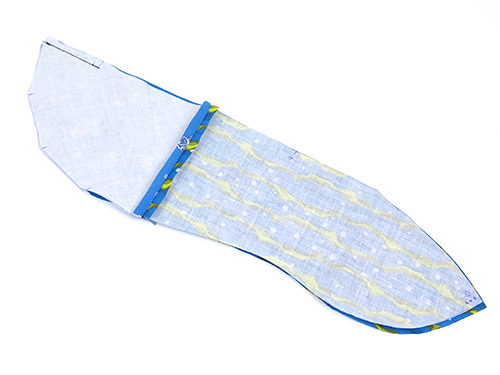
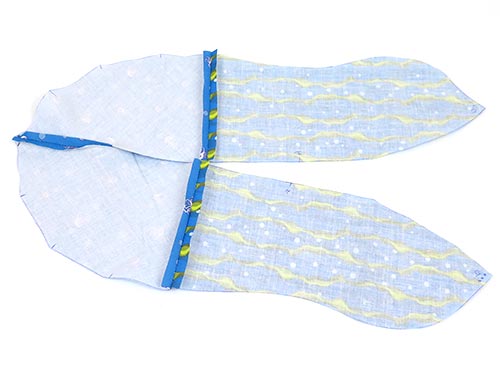
Cut out the LEG PIECES with a 3mm/1/8inch seam allowance. You may need to clip around the very curved ends of the legs. Then turn them right sides out.
TIP: I like to use a sharp object like a wooden chopstick to turn the tips really well.

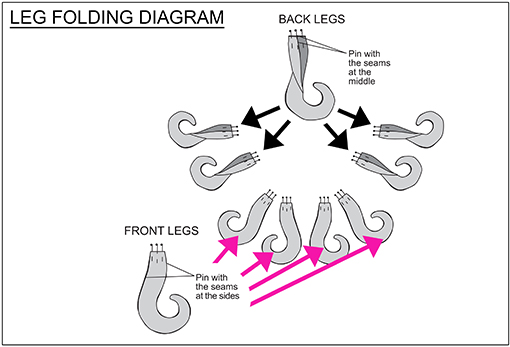
STEP 6
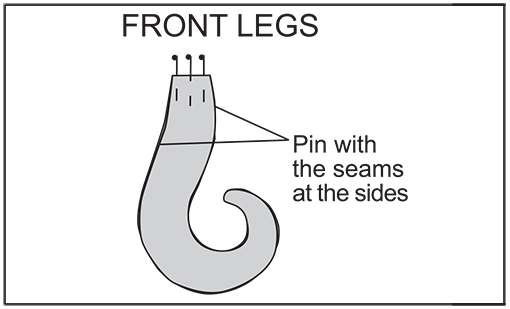
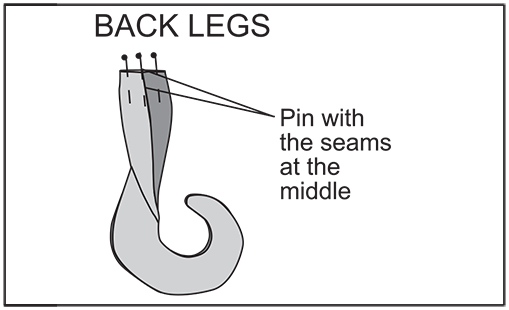
Fold and pin the LEGS closed at the top following the LEG FOLDING DIAGRAMS below.
The 4 FRONT LEGS (2 right,2 left) must be folded with the seams at the side.
The 4 BACK LEGS (2 right,2 left) must be folded and pinned with the seams in the middle.
Lay out the 8 legs so you can see which order they will go.
STEP 7
Pin the first left and right FRONT LEG (seams at sides) to the FACE PIECE and pin/baste these in position.
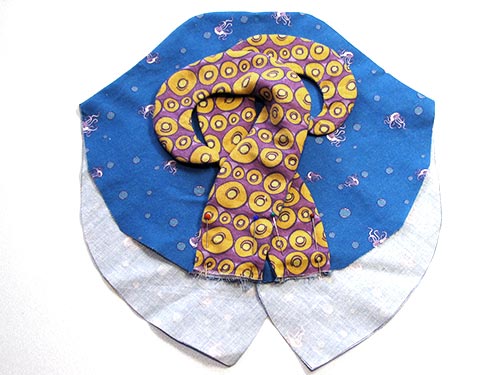
STEP 8
Pin another left and right FRONT LEG (seams at sides) to the FACE PIECE and pin/baste.

STEP 9
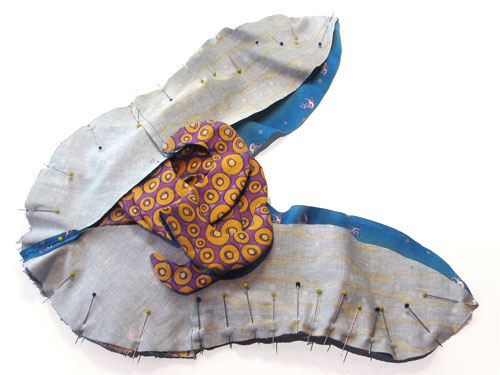
Fold the FRONT LEGS down so they are out of the way. Pin the 2 left, and 2 right BACK LEGS (seams in middle) to the FACE PIECE. Pin/baste these 4 legs in place.
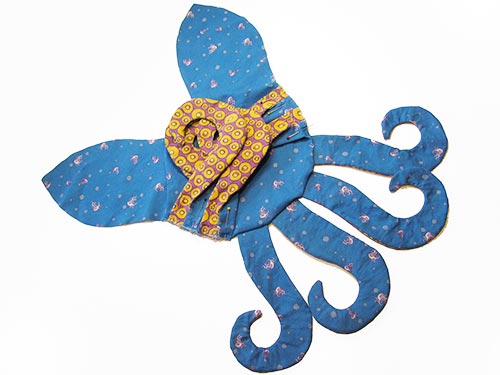
STEP 10
Check that you have the legs positioned correctly before you go ANY FURTHER!
The FRONT LEGS should be ‘curling outwards’ and be positioned with the tentacle-patterned fabric facing downwards, and the BACK LEGS should be ‘curling upwards’ and with the tentacle patterned fabric facing towards the back.
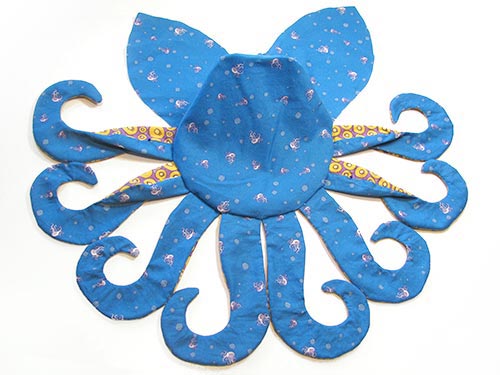
STEP 11
Fold ALL the LEGS inside the body cavity.
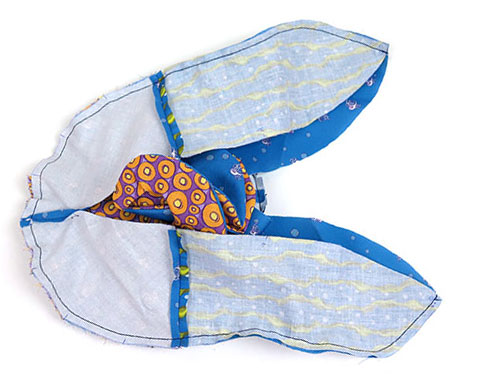
CHEST PIECES:
STEP 12
Sew each CHEST PIECE to a TUMMY PIECE, sewing from C – D, matching the double dots of the pattern markings. (I like to press this seam so it lies nice and flat)
STEP 13
Sew the CHEST PIECES together from E-F.
TIP: Open out the CHEST PIECES and finger press this seam flat.
STEP 14
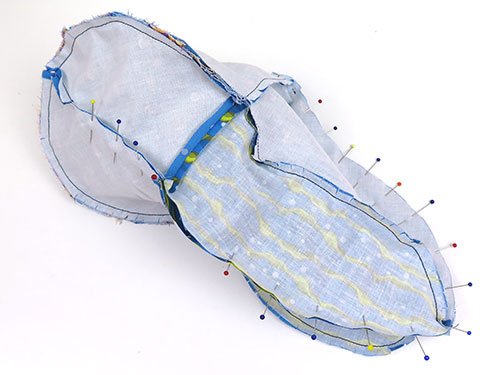
Pin the CHEST-TUMMY PIECES to the BODY-FACE PIECES.
STEP 15
Sew the CHEST-TUMMY PIECES to the BODY-FACE PIECES.
STEP 16
Pin CHEST PIECES together from E – D, and the TUMMY PIECES from H – G, and the BODY PIECES together from G – B so that all that is left open is the gap for turning and stuffing (between H and D).
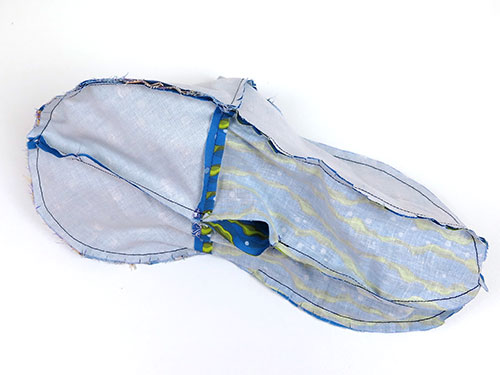
STEP 17
Sew the seam you have just pinned, leaving the turning gap open.
ASSEMBLY:
STEP 18
Turn right sides out through the gap left on the TUMMY PIECES.
STEP 19
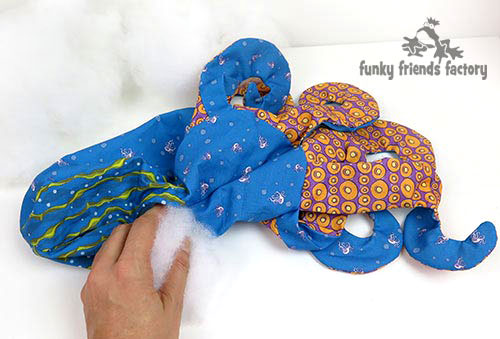
Stuff the BODY and LEGS.
TIP: A children’s paintbrush is a great tool for stuffing long thin toy parts like Ozzie’s legs. Use the paintbrush (or your finger) to stuff the legs with small bits of toy stuffing pushing them in firmly, as you go along, to avoid lumps.
STEP 20
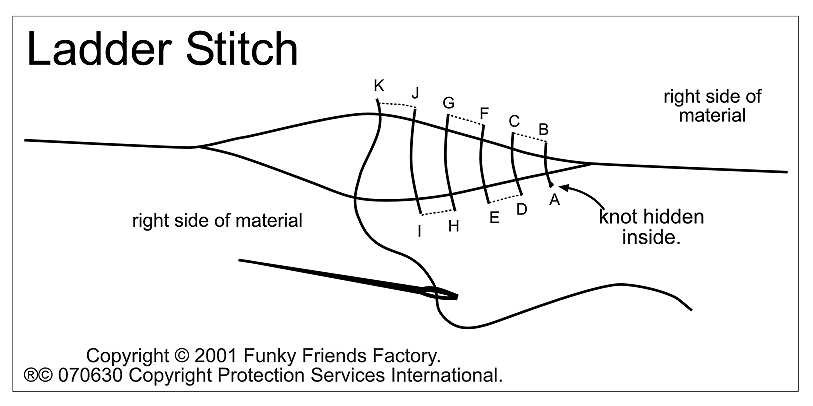
Sew the turning gaps on the BODY and each of the LEGS closed with a ladder stitch.
FINISHING TOUCHES:
STEP 21
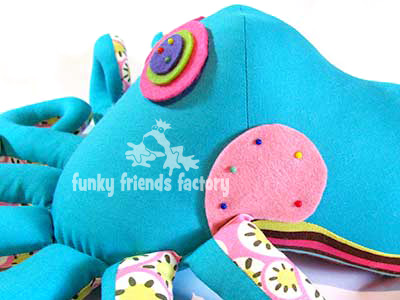
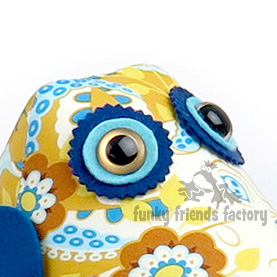
Cut your EYE PIECES and GILL PIECES from brightly coloured felt. This is the fun bit – go wild and add lots of different colours! Use embroidery thread (or a double piece of sewing machine thread) to sew the felt pieces in place
TIP: You can also use craft eyes instead of the smallest felt EYE PIECE.
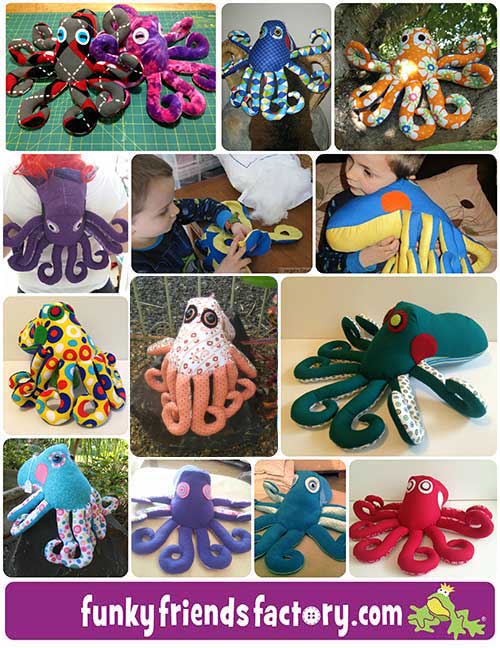
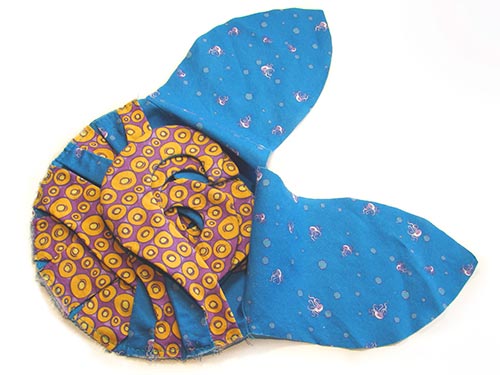
Your Octopus is ready to LOVE!
![]()
Come join the fun on Facebook!
When you’ve made your own toy octopus – come and post some photos of your NEW Funky Friend for me to see on my Funky Friends Factory Facebook page.
You could WIN a FREE PATTERN in the MAKER OF THE MONTH Pattern Giveaway!
I can’t wait to see the Funky Friends you sew!

bye for now,
Pauline
![]()
