
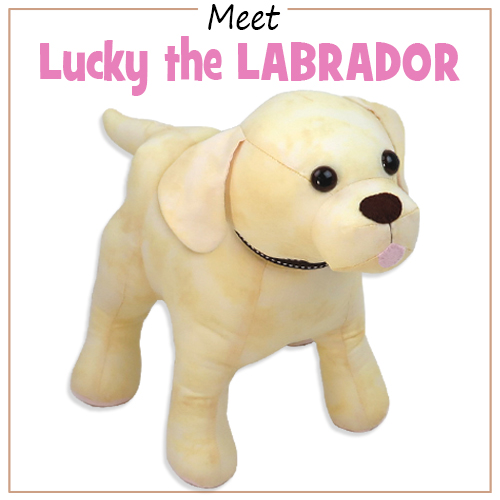
I made this photo tutorial so you can see how to sew my Labrador Sewing Pattern ~> scroll down for step-by-step photos!
*** PLEASE NOTE – this is ONLY a PHOTO TUTORIAL ***
The FULL PATTERN IS NOT included here.It is NOT A FREE PATTERN!
I have made this photo tutorial so people who have purchased my Labrador pattern can SEE how to sew a Labrador toy! (I wanted to explain this so you are not disappointed if you have found this page via a search engine and not from the link in my Labrador Pattern)
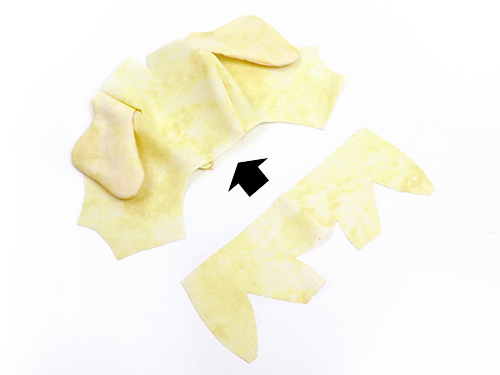
First choose some fabric!
I made a Golden Labrador with mottled gold-yellow fabric but this lovable pup will look fantastic in ANY fabric!

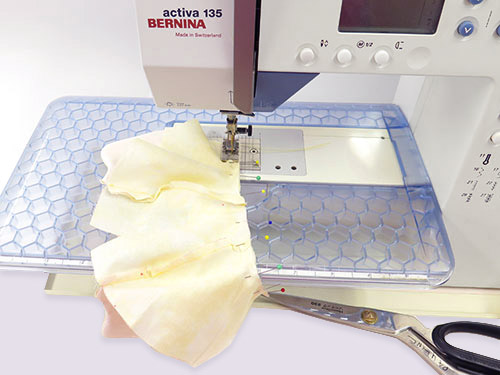
Let’s get sewing!
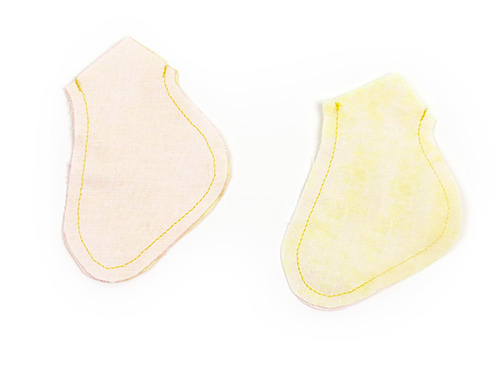
EARS:
STEP 1
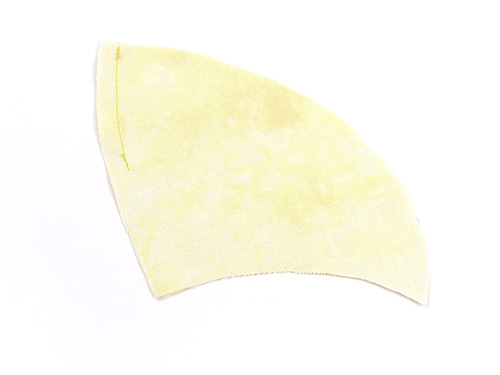
Sew the EAR PIECES together in pairs, leaving the straight edges open.
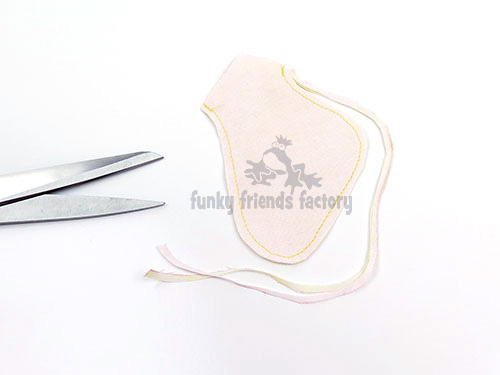
STEP 2
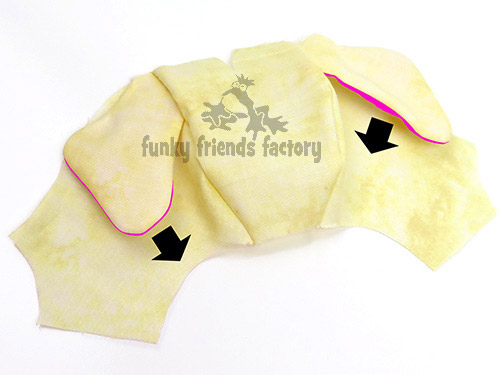
Trim the seam allowance of the EAR PIECES to 3mm (1/8 inch) and turn the EARS right sides out.
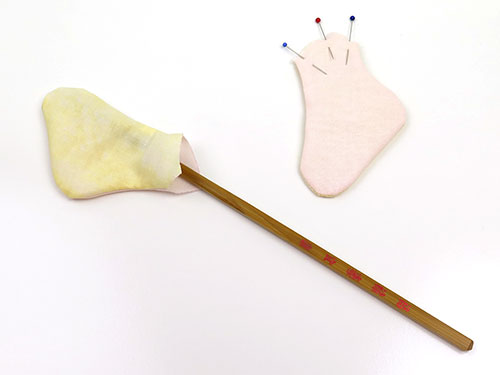
* Do NOT stuff the EARS! *
TIP: I like to use a wooden chopstick to help turn the seams nicely. Run the end of the stick back and forth along the stitching inside the EARS until the seam is nice and smooth.
FOREHEAD and FACE:
STEP 3
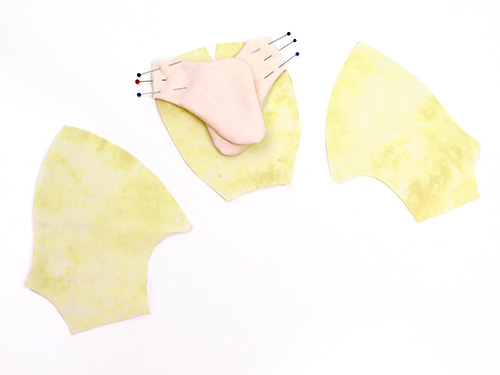
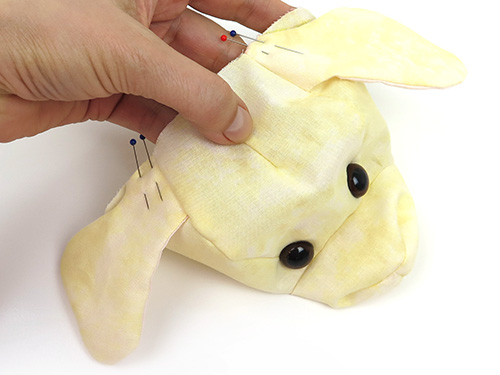
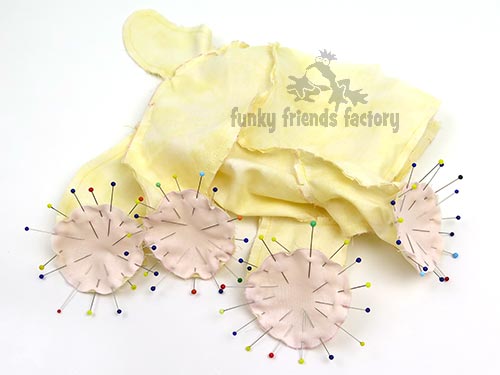
Pin the EARS to the FOREHEAD PIECE matching up the single dot pattern markings.
*The EARS should be pinned with the main fabric touching the
FOREHEAD PIECE and the contrast fabric UP.*
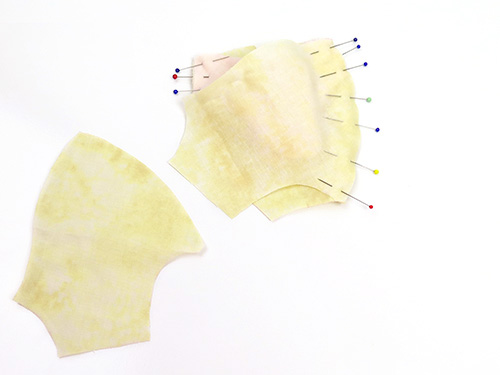
STEP 4a
Sew one of the FACE PIECES to the FOREHEAD PIECE from A – B (with the EAR in between). It’s just easier to keep the EARS put of the way if you sew one side at a time!
STEP 4b
Sew the other FACE PIECE to the other side of the FOREHEAD PIECE from A – B (with the EAR in between).
TIP: Double check that the pink fabric (contrast fabric) EAR PIECES are facing/touching the FACE PIECES. It would be a real pain to unpick the whole head later on!
SNOUT:
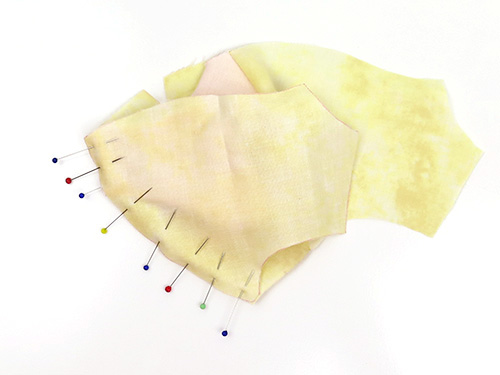
STEP 5a
* Remember to clip all the seams as you go,
especially where they are particularly curved, so that they turn nicely
and lie flat and smooth.*Pin the SNOUT PIECE to the FOREHEAD& FACE PIECES, matching points C at the centre and D on each side…
STEP 5b
…and sew them together from D – C – D.
TIP: Sew this seam with the SNOUT PIECE down so that you can make sure no folds or puckers form in the FOREHEAD& FACE PIECES. Use LOTS of pins as this is an important seam as it’s on the Labrador’s face!

STEP 6
Fold and pin the SNOUT PIECE at the snout darts (fabric right sides together) and sew the snout darts closed.
TIP: I like to finger press the darts open so the seams are nice and smooth.
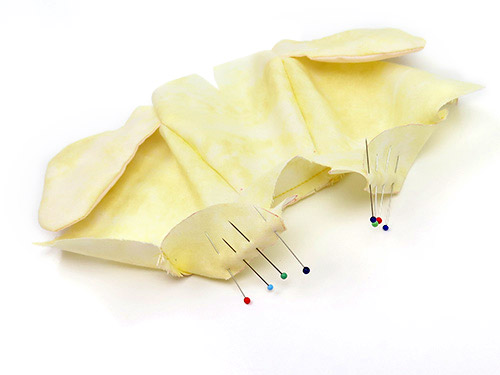
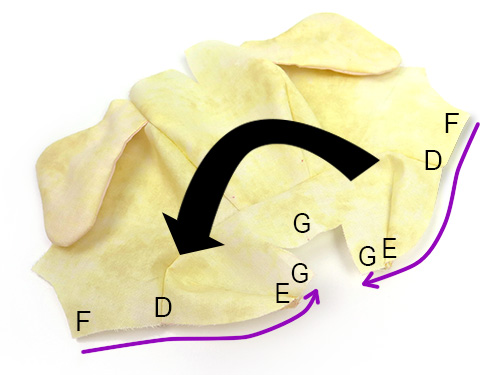
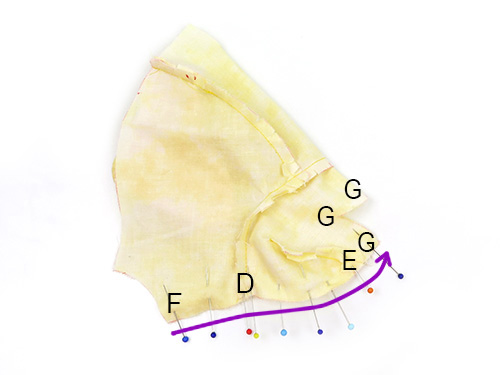
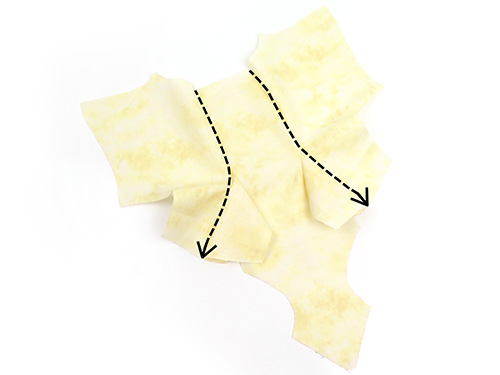
STEP 7a
Fold the SNOUT and FACE PIECES with the fabric right sides together so you can pin them along the chin seam. (See the purple arrows in the photo below.)
STEP 7b
Sew them together from F – D – E – G.
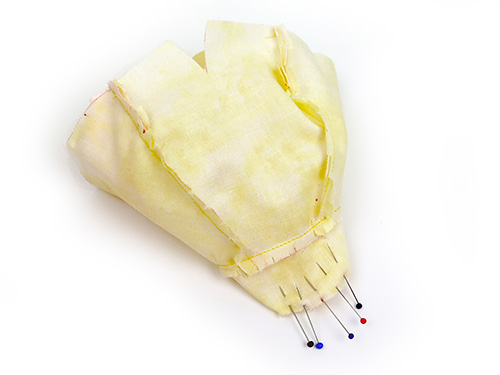
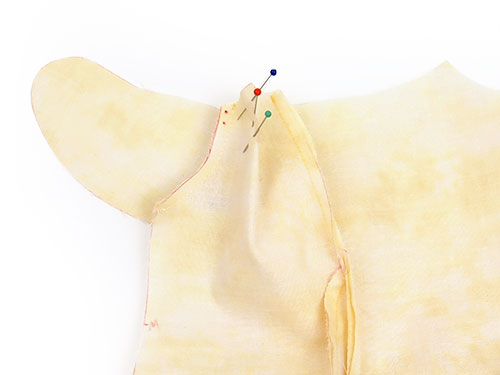
STEP 8
Fold and pin the SNOUT PIECE at the nose darts (fabric right sides together), matching point G at the centre, and sew the snout darts closed.
TIP: Use lots of pins and sew this seam with the FOREHEAD PIECE facing down to keep the pieces from slipping. You want your pup’s nose to be as straight as possible!
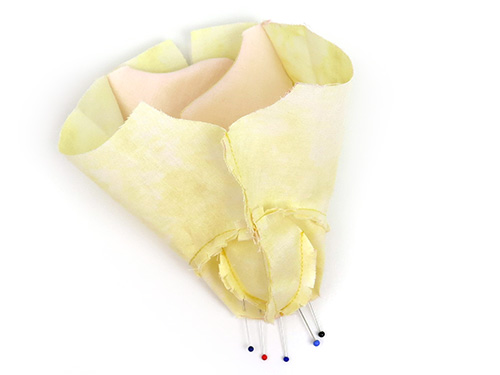
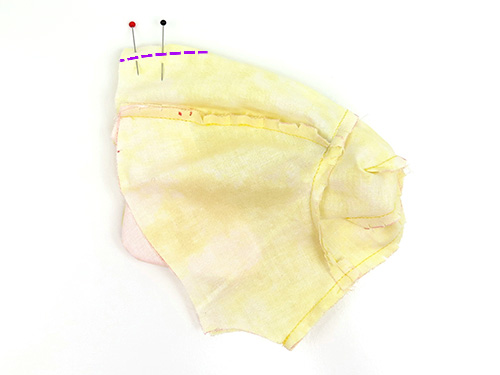
STEP 9
Fold and pin the FOREHEAD PIECE with the fabric right sides together and sew the forehead dart as shown on the pattern markings.
*I have added a purple dashed line in the photo below,
so you can see where to sew the forehead dart.
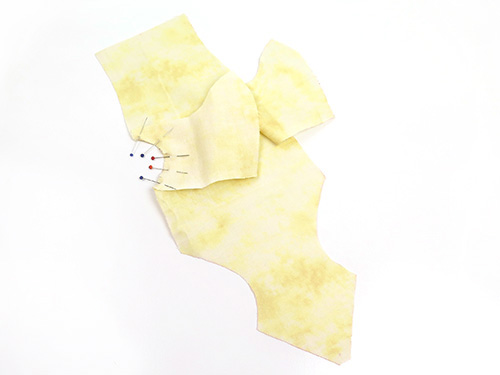
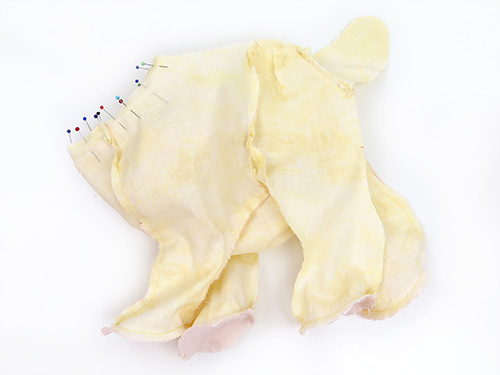
STEP 10
Fold the EARS to the sides, so the open edge of each EAR lines up with the edge of the FACE PIECES along the side seam and pin them in this position.
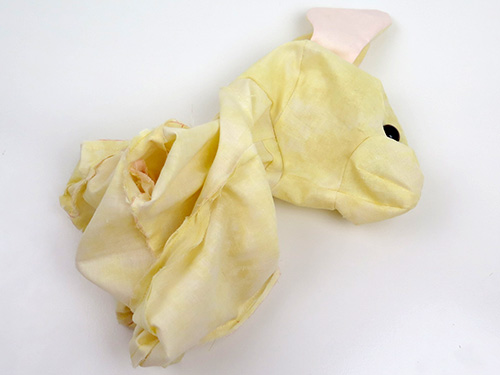
BACK HEAD:
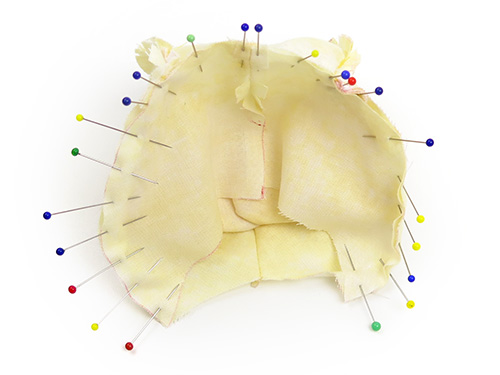
STEP 11
Sew the BACK HEAD PIECES together from H – J.
STEP 12
Sew the BACK HEAD PIECES to the FOREHEAD & FACE PIECES from K – H – K.
TIP: Use lots of pins to make sure the pieces don’t slip as you sew the head together.

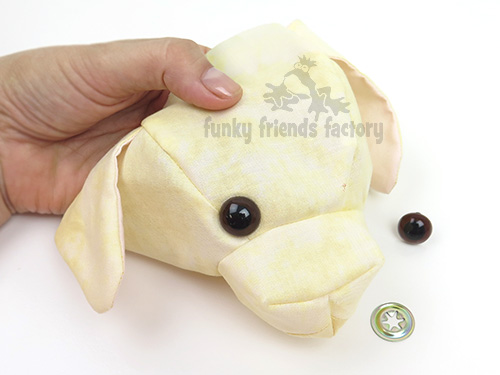
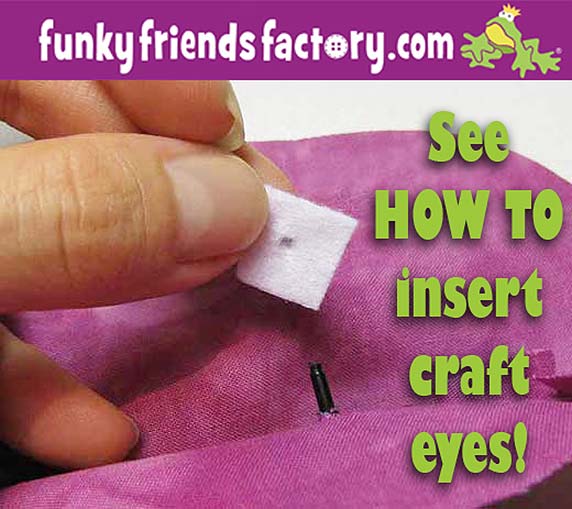
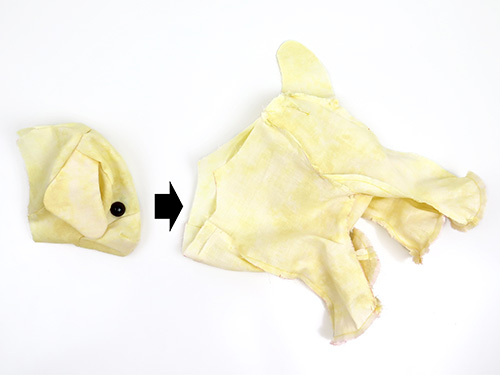
EYES:
STEP 13
If you are using craft eyes, insert them now. Put the head aside while you sew the rest of your Labrador’s body.
TIP: I have a tutorial to show you how to insert craft eyes on my blog.
FRONT LEGS:
STEP 14
Sew the FRONT LEGS to the TUMMY PIECE from L – M.
BACK LEGS & FOOTPADS:
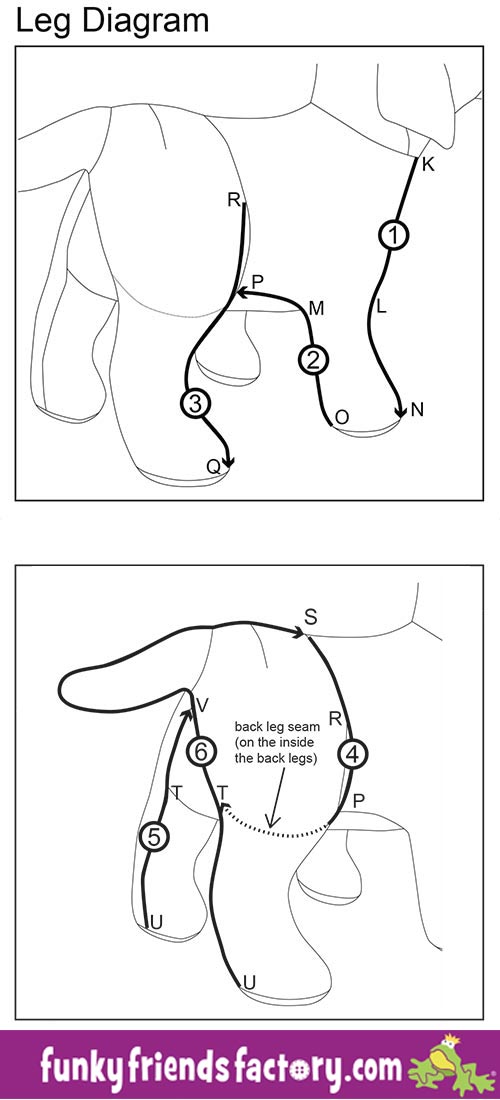
STEP 15a
Study the Leg Diagram below before going on, so you can picture the seams as you sew.
STEP 15b
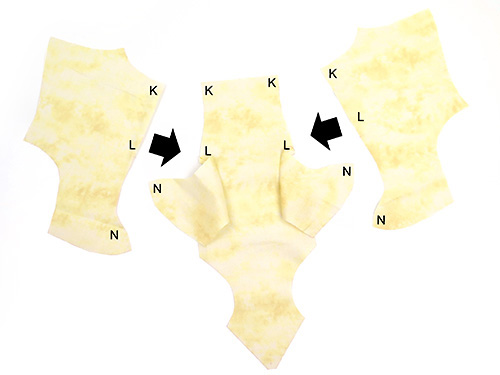
Sew the FRONT PIECES to the TUMMY PIECE & FRONT LEG PIECES on each side from K – L – N. (Leg Diagram arrow 1)
* I have added the letters from the pattern markings in the photo below
to help you make out where L is!
Here you can see the first FRONT PIECE PINNED to the TUMMY PIECE & FRONT LEG PIECE on one side.
And here you can see where both FRONT PIECES have been sewn in place, (looking from the right side of the fabric).
STEP 16
Sew one FRONT LEG and FRONT PIECE together from O – M and continue sewing the FRONT LEG to the TUMMY PIECE together from M – P. (Leg Diagram arrow 2) Repeat on the other side, sewing from O – M – P.
STEP 17a
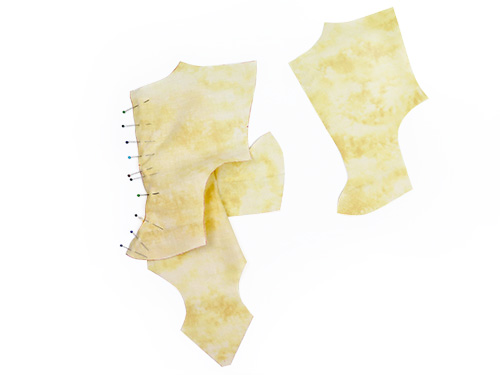
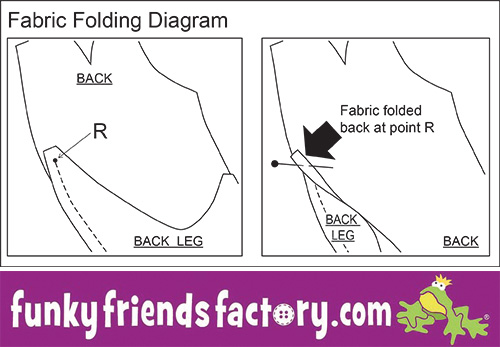
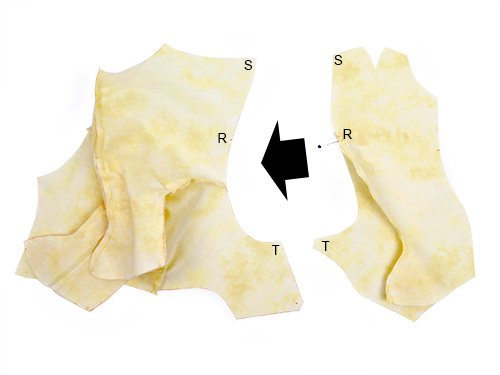
Sew the BACK LEG PIECES to the BACK PIECES from Q – R. (Leg Diagram arrow 3)
*** Do not sew past point R.***
STEP 17b
Fold the fabric back at point R.
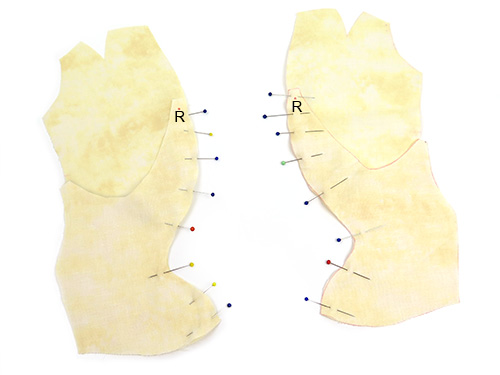
STEP 18a
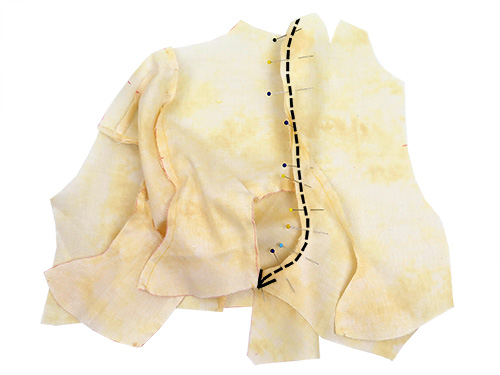
Pin the BACK & BACK LEG PIECES to the FRONT PIECE & TUMMY PIECE from S – R – T. (Leg Diagram arrow 4)
STEP 18b
Sew them together from S – R – T. (Leg Diagram arrow 4)
*Here I have pinned the first side, don’t forget to do the other side too!
STEP 19
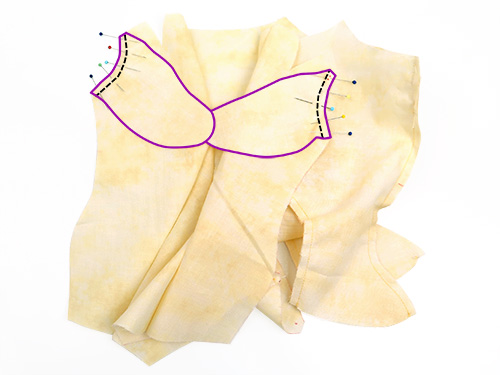
Pin the TAIL PIECES to the BACK PIECES matching the dot pattern markings.
*I outlined the TAIL PIECES in purple in the photo below
as they are hard to see against the yellow!
STEP 20
Fold the BACK PIECES (fabric right sides together) and sew the back darts. (One on each BACK PIECE.)
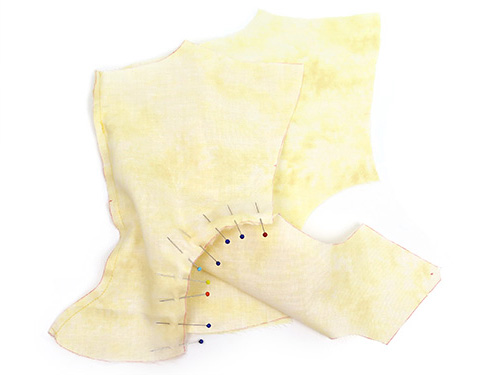
STEP 21a
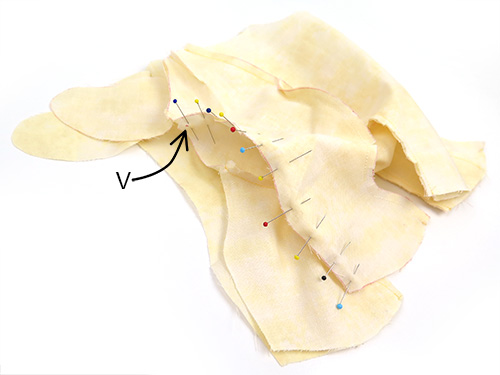
Sew one of the BACK LEG PIECES to the BACK PIECE from U (at the bottom) to T and continue sewing the BACK PIECE to the TUMMY PIECE from T – V. (Leg Diagram arrow 5).
You must STOP at point V so you can…
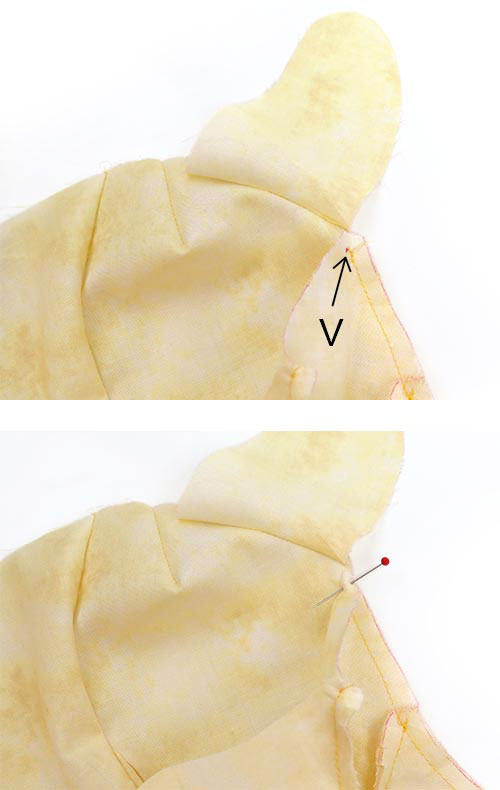
STEP 21b
…fold the TUMMY PIECE (fabric right sides together) at point V, before you pin the other side.
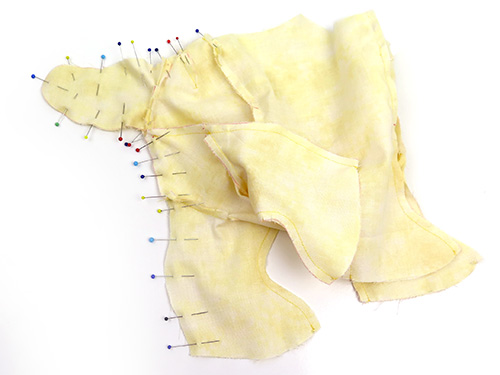
STEP 22
Sew the back of the other back leg closed from U – T – V and continue sewing your doggy closed, around the TAIL PIECES and along the top of the BACK PIECES to S. (Leg Diagram arrow 6)
STEP 23
Sew the FOOT PADS to the legs, matching N/Q at the front and O/U at the back.
TIP: I have a tutorial on my blog to show you how to sew perfect plushie feet – it’s easy when you know how!

NECK SEAM:
STEP 24
Sew the HEAD to the BODY at the neck seam. Sew from W – K – F – K – W.
TIP: I find the best way to do this is to turn the head right sides out and push it nose first ‘inside the body’ so you can pin the pieces together at the neck seam, with the fabric right sides together.
STEP 25
Pull the HEAD back out of the BODY. Sew the BACK HEAD PIECES together from J to W.
*Leave the stuffing gap open between W and S***

ASSEMBLY:
STEP 26
Make sure all the seams are clipped then turn the Labrador right sides out.
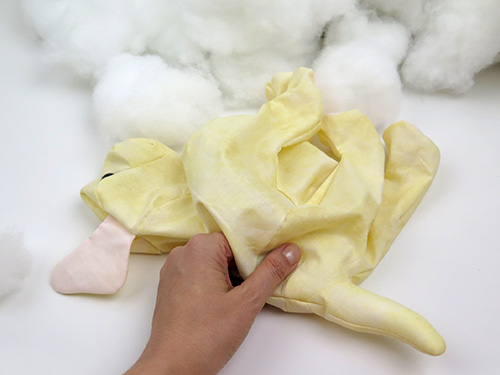
STEP 27
Stuff the TAIL and LEGS, then stuff the HEAD making sure that the SNOUT is very firmly stuffed. Stuff the NECK AREA very well then finish stuffing the BODY.
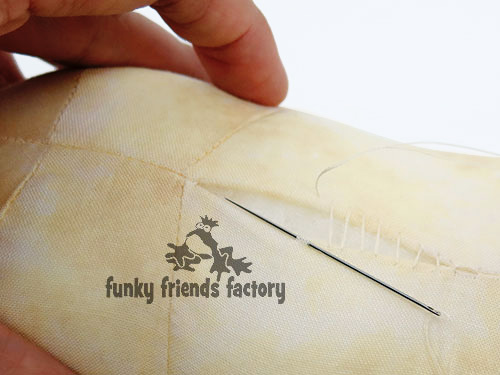
STEP 28
Sew the stuffing gap on the FRONT PIECES closed with a ladder stitch.
FACE:
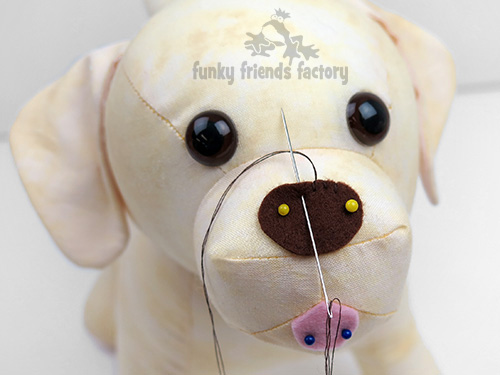
STEP 29a
Cut the NOSE PIECE and TONGUE PIECE from felt. Sew the NOSE PIECE onto the SNOUT PIECE, with embroidery thread and a blanket stitch, using the pattern markings to guide you with its position. Sew a long stitch between the nose and the top of the tongue then finish off, hiding your finishing knot under the tongue felt. Sew the TONGUE PIECE to the SNOUT PIECE with the pointy bit touching the snout dart seam. (You can also use this photo of the Labrador to guide you.)
STEP 29b
If you are embroidering the eyes, use embroidery thread and a satin stitch.
Add a piece of ribbon for a collar.
Your Labrador Toy is ready to LOVE!
Want to win a
FREE toy pattern?
It’s so EASY to enter our Pattern GIVEAWAY!
![]() ALL you need to do is post a photo of a FUNKY FRIENDS FACTORY toy that you have made on the Funky Friends Factory Facebook Page .
ALL you need to do is post a photo of a FUNKY FRIENDS FACTORY toy that you have made on the Funky Friends Factory Facebook Page .
At the end of each month I draw a winner and post the winner’s name on the Blog the following MONTH. I have an Album on Facebook for all the MAKEROFTHEMONTH winners. You can check it out HERE!
NOT on Facebook? ENTER by email! 😀
*** You can send me your photos by email too!
So come on! Share your photos ~>
The next winner could be YOU!!!
 .
.
Till next time,
Happy Sewing,
Pauline
xxx
![]()
