
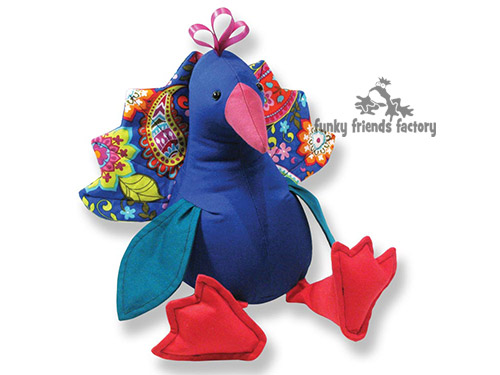
I had such fun designing and sewing my little baby Peacock toy sewing pattern. I took photos as I went along to create a photo tutorial so you can see how to put your Peacock together ~> scroll down for step-by-step photos!
I even had a ‘little helper’
who kept trying to get in on the shot!!!! 🙂

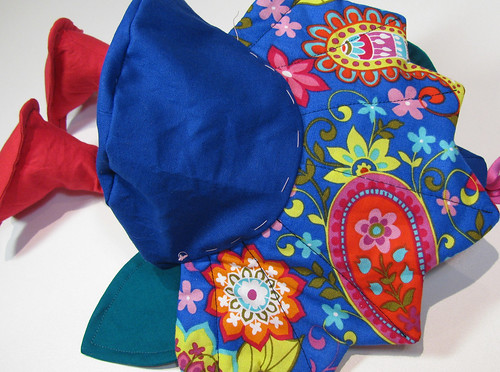
First choose some Peacock fabric:
A peacock can be ANY colour you like –
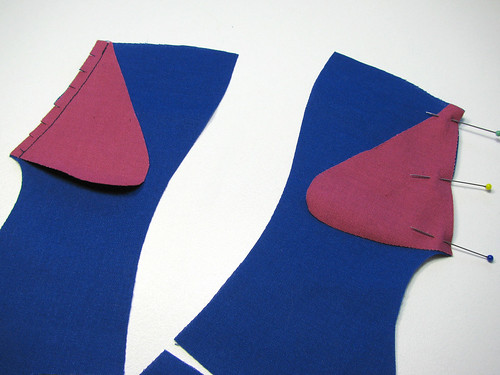
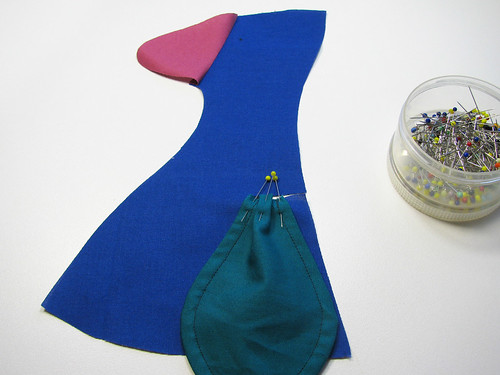
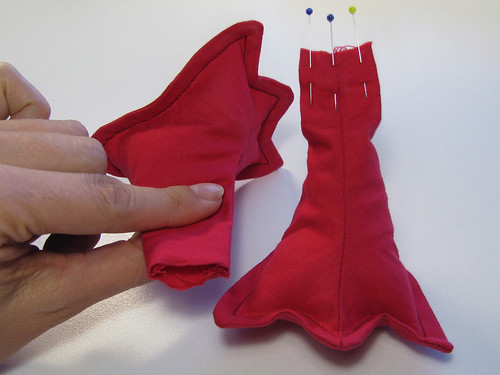
Step 1 – Start with the beak.
Sew the BEAK PIECES to the BODY PIECES. (Match the star pattern marking so you don’t get it upside down!).
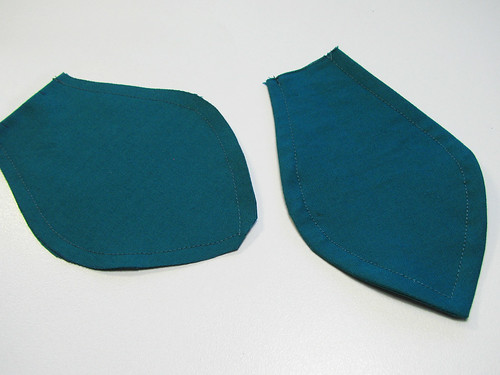
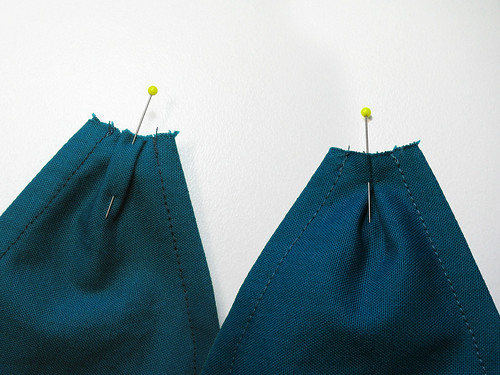
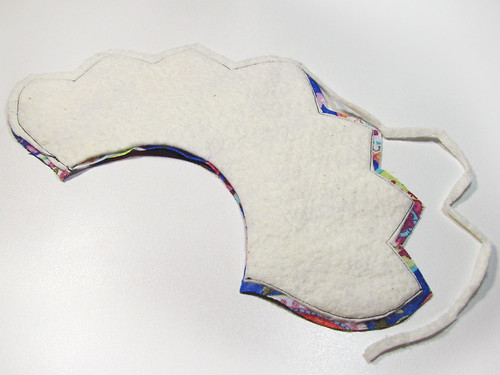
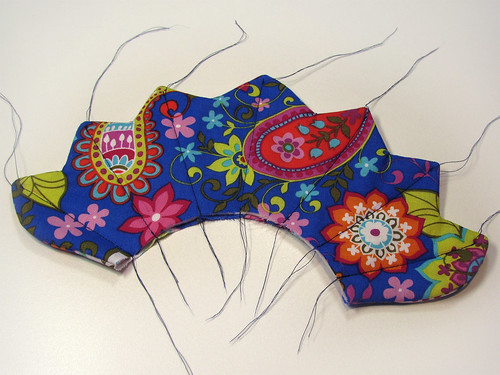
Step 2 – Add the WINGS.
Sew the WING PIECES together, leaving the straight edge open. Trim the fabric at the tip of each wing, then turn the WINGS right sides out. Pin the WING PIECES so that the seams lie flat then sew a line around the edge of each wing, 5mm / ¼inch in from the edge.
Fold the WINGS in half, then using the pattern markings to guide you, pin and sew the flat edges of the wings together at the markings to form a tuck /fold.
You can see what the ‘tuck’ looks like from the top (on the left) and from underneath (on the right).
Pin the WINGS to the BODY PIECES at the wing dart.
Fold the top of the BODY PIECE down and pin the WINGS inside each wing dart. Sew the WINGS in place.

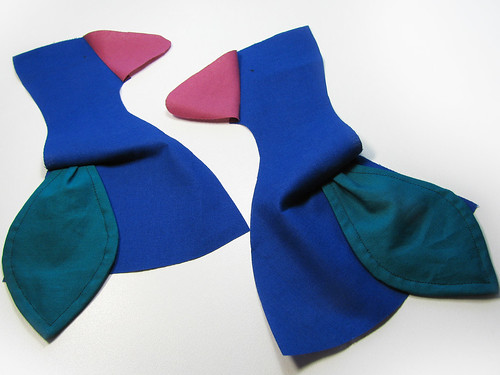
Wing’s ALL done!
Here you can see how the WINGS look when they are sewn in place.
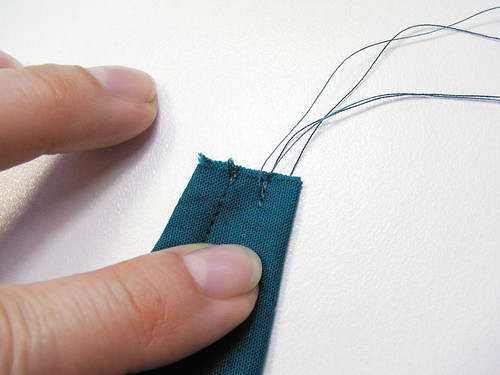
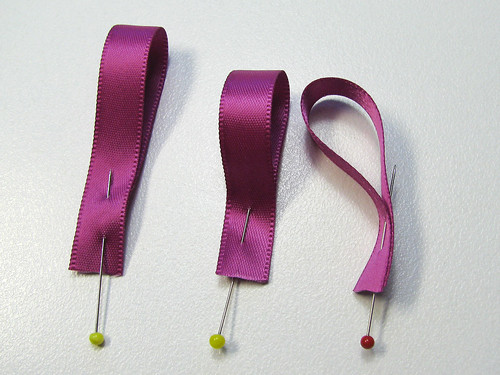
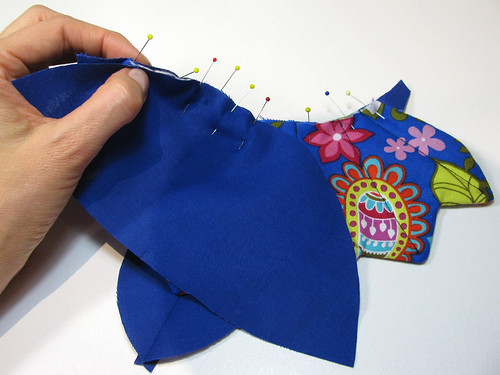
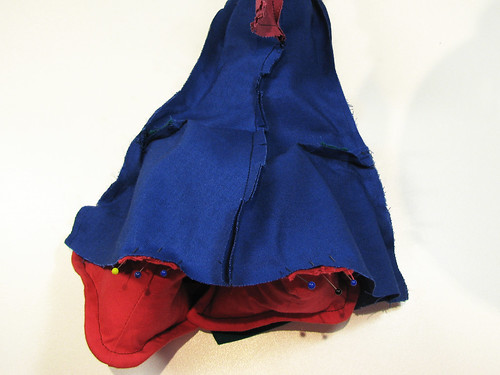
Step 3 Add some head feathers.
Cut 3 pieces of RIBBON and fold them in half to make loops. (The longer ones goes in the middle!)
Pin the BODY PIECES together, with the RIBBON in between.
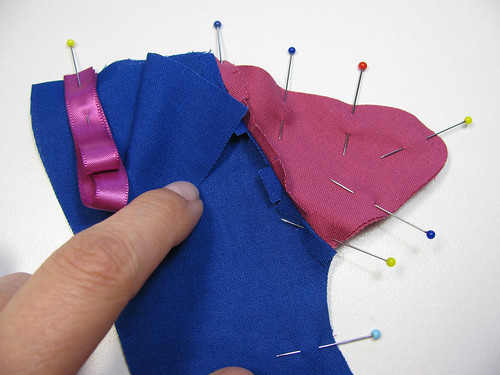
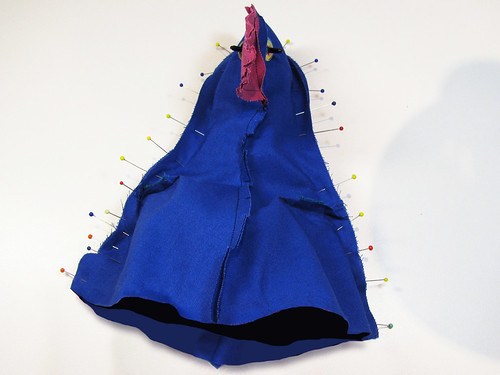
Sew the BODY PIECES together from the top, around the BEAK to the bottom. (You can’t see the RIBBONS here BUT they are inside the BODY PIECES!)
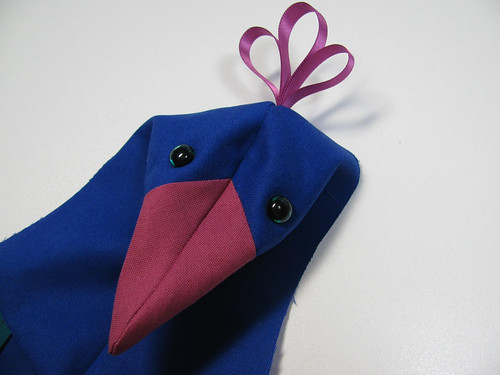
Step 4 – Add some eyes.
If you are using craft/safety eyes, insert these now.
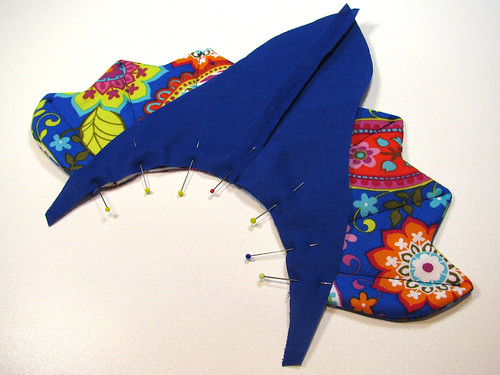
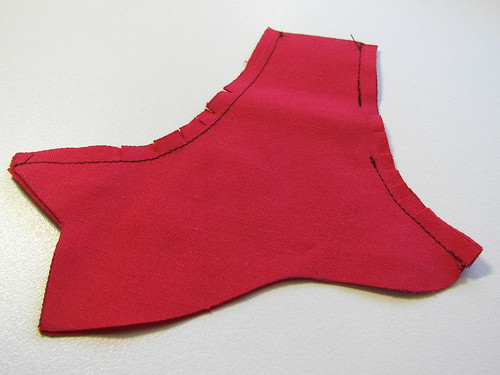
Step 5 – Add a Peacock’s TAIL.
Cut 2 TAIL PIECES from fabric and 1 from quilter’s batting. Sew the 3 layers together. (Sew the fabric TAIL PIECES with right sides together, to the batting TAIL PIECE.). Trim the batting in the seam allowance back to the stitch line, being careful not to cut your stitching.
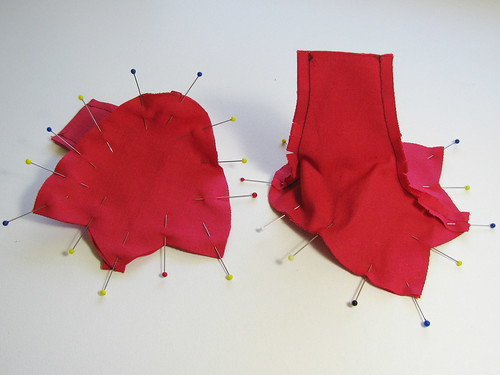
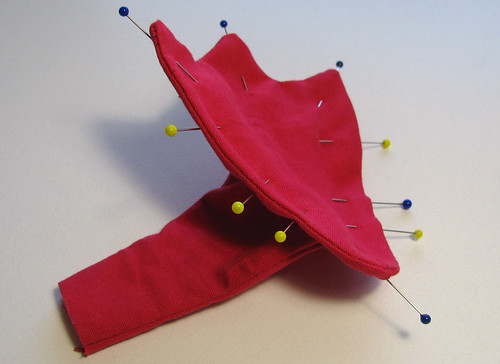
Clip the seam very well then turn the TAIL PIECES right sides out so that the batting is in between the 2 fabric pieces.Pin the TAIL so that it lies nice and flat, then using the pattern markings as a guide, sew the 7 top-stitching lines in the direction of the dashed arrow pattern markings. (Sewing towards the centre helps to keep the TAIL PIECES from bunching up as you sew the 3 layers together.)
Sew the BACK PIECES together.
Pin the BACK PIECES to the TAIL PIECES. Turn all these pieces over, so the TAIL is on top.
Pin the BOTTOM PIECE to the TAIL and BACK PIECES. The tail should be in between the BOTTOM PIECE and the BACK PIECES.
Pin the BOTTOM PIECE WELL! This is a hard seam to pin, so take it SLOW and use LOTS of pins! When it is sewn you will see it lies quite flat! : )
Here is the TAIL all sewn! Look how nice and flat it looks after the TAIL is sewn in place!
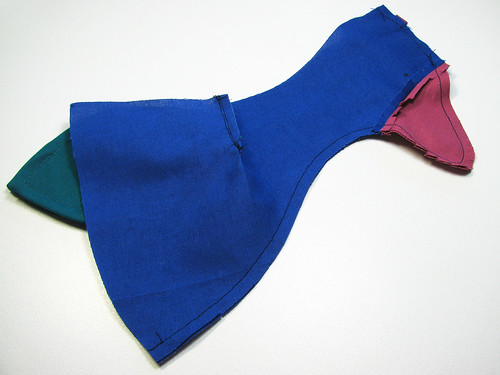
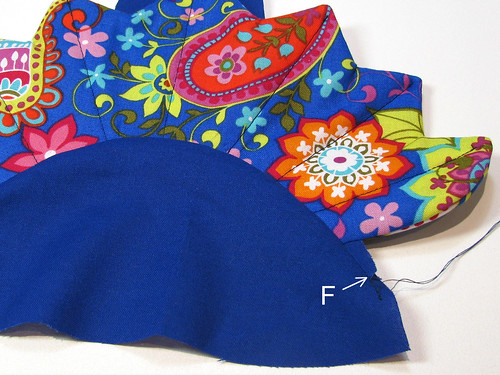
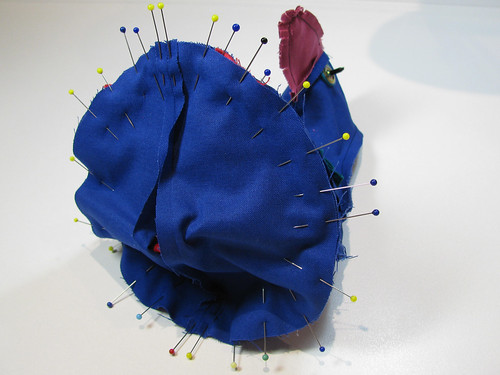
Turn the pieces over. Fold the BACK PIECES at point F (see the arrow in this picture).
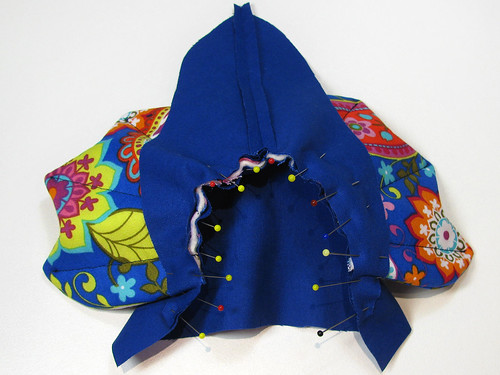
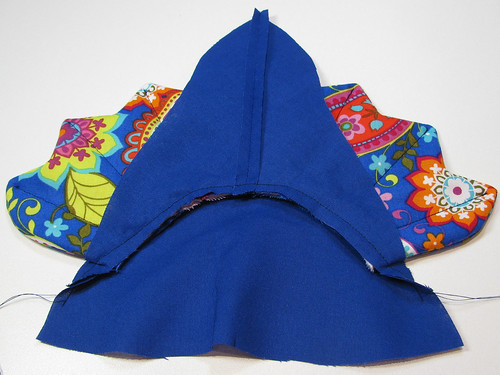
Sew the Peacock’s body together. Pin the BODY PIECES to the BACK & BOTTOM PIECES with the TAIL, RIBBONS and WINGS ‘inside’. Sew them together, leaving the bottom edges open.
Step 6 – Add some Peacock Legs.
Sew the LEG PIECES together in pairs. Sew the seams along the front and back of each LEG, remember to leave the gap for stuffing at the back of each LEG!
Pin and sew the FOOT PIECES to each of the LEGS (sew right around without a gap.)
Trim the fabric at the end of each toe, clip between each toe and turn the feet right sides out. Pin the FOOT PIECES so that the edge seam lies flat then sew a line around the edge of the foot, 5mm / ¼inch in from the edge, just like you did with the wings.
Pin the top of each LEG closed so that the seams line up at the middle.
Pin the LEGS to the BODY PIECES, use the pattern markings to guide you.
Sew the BASE PIECES together, leaving a gap open for stuffing. Then sew the BASE PIECES to the BODY, BACK and BOTTOM PIECES.
Step 7 – Time to turn and stuff your Peacock softie.
Turn your Peacock right sides out through the gap left on the BASE PIECES.
* I LOVE this part – it’s like an EXPLOSION of colors!!!!
NOW for a clever TAIL TRICK!
To MAKE SURE the TAIL stands upright I tack the seam of the tail so it stays lying down inside the peacock as I stuff the body.
Step 8 – Stuff your Peacock toy.
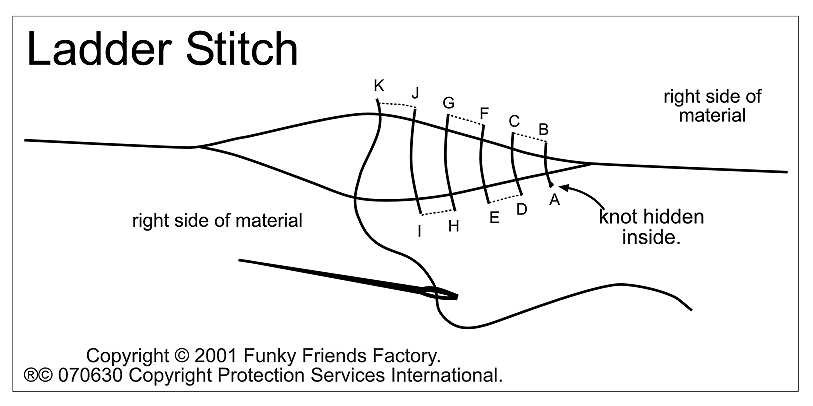
Stuff the head area firmly with toy stuffing, then stuff the rest of the body and don’t forget the feet. If you are embroidering the eyes, do these now with black thread. Sew the gaps on the BASE PIECE and LEG PIECES closed with ladder stitch.
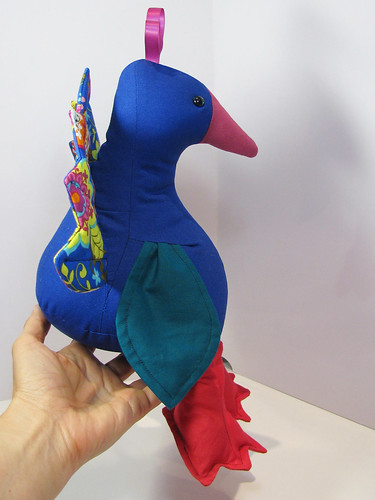
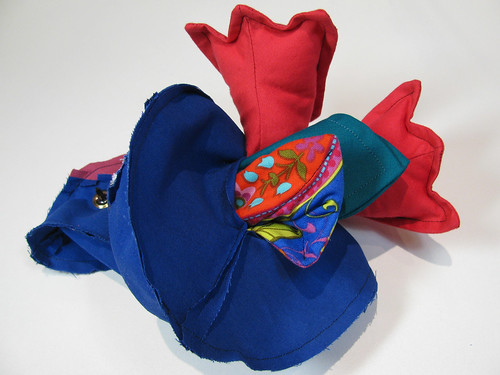
Your Peacock is
READY TO LOVE!!!
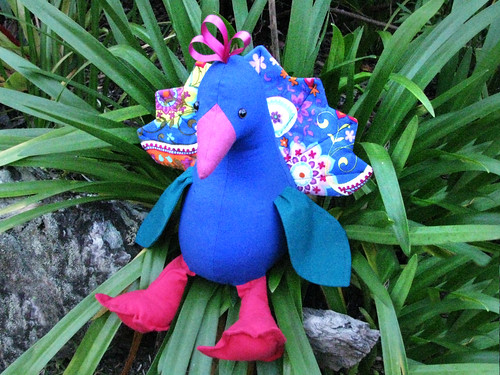 Peacock LOVES to hang out in the garden –
he thinks he’s pretty as a flower!!!
![]()
Come join the fun on Facebook!
![]()
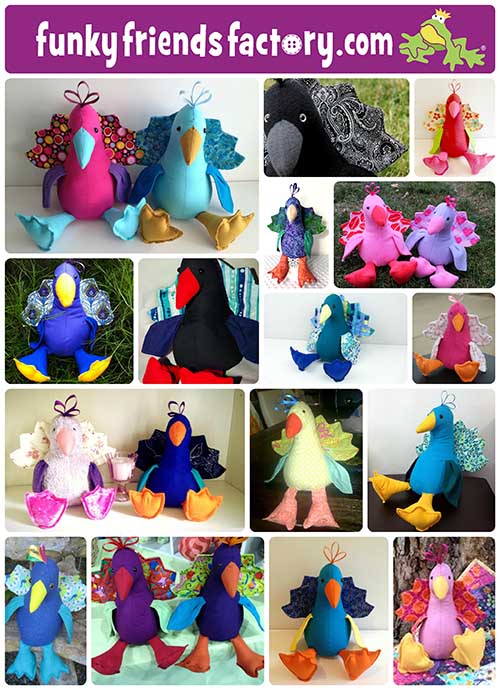
When you’ve made your own peacock toy – come and post some photos of your NEW Funky Friend for me to see on my Funky Friends Factory Facebook page.
You could WIN a FREE PATTERN in the MAKER OF THE MONTH Pattern Giveaway!
I can’t wait to see the Funky Friends you sew!

bye for now,
Pauline
![]()
