
This photo tutorial shows you how to sew my Bedtime Baby Doll Sewing Pattern ~> scroll down for step-by-step photos!
*** PLEASE NOTE – this in ONLY a PHOTO TUTORIAL ***
The FULL PATTERN IS NOT included here.
It is NOT A FREE PATTERN.I have made this photo tutorial so people who have purchased the pattern can SEE how to sew the Bedtime Baby Dolls! (I wanted to explain this so you are not disappointed if you have found this page via a search engine and not from the link in my Baby Doll pattern!)
* The Bedtime Baby Doll Sewing Pattern is available to buy, from the Funky Friends Factory website as an Instant Download e-Pattern.
Right, let’s sew a Baby Doll!
STEP 1 – Choose some fabric.
Choose some doll fabric – you can make the doll any colour you like! 😀

STEP 2 – Sew the ARMS:
Sew the HAND PIECES to the ARM PIECES. Use the single dot of the pattern markings to guide you. Fold and pin the seam towards the ARM PIECES…
…and top-stitch this down. (This is especially important for light skin-toned fabric so you don’t see the pyjama fabric underneath!)
Sew the ARM & HAND PIECES together in pairs, sew from L around the hand to M, leaving a gap open for stuffing. Turn the arms right sides out and use a blunt object like a wooden chopstick to turn the seams nicely then pin the ARM PIECES closed at the top (straight edge).

STEP 3 – HOOD and BUNNY EARS:
Zig-zag/overlock/serge the front edge of the HOOD PIECE. Turn under a 1/3 inch / 8mm hem on the front edge, as shown on the pattern…
and top-stitch this down.
Sew the BUNNY EAR PIECEStogether in pairs, clip the curved seams and turn the ears right sides out.
Pin the BUNNY EARS to the HOOD PIECEmatching the double dots of the pattern markings. (They must just touch at the centre – E.)
Don’t sew them in place just yet.
Fold the HOOD PIECEas shown in this picture.
Pin and sew the HOOD PIECEStogether at the back from F -G and zig-zag/overlock/serge to finish this seam neatly.
Pin the HOOD PIECES together (where the bunny ears touch!) matching point F to E with the BUNNY EAR PIECESsandwiched in between them. Sew them together from H – E – H. Make sure you have caught all the layers in this seam then zig-zag/overlock/serge to finish this seam neatly. Put the hood aside.
TIP: To keep the BUNNY EARS standing up – pin the seam you have just finished to the HOOD PIECES so that the bunny ears lie flat, pointing to the front, and sew a line of stitching to hold the seam in this position. You can sew this by hand if you find it is too fiddly to do on the sewing machine.


STEP 4 – Doll’s EARS:
Trace the EAR PIECE 2 times onto a double layer of fabric but do NOT cut them out. Sew along the dotted-sewing line of the EAR PIECESthen cut them out with a 1/8 inch/3mm seam allowance outside the dotted-sewing line.
Turn the EARS PIECESright sides out, pin the flat edge of the ears closed and set them aside. (Baby ears are quite small so they a bit fiddly! )Use a chopstick to help you turn them nicely.
TIP: You could also use felt for ears too if you like. BUT use a good quality felt so the ears can put up with a bit of tugging! Cut out on the sewing line so they won’t be too big!


STEP 5 – Doll’s HEAD:
Trace the pattern markings for the face onto ONE of the HEAD PIECES. This will now be called the FRONT HEAD PIECE, BUT we will sew the BACK of your baby, with the hood, first!
Fold the fabric right sides together and sew the darts at the top and bottom of the HEAD PIECES.


STEP 6 – BACK Body:
Sew the BACK PIECEStogether along the centre seam, leaving the gap open for turning and stuffing.
Fold, pin and sew the darts in the BACK PIECES.
Pin the HOOD PIECE to the BACK PIECESat the neck seam, the fabric right sides together, matching point G.
(Using the pattern markings on the BACK PIECES to guide you – make sure that the hood does NOT reach the edge of the BACK PIECES at Cor it will get stuck in the seams when you sew your baby together!)
Take the BACK HEAD PIECE and place it on top of the HOOD PIECE. Pin and sew the BACK HEAD PIECE to the BACK PIECES at the neck seam with the HOOD PIECE sandwiched in between.
(The BACK HEAD PIECE and BACK PIECES should have right sides together but the right side of the BACK HEAD PIECE will be against the wrong side of the HOOD PIECE.)


STEP 7 – FRONT Body:
Sew the dart at the top of the FRONT PIECE.
Sew the FRONT HEAD PIECE to the FRONT PIECEat the neck seam.
Fold the seam towards the FRONT PIECE and top-stitch this down. (This is especially important if you are using light skin-toned fabric.)
Pin the EARS, in position on the FRONT HEAD PIECE, and pin the ARMS to the FRONT PIECEmatching M and L.


STEP 8 – Put it all together:
Fold the HOOD and BUNNY EAR PIECES to the middle of the BACK PIECE and pin them so they will not get caught in the seam when you sew the BACK AND FRONTtogether.
TIP: Push the pin in from the wrong side of the BACK PIECE so that it will not be ‘inside’ your dolly’s body when you turn it right sides out. This way you won’t prick yourself when you turn your dolly right sides out!!!
Place the BACK BODY on top of the FRONT BODY and pin them together with the EARS and ARMS sandwiched in between. Sew right around the HEAD AND BODY PIECES without leaving a gap. Use lots of pins so the pieces won’t slip when you sew your baby together!
Remove the pins holding the BUNNY EARS out of the way and and don’t forget to clip the seams – especially the very curved bits!


STEP 9 – Turning and stuffing the dolly:
Turn your baby right side out through the gap left on the BACK PIECES. (I use a chopstick to turn out the seams nicely!)
Stuff the head with toy stuffing. Stuff it very firmly so that it is nice and round
with no wrinkles!
Stuff the body starting with the feet then the legs. Make sure the neck area is also stuffed very firmly then finish stuffing the tummy area last.
Stuff the arms and sew the gaps on them closed with a ladder stitch.


Step 10 – How to embroider the Doll’s Face:
Embroider the eyes with a satin stitch.
TIP: You can hide your start and finishing knots underneath where the PACIFYER/DUMMY will be placed, or you can sew in through the gap on the back piece so the knots are inside the doll.
I like to use a stem stitch for the hair…
Here is a close up of the forehead curl.


STEP 11 – Sew your doll closed:
Sew the gap closed on the BACK PIECESwith a ladder stitch.

STEP 12 – Pacifier/Dummy/Soother!!!!
Cut out the PACIFIER/DUMMY PIECES from felt and sew them together. (I like sewing them together with the sewing machine as it looks neater, but you can also sew it by hand.)
I like to trace my felt pieces with a fabric marker, if you don’t have one ~
you can go to my blog for other methods of cutting out felt –CLICK on this PICTURE or the LINK below it!
5 easy techniques for neat accurate pieces>>Using a matching coloured thread sew the PACIFIER/DUMMY in place with a row of stitches ‘just outside’ the HANDLE PIECE, so that they are hidden in the seam.
You can add a little bit of blusher to the give your doll some rosy cheeks. Test your make up on a scrap of your skin-toned fabric first so you don’t use too much!


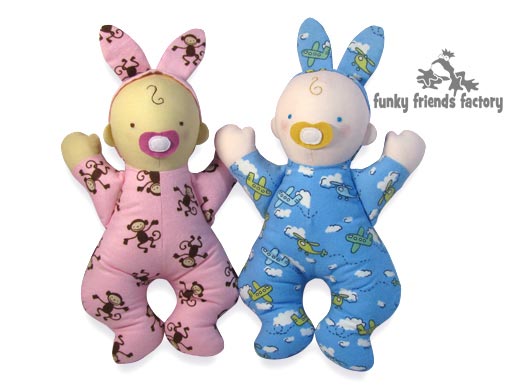
Your Bedtime Baby Doll is ready to LOVE!
![]()
I’d LOVE to see how your Funky Friends Factory dolls turn out! When you’ve made your own dolly – please come and paste a photo of your NEW Funky Friend on my Funky Friends Factory Facebook page for me to see!
You could win a FREE PATTERN in the MAKE MY MONDAY Pattern Giveaway!

Till next time,
Happy Sewing,
Pauline
xxx
