
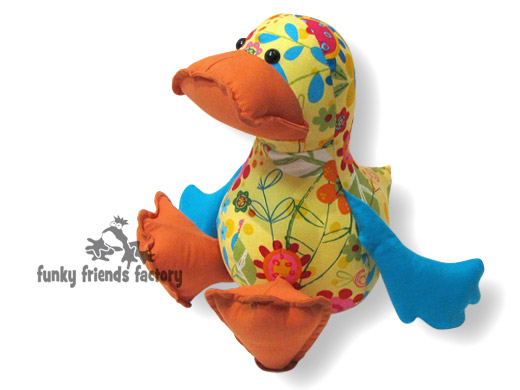
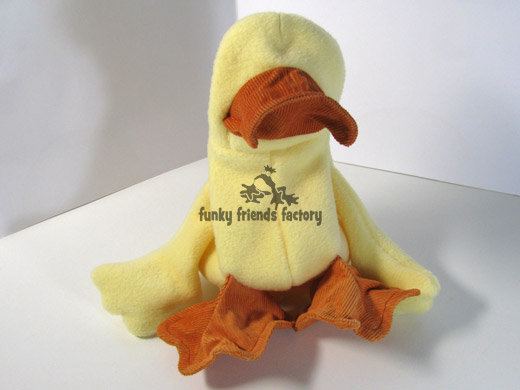
This photo tutorial shows you how to sew my Duck soft toy pattern ~> scroll down for step-by-step photos!
*** PLEASE NOTE – this in ONLY a PHOTO TUTORIAL ***
The FULL PATTERN IS NOT included here.
It is NOT A FREE PATTERN.I have made this photo tutorial so people who have purchased the pattern can SEE how to sew the toy duck! (I wanted to explain this so you are not disappointed if you have found this page via a search engine and not from the link in my Dilby Duck Sewing Pattern!)
* The Duck Soft Toy Sewing Pattern is available to buy, from the Funky Friends Factory website as an Instant Download e-Pattern.
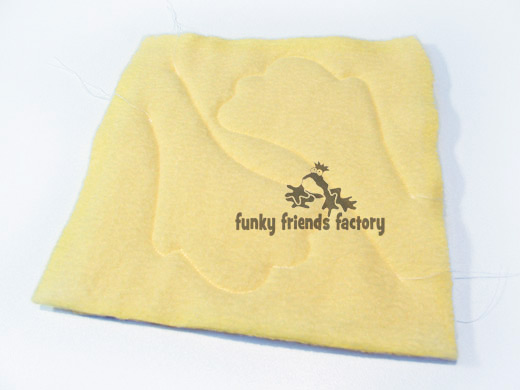
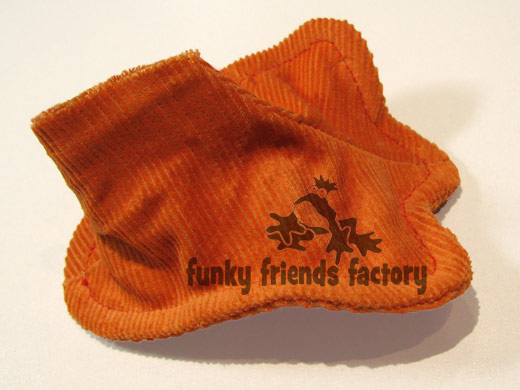
Choose some duck fabrics first.
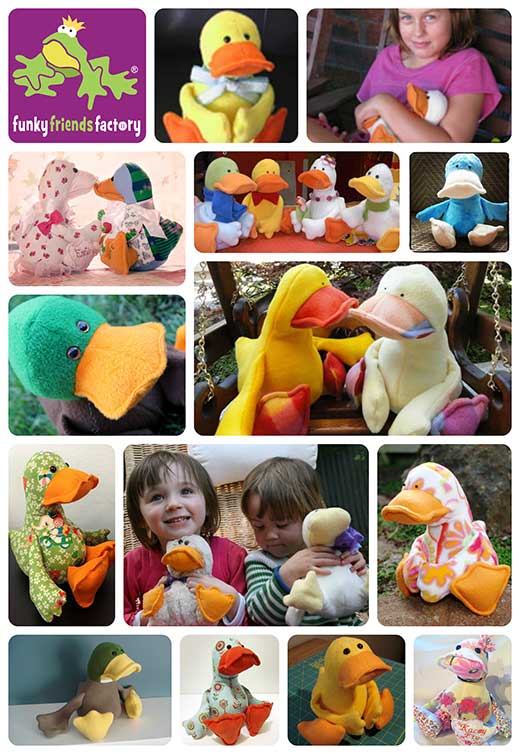
A duck doesn’t have to be yellow! Have a look at these awesome feedback photos people have sent me of their Dilby Ducks in all sorts of colours and fabrics…
Right, let’s sew a toy duck!
HEAD
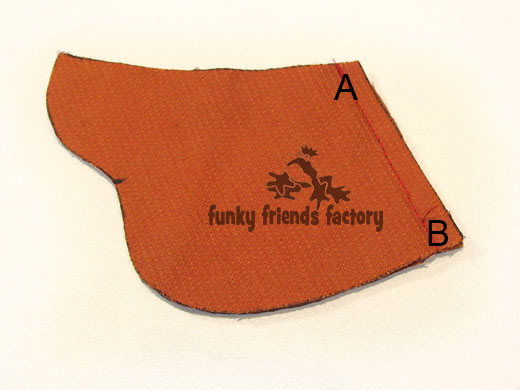
STEP 1
Sew the BEAK TOP PIECES together, from A to B.
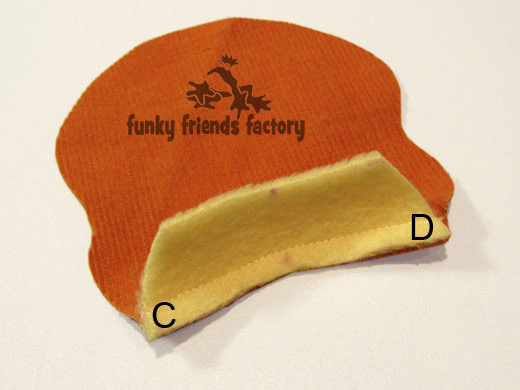
STEP 2
Sew the NECK PIECE to the BEAK BASE PIECE, matching C & D.
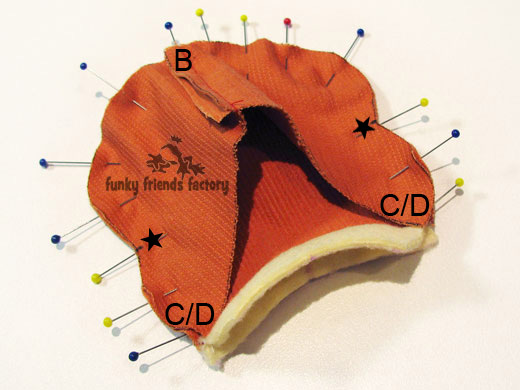
STEP 3
Sew the BASE BEAK and TOP BEAK PIECES together, matching point B, C/D and the star pattern markings on the sides of the BEAK PIECES.
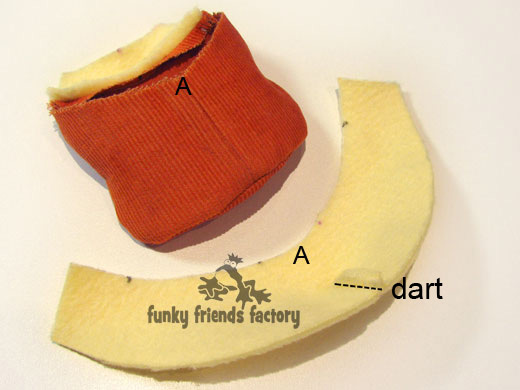
STEP 4
Sew the dart at the center of the HEAD PIECE. (Fold the fabric right sides together to sew the dart!).
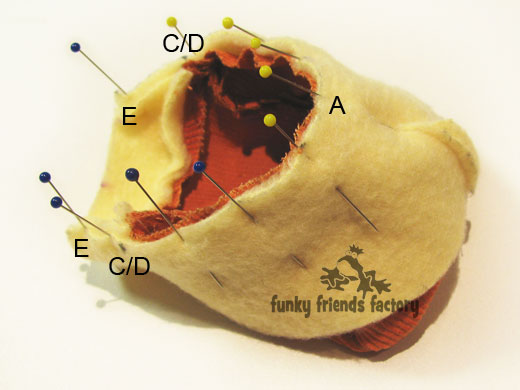
STEP 5a
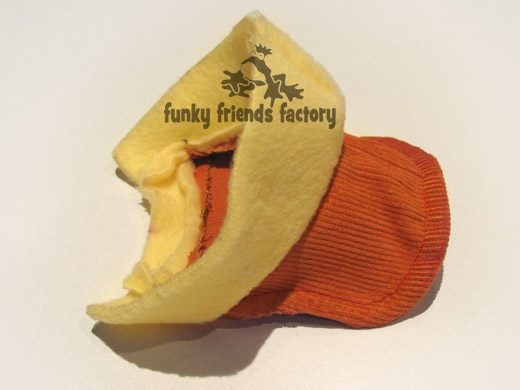
With the beak right side out, pin the HEAD PIECE to the NECK and BEAK PIECES, matching points A, C/D and E on both sides.
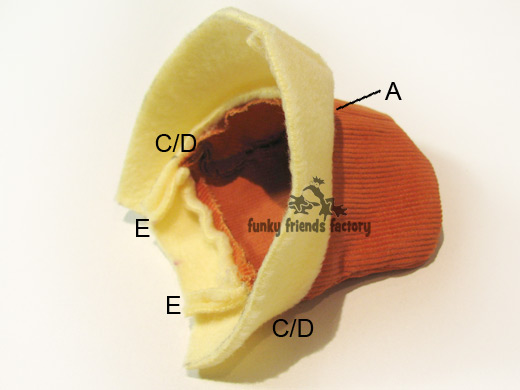
STEP 5b
Sew the HEAD PIECE to the NECK and BEAK PIECES.
STEP 6a
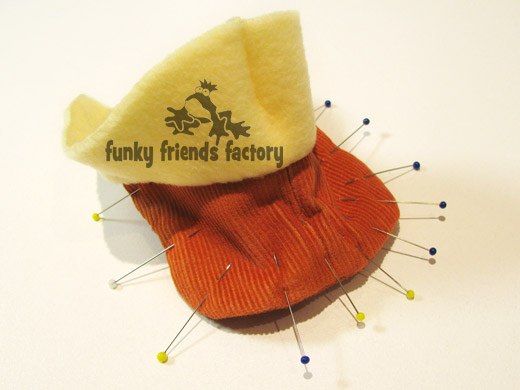
Pin the edge of the BEAK so that the seam lies flat.
STEP 6b
Sew a line around the edge of the BEAK, 5mm / ¼inch in from the edge, to create a pouty lip!
TIP: This seems like such a small detail – BUT please don’t leave out this simple step – it will REALLY make your duck so much cuter! 🙂
BODY
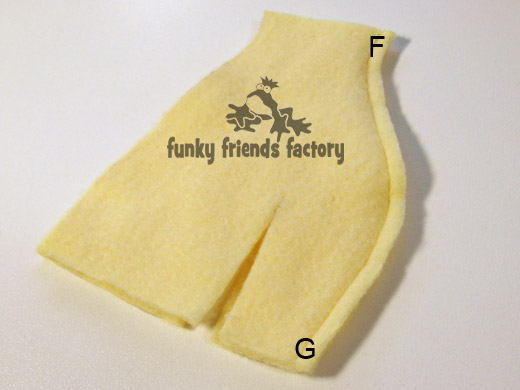
STEP 7a
Sew the TUMMY PIECES together, from F – G.
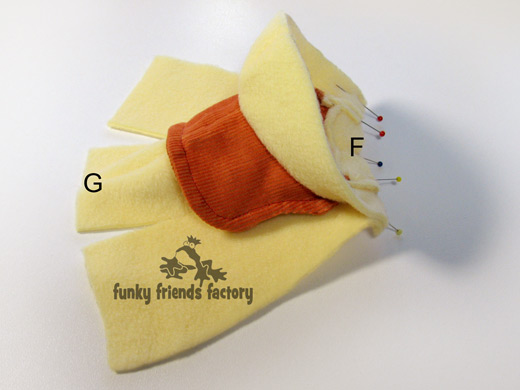
STEP 7b
Pin and sew the HEAD and NECK PIECES to the TUMMY PIECES together, matching point F.
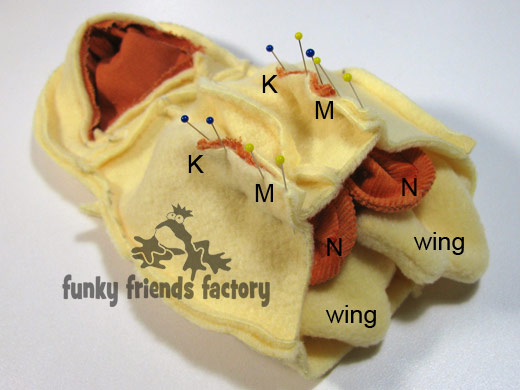
WINGS
STEP 8a
Place the fabric for the WINGS right sides together. Sew the WINGS on the sewing lines.
STEP 8b
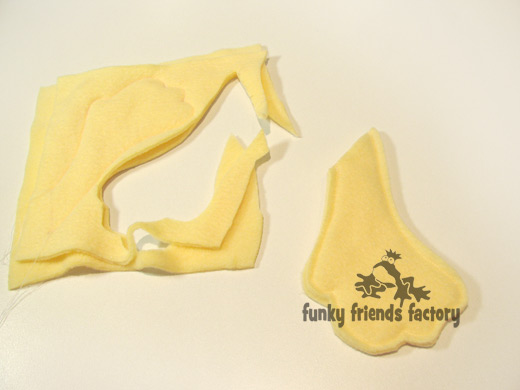
Cut the WINGS out with a 5mm/¼inch seam allowance (outside the sewing line).
STEP 8c
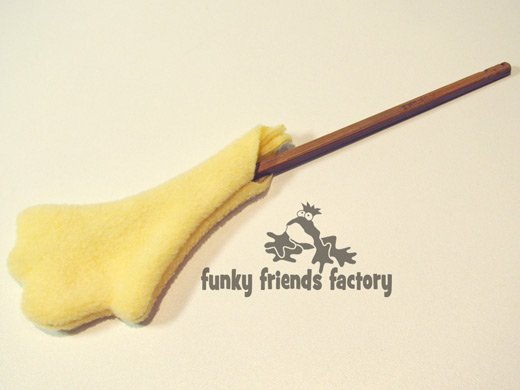
Clip the seams well especially around the very curved parts, the turn the WINGS right sides out. Stuff a small amount of toy stuffing into each WING, see the pattern markings as a guide.
STEP 9
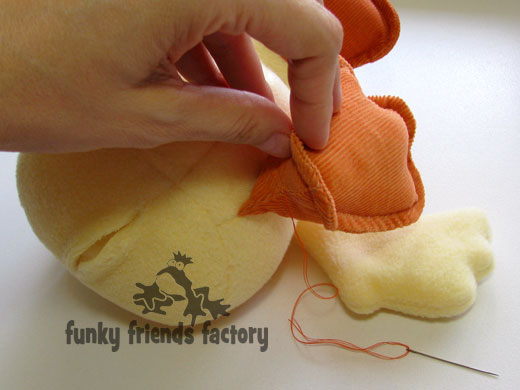
Pin the wings in position on the TUMMY PIECES as indicated by the pattern markings.
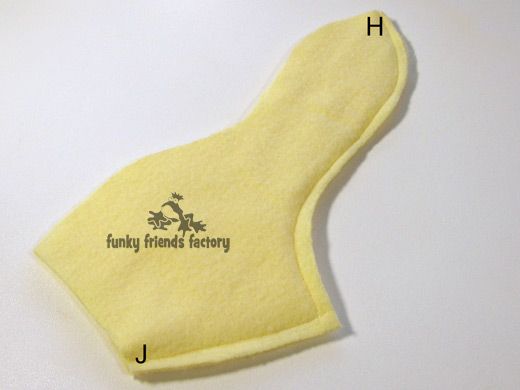
BACK
STEP 10
Sew the BACK PIECES together, from H to J.
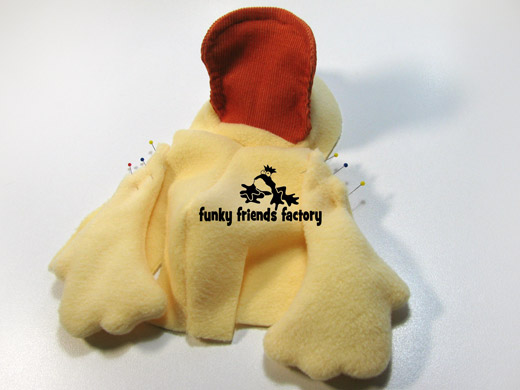
STEP 11
Sew the BACK PIECES to the HEAD and TUMMY PIECES with the wings in between.
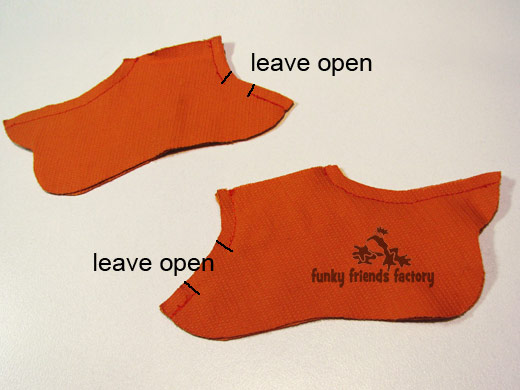
FEET
STEP 12a
Sew the FOOT PIECES together from K – L and M – N, leaving a gap open for stuffing later!
STEP 12b
Sew the FOOT PAD PIECES to the FOOT PIECES, (sew right around without a gap.)
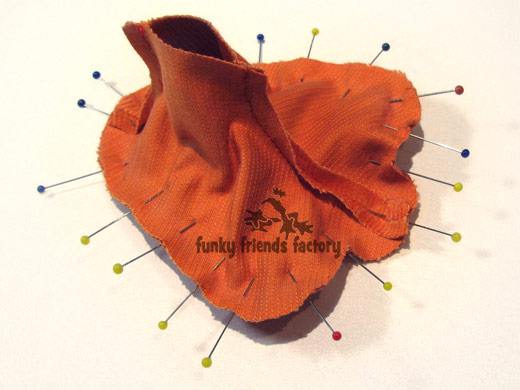
STEP 12c
Turn the feet right sides out and pin them so that the edge seam lies flat then sew a line around the edge of the feet, 5mm / ¼inch in from the edge, like you did with the beak.
STEP 13
Pin the FOOT PIECES to the TUMMY PIECES matching point K and M. (CHECK that the toes are pointing into the tummy and towards the head, otherwise they will be upside down!) Pin the darts of the TUMMY PIECE with the LEGS in between then sew them closed.
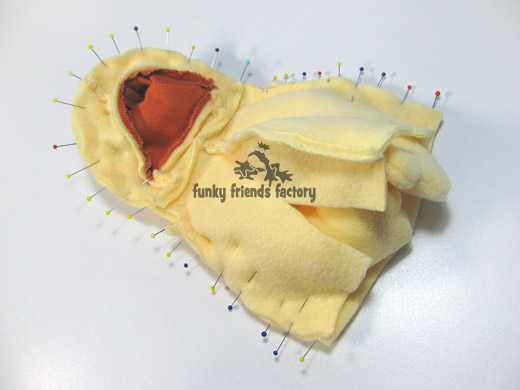
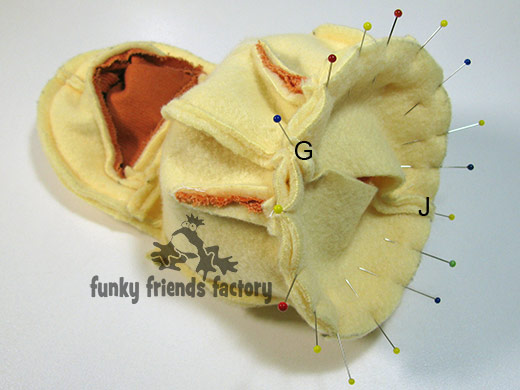
BASE
STEP 14a
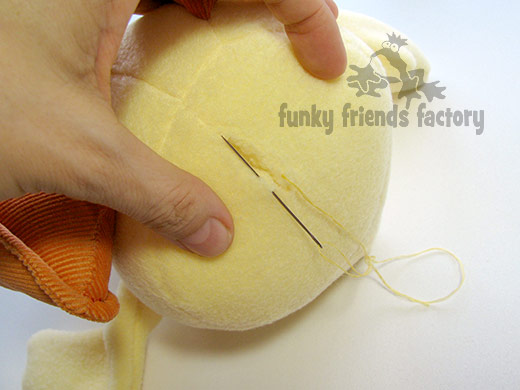
Sew the BASE PIECES together from G – J, remembering to leave a gap open for stuffing your duck. Pin the BASE PIECES to the TUMMY and BACK PIECES matching points G and point J.
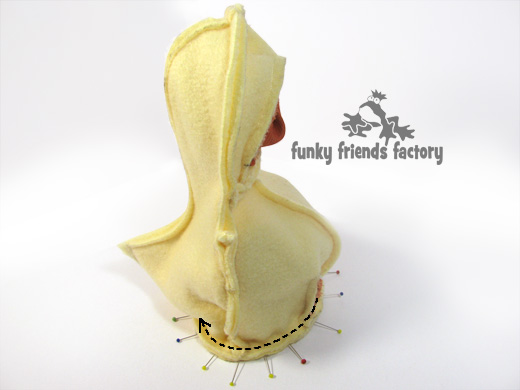
STEP 14b
Hold the duck in a ‘standing up’ position as you sew the BASE PIECES to the TUMMY and BACK PIECES. This makes it easier to sew around the curves and remove the pins as you go.
STEP 15
Turn your duck right sides out through the gap left in the BASE PIECES.
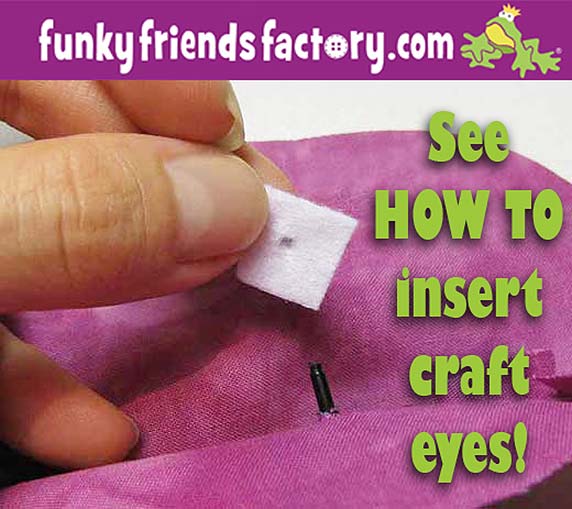
TIP: If you are using CRAFT EYES, insert these now. I have a photo tutorial for inserting craft eyes on my blog ~>
ASSEMBLY
STEP 16
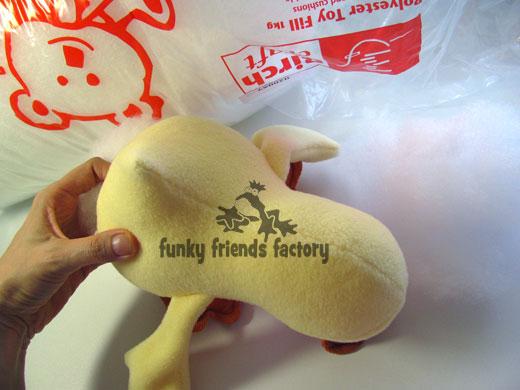
Stuff the duck’s head and body firmly with toy stuffing.
STEP 17
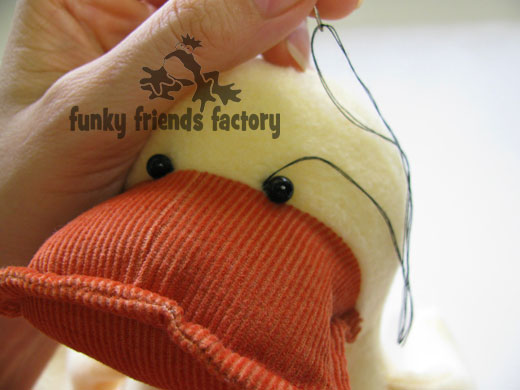
If you are using BEADS for your duck’s eyes, sew two 9mm beads in place just above the beak seam. (You can use beads or buttons if the toy will be for a child older than 3 years old).
STEP 18
Stuff the feet firmly and sew the gaps at the back of the FOOT PIECES closed with a ladder stitch.
STEP 19
Sew the gap in the BASE PIECES closed with a ladder stitch.
Your ducky is ready to LOVE!
![]()
I’d LOVE to see how your Funky Friends Factory toys turn out! When you’ve made your own toy duck – please come and paste a photo of your NEW Funky Friend on my Funky Friends Factory Facebook page for me to see!
You could win a FREE PATTERN in the MAKE MY MONDAY Pattern Giveaway!

Till next time,
Happy Sewing,
Pauline
xxx
